
Are you ready to dive into the world of blogging or build your vrey own website? If so, you’ve probably heard of WordPress—the powerhouse behind over 40% of all websites on the internet! Whether you’re a complete beginner or someone looking to brush up on your skills, installing wordpress can seem a little daunting. But don’t worry! In this article, we’ll walk you through two easy methods to get wordpress up and running in no time. With step-by-step guidance, you’ll be able to set up your site confidently, whether you prefer the simplicity of a one-click installation or the hands-on approach of manual installation. So, grab your coffee, roll up your sleeves, and let’s get you started on your WordPress journey!
Understanding the Importance of Choosing the right Hosting Provider
Choosing the right hosting provider is a crucial decision that can substantially impact your website’s performance, security, and overall success. With numerous options available, it’s essential to evaluate your specific needs and align them with the services offered by potential hosts. A reliable hosting provider ensures that your website remains accessible, loads quickly, and provides a seamless experience for your visitors.
Here are some key factors to consider when selecting a hosting provider:
- Performance and Uptime: Look for hosts that guarantee high uptime percentages (ideally 99.9% or higher) and fast loading times. These factors are vital for retaining visitors and improving search engine rankings.
- Customer Support: Opt for a provider that offers 24/7 customer support. Quick and educated assistance can resolve issues before they escalate, keeping your site running smoothly.
- Security Features: Choose a host that prioritizes security with features like SSL certificates, regular backups, and malware protection. This protects both your website and your visitors’ data.
- Scalability: Ensure that the hosting service can grow with your needs. If you anticipate increased traffic or plan to expand your site, look for flexible plans that can accommodate upgrades easily.
To help you visualize the differences, here’s a simple comparison of common hosting types:
| Hosting Type | Pros | Cons |
|---|---|---|
| Shared Hosting | Cost-effective, easy to use | Limited resources, potential slowdowns |
| VPS hosting | More control, better performance | Higher cost, requires some technical knowledge |
| Dedicated Hosting | Full control, optimal performance | Most expensive, requires technical expertise |
| Managed WordPress Hosting | Optimized for WordPress, automatic updates | Higher pricing, may have limitations on plugins |
Ultimately, the right hosting provider lays the foundation for your website’s success. Investing the time to research and select a suitable host will pay off in the long run, enhancing user experience, improving SEO, and allowing you to focus on content creation rather than technical hiccups. Remember, your hosting choice can either propel your site forward or hold it back, so choose wisely!
Exploring the One-Click Installation Method for WordPress
If you’re looking to set up a WordPress site without the hassle of manual installation, the one-click installation method is the way to go. This approach is ideal for beginners and those who want to get their site up and running in no time. Here’s how it effectively works and why it might be the perfect solution for you.
First, let’s clarify what one-click installation means. Many web hosting providers offer this feature, allowing you to install WordPress on your server with a single click. This method eliminates the need for downloading files, creating databases, and configuring settings manually, making the process incredibly straightforward.
Here are some benefits of using the one-click installation method:
- Speed: Install WordPress in less than a minute.
- User-friendly: No technical knowledge required.
- Automatic updates: Many hosts also offer automatic updates for WordPress, ensuring your site stays secure and up to date.
Most hosting providers will have a control panel where you can find the one-click install feature. Here’s a brief guide on how to use it:
| Step | Action |
|---|---|
| 1 | Log in to your hosting account. |
| 2 | Go to the control panel (like cPanel). |
| 3 | Find the “softaculous” or “WordPress Installer” icon. |
| 4 | Select your domain for installation. |
| 5 | Click the “install” button and fill in the necessary details. |
| 6 | Hit “Finish” and watch the magic happen! |
After completing these steps, you can easily log into your new wordpress site and start customizing it to fit your vision. The dashboard will guide you through further adjustments,plugin installations,and theme selections,all while you revel in the ease of your installation process.
adopting the one-click installation method for WordPress is a smart choice for anyone looking to streamline their website setup. With its simplicity and efficiency, you can focus on what really matters—creating great content and engaging with your audience!
Getting Your Domain Name Ready for WordPress Installation
Before diving into the world of WordPress, it’s essential to ensure that your domain name is primed and ready for installation. Your domain name acts as your website’s address on the internet, making it vital for your online presence. Here’s how to get it ready without a hitch.
First things first, choose a reliable domain registrar. This is where you’ll purchase your domain name and manage it over time. Look for registrars that offer:
- Competitive pricing
- Robust customer support
- Easy domain management tools
Some popular options include GoDaddy, Namecheap, and Google Domains. Take a moment to compare features before settling on one.
Once you’ve selected a registrar, it’s time to search for your desired domain name. Think about what reflects your brand best. A memorable name that aligns with your niche can help attract visitors. When brainstorming, consider the following tips:
- Keep it short and simple
- Avoid hyphens and numbers
- Use keywords related to your business
When you find a name you like, check its availability. If it’s taken, consider slight variations or different extensions (.com, .net, etc.).
After acquiring your domain, you’ll need to set up domain name servers (DNS). This step links your domain with your hosting provider. Most registrars provide a straightforward interface to configure DNS settings. Make sure to:
- Obtain the DNS addresses from your hosting provider
- Input these addresses in your domain registrar’s DNS settings
- Allow some time for these changes to propagate across the web
| Action | Details |
|---|---|
| Choose a Registrar | Look for good pricing and support. |
| search Domain Name | Use keywords, keep it short. |
| Set up DNS | Link your domain to your hosting provider. |
Lastly, don’t forget to enable domain privacy protection if your registrar offers it. This feature helps shield your personal facts from public view, keeping your details safe from spammers and unwanted solicitations. It’s a small step that can offer significant peace of mind.
With these steps completed, your domain name will be ready for the exciting journey of WordPress installation. You’re now on the threshold of building your online presence, and it all starts with a solid foundation—your domain name!
A Detailed Walkthrough of Manual WordPress Installation
Manual WordPress Installation
Installing WordPress manually is an empowering way to take control of your website setup. Here’s a step-by-step guide to help you through the process seamlessly.
Step 1: Download WordPress
First, head over to the official WordPress website and download the latest version of WordPress. You will receive a compressed .zip file that you will need to extract.
Step 2: Create a Database
Before you can install WordPress, you need a place to store your site’s data. Here’s how to create a database:
- Log in to your hosting control panel (like cPanel).
- Navigate to the “MySQL Databases” section.
- Create a new database and note down its name.
- Create a new mysql user and assign a strong password.
- Add this user to the database, granting all privileges.
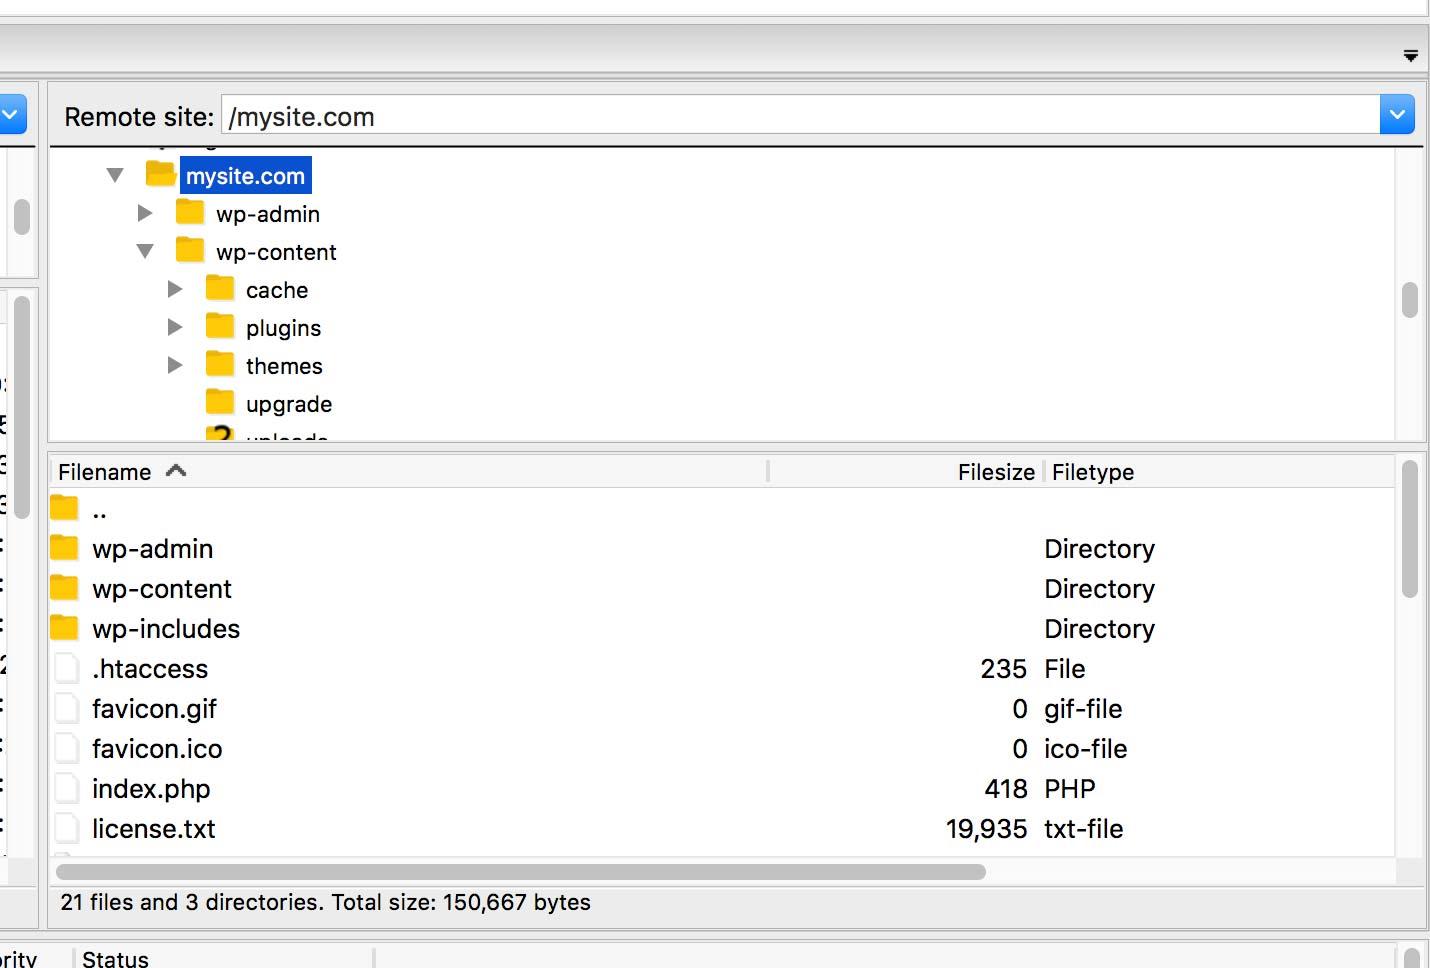
Step 3: Upload WordPress Files
Using an FTP client (like FileZilla), upload the extracted WordPress files to your server. Here’s how:
- Connect to your server using the FTP credentials provided by your hosting service.
- Upload the files to the root directory (public_html or www).
Step 4: Configure wp-config.php
Now, find the wp-config-sample.php file in your uploaded files and rename it to wp-config.php.Open this file and fill in your database details:
define('DB_NAME','your_database_name');
define('DB_USER','your_database_user');
define('DB_PASSWORD','your_database_password');
Step 5: Run the Installation
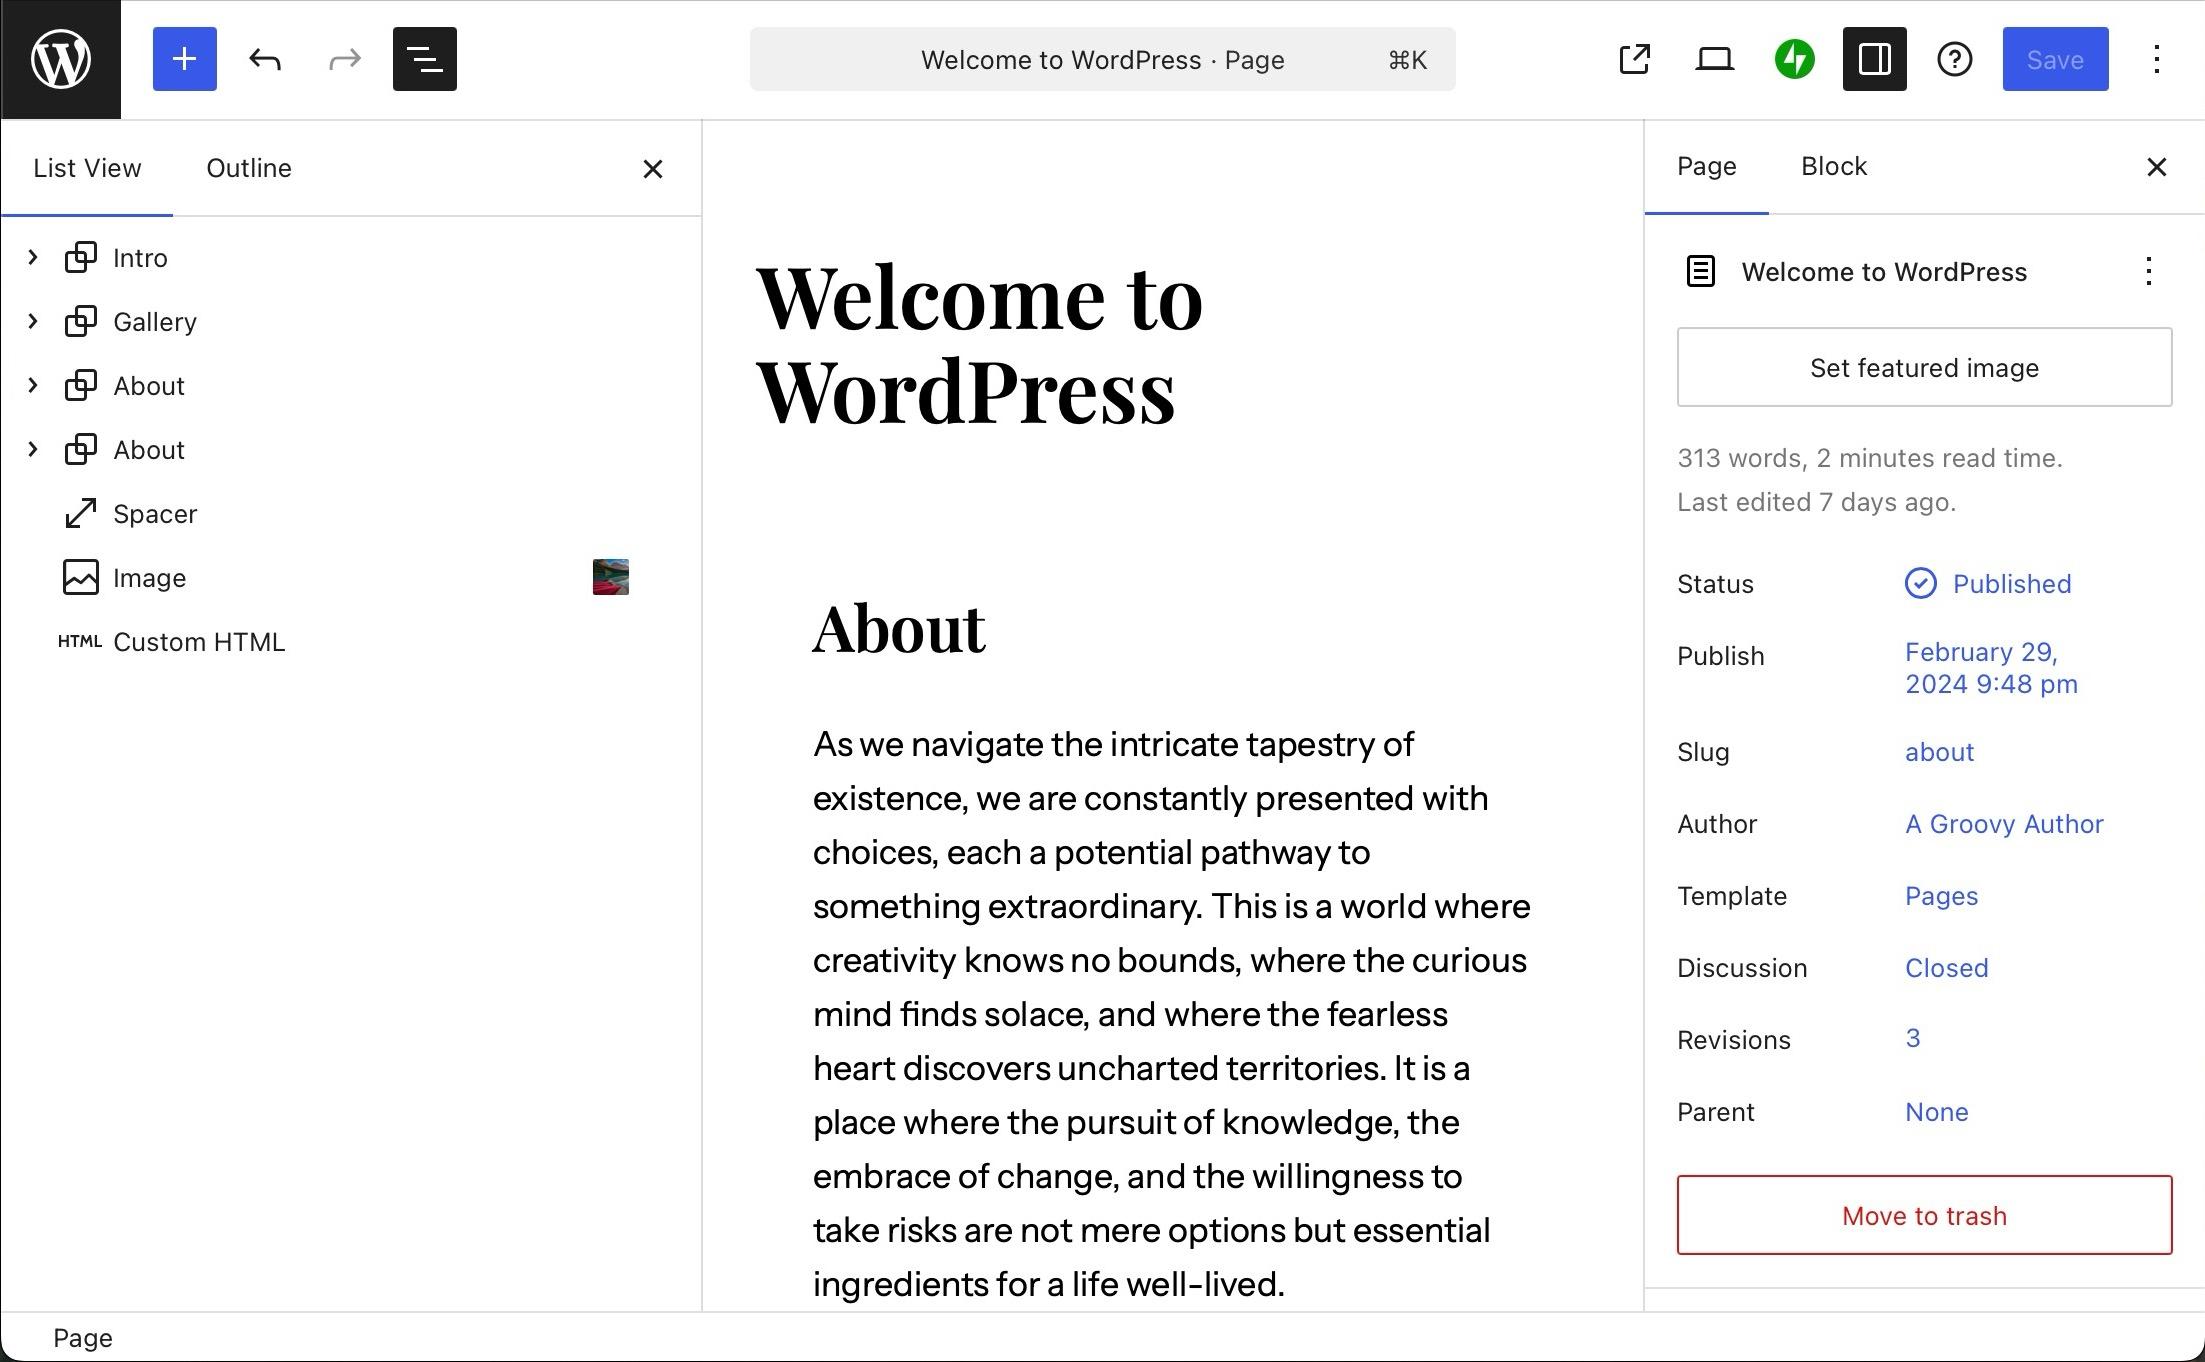
Visit your website URL in a web browser. You will see the WordPress installation wizard. Follow these prompts:
- Select your preferred language.
- Fill in your site title, username, password, and email address.
- Decide if you want search engines to index your site.
Step 6: Complete Installation
Once you click “Install WordPress”, you will receive a success message. Now you can log into your new WordPress site through the /wp-admin section.
Quick Reference Table
| Step | Description |
|---|---|
| 1 | Download WordPress from the official site. |
| 2 | Create a database and user for WordPress. |
| 3 | Upload wordpress files to your server. |
| 4 | Configure the wp-config.php file. |
| 5 | Run the installation wizard through your browser. |
| 6 | Log in and start customizing your site. |
By following these steps,you will have your WordPress site up and running in no time. Enjoy the process and don’t hesitate to explore all the powerful features WordPress has to offer!
Essential Pre-Installation Checks You Shouldn’t Skip
Before diving into the installation of WordPress,it’s crucial to ensure that everything is set up for a smooth process. Skipping these essential pre-installation checks could lead to unneeded headaches down the line. Here’s what you need to verify:
- Hosting Requirements: Ensure your web hosting provider supports WordPress. Check if they meet the following minimum requirements:
- PHP version 7.4 or greater
- MySQL version 5.7 or MariaDB version 10.3 or greater
- HTTPS support
| Component | Recommended Version |
|---|---|
| PHP | 7.4+ |
| MySQL/MariaDB | 5.7+/10.3+ |
| HTTPS | Yes |
- domain name: If you don’t have a domain name yet, you’ll need to register one. Your domain name is not just your website’s address; it also helps establish your brand identity.
- FTP Access: Familiarize yourself with FTP (File Transfer Protocol) tools, like filezilla, to manage your website files easily. You’ll need your FTP credentials, usually provided by your hosting service.
- Database Setup: Create a MySQL database and user for WordPress.Most hosting services provide a control panel, like cPanel, to set this up quickly. Make sure to note down the database name, username, and password for later use.
it’s wise to have backups of any existing site data or files, just in case you’re working on an existing server. This precaution ensures you can restore your system if anything goes wrong during installation. Taking these steps will set the stage for a seamless WordPress installation experience.
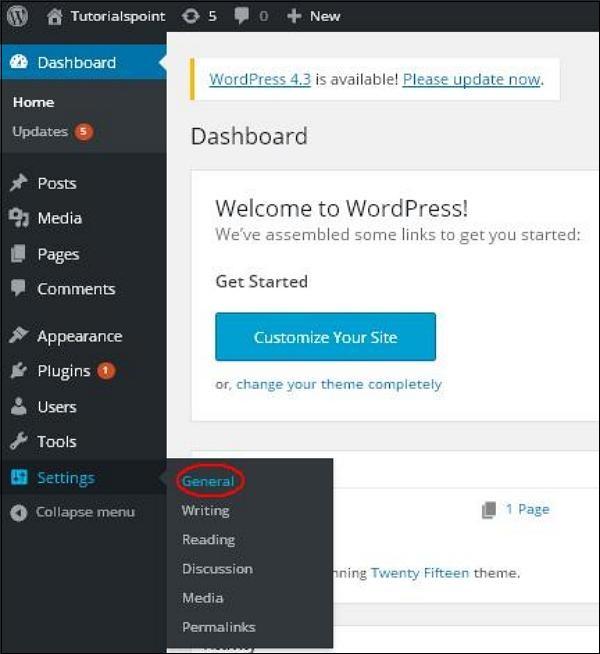
Configuring Your WordPress Settings for Optimal performance
Once you’ve successfully installed WordPress, the next crucial step is to configure your settings to ensure optimal performance. A well-configured website not only enhances user experience but also boosts your search engine rankings. here’s how to get started:
1. General Settings
- Site Title and Tagline: Make sure your site title is catchy and reflects your brand. The tagline should summarize what your site offers in a few words.
- Timezone: Select the correct timezone to ensure your posts are timestamped correctly.
- Site Language: Choose the language you wish to use on your site,which helps in reaching your target audience effectively.
2.Reading Settings
- Homepage Display: Decide whether you want your homepage to show your latest posts or a static page. For many, a static homepage can give a more professional appearance.
- Search Engine Visibility: Make sure to uncheck the box that discourages search engines from indexing your site. This is crucial for SEO!
3. Permalinks Structure
Setting up your permalinks correctly is essential for both user experience and SEO. Navigate to the permalinks settings and select the Post Name option. This choice creates clean, readable URLs that contain keywords, making them more appealing to search engines and users alike.
4. Performance Optimization
To further enhance your site’s performance, consider leveraging caching plugins like W3 Total Cache or WP Super Cache. These plugins help speed up your site by storing a static version of your content, reducing load times significantly. Additionally, optimize your images using plugins like Smush to ensure they don’t slow down your site.
5. Security Settings
Securing your WordPress installation is paramount. Use plugins like Wordfence or iThemes Security to add an extra layer of protection. Don’t forget to regularly update your WordPress version, themes, and plugins to minimize vulnerabilities.
Bonus Tip: Database Optimization
Consider regularly cleaning up your database to improve performance. You can use plugins like WP-Optimize to remove unnecessary data such as post revisions, spam comments, and transients, which can bloat your database over time.
| Setting | Importance | Recommended Action |
|---|---|---|
| site Title | Brand Recognition | Customize for clarity |
| Timezone | accurate Posting | Select your local timezone |
| Permalinks | SEO Benefits | Use Post Name structure |
| Cache Settings | Site speed | Install a caching plugin |
| Security | Site Protection | Use a security plugin |

Choosing the Perfect Theme to Reflect Your Brand
When it comes to setting up your WordPress site,selecting a theme that aligns with your brand identity is crucial. The right theme not only enhances your website’s aesthetics but also improves user experience and engagement. Here are some important factors to consider when choosing your theme:
- brand Colors: Ensure your theme complements your brand’s color palette. This creates a cohesive look that resonates with your audience.
- Typography: Choose a theme that supports the fonts that represent your brand’s personality. Readability should always be a priority.
- Layout options: Think about how you want to display your content. A theme with flexible layout options can help you showcase your products or services effectively.
- Customization Features: Look for themes that offer customization options. Being able to tweak elements like headers, footers, and sidebars can definitely help tailor the site to your brand’s voice.
- Responsive Design: In today’s mobile-first world, it’s essential that your theme is responsive and looks great on all devices.
highlighting key features of your brand through your theme is vital. Such as, if you’re a creative agency, you might want to consider a theme that emphasizes visuals. Conversely,if your business is more corporate,look for a clean,professional design that communicates trust and reliability.
Here’s a simple comparison table to help you visualize the differences among popular WordPress themes:
| Theme Name | Best For | Key Features |
|---|---|---|
| Divi | Versatile designs | Drag-and-drop builder, highly customizable |
| Astra | Lightweight sites | Fast loading, SEO-friendly |
| OceanWP | eCommerce | Highly extendable, WooCommerce compatible |
Keep in mind that while exploring themes, demos can provide a sneak peek into how your future site might look. Don’t hesitate to test out a few to see which one truly embodies your brand’s essence. A good theme will not only look good but also help you achieve your site’s goals, whether it’s driving sales or building a community.
Must-Have Plugins to enhance Your WordPress Experience
Once you have successfully installed WordPress, the next step is to supercharge your site with plugins that can transform its functionality.Plugins are like apps for your website, and choosing the right ones can make a world of difference.
Here’s a quick rundown of essential plugins you should consider:
- Yoast SEO – This plugin simplifies the process of optimizing your content for search engines. Its user-friendly interface helps you manage keywords, meta tags, and readability scores effectively.
- WooCommerce – If you plan to sell products or services, WooCommerce is a must-have. It transforms your site into a fully functional online store, complete with payment processing and inventory management.
- Elementor – A drag-and-drop page builder that allows you to create stunning layouts without touching a single line of code. This is perfect for those who want to design visually appealing pages effortlessly.
- Akismet Anti-Spam – To keep your comments section clean and spam-free, Akismet analyzes comments and filters out the malicious ones automatically.
- UpdraftPlus – Backing up your site is crucial, and this plugin makes it easy by automating the process. You can schedule backups and store them remotely for peace of mind.
When choosing plugins, consider both functionality and performance.too many plugins can slow down your site, so it’s wise to pick only the ones that truly add value to your user experience.
Here’s a quick table of recommended plugins, their functionalities, and pricing plans:
| Plugin | Functionality | Pricing |
|---|---|---|
| Yoast SEO | SEO Optimization | Free / Premium ($99/year) |
| WooCommerce | E-commerce | Free / Paid Extensions |
| Elementor | Page Builder | Free / Pro ($49/year) |
| Akismet | spam Protection | Free / Paid Plans ($5/month) |
| UpdraftPlus | Backup Solution | Free / Premium ($70/year) |
By integrating these plugins, you’ll not only enhance your website’s performance but also improve user engagement and satisfaction. remember, the right tools can take your WordPress experience from average to extraordinary!
Tips for Securing Your WordPress Site from Day One
When you embark on the journey of setting up your WordPress site, it’s crucial to implement security measures right from the get-go. By taking a proactive approach,you’ll save yourself headaches down the line. Here are some powerful strategies to keep your site safe.
Choose a Reliable hosting Provider
Your hosting provider plays a pivotal role in your site’s security. Opt for providers that prioritize security, offer regular updates, and have robust backup solutions. Look for features like:
- SSL Certificates
- Firewall protection
- Daily or weekly backups
- Malware scanning
Use Strong Passwords and User Roles
It’s tempting to use simple passwords, but a strong password is your first line of defense. Make sure to:
- Use a combination of letters, numbers, and symbols.
- Change passwords regularly.
- Limit user roles to only what’s necessary.
Keep Everything Updated
WordPress, themes, and plugins are frequently updated to patch vulnerabilities. Be diligent about:
- Regularly checking for updates.
- Enabling automatic updates when possible.
Install a Security Plugin
There are numerous security plugins available that can definitely help bolster your site’s defenses. Consider using one that offers:
- Brute force attack protection
- Firewall settings
- File integrity monitoring
backup Your Site Regularly
Even with top-notch security, the unexpected can happen. Set up a backup solution to keep your data safe. A good backup strategy includes:
- Automated backups scheduled weekly or daily.
- Storing backups in multiple locations (cloud, external drives).
Table of Basic WordPress Security Measures
| Measure | Description |
|---|---|
| SSL Certificate | encrypts data transferred between users and your site. |
| Two-Factor Authentication | Adds an extra layer of security by requiring a second form of verification. |
| Limit Login Attempts | Prevents brute force attacks by limiting the number of login attempts. |
By implementing these practices, you not only enhance the security of your WordPress site but also create a safer surroundings for your visitors. Take the time to establish these foundations, and your future self will surely thank you!
How to Keep Your WordPress Site Updated and Running Smoothly
Keeping your WordPress site updated is essential for its security, performance, and overall user experience. Here are some practical steps you can take to ensure your site runs smoothly:
- Regular Backups: Always back up your website before making any updates. You can use plugins like UpdraftPlus or BackupBuddy for this purpose. Regular backups will save you in case of any issues during updates.
- Update Core, Themes, and Plugins: Make it a habit to check for updates regularly. WordPress notifies you about core updates, and you should also keep an eye on your themes and plugins. Outdated versions can lead to vulnerabilities.
- Use a Staging Site: If possible, create a staging site where you can test updates before applying them to your live site. This helps prevent downtime and ensures compatibility.
another crucial aspect of site maintenance is monitoring website performance. A slow site can drive visitors away, so consider the following:
- Optimize Images: Large images can slow down your site.Use plugins like Smush or ShortPixel to compress images without losing quality.
- Minify CSS and JavaScript: Reducing the size of your website’s CSS and JavaScript files can improve loading times. Tools like Autoptimize can definitely help you with this.
- Choose Reliable Hosting: Your hosting provider plays a vital role in your site’s performance.Opt for a host that offers speed optimization features and excellent support.
Along with these technical aspects,it’s important to keep your content fresh and engaging. Here are some tips to enhance user experience:
- Regularly Update Content: Fresh content not only boosts SEO but also keeps your audience engaged. Set a schedule for regular posts and updates.
- Engage with Your Audience: Encourage comments and feedback, and make sure to respond promptly. This interaction can improve user experience and create a loyal community.
- Monitor Analytics: Use tools like Google Analytics to track your website’s performance. Understanding user behavior can help you identify areas for improvement.
Lastly, don’t forget to implement security measures. A secure site protects your data and builds trust with your users:
| Security Measure | Description |
|---|---|
| SSL certificate | Encrypts data between your site and users, enhancing security. |
| Security Plugins | plugins like Wordfence and Sucuri can help monitor and protect your site. |
| Strong Passwords | Use complex passwords for all accounts and change them regularly. |
By following these steps, you can keep your WordPress site updated and running smoothly, ensuring a seamless experience for both you and your visitors.
Troubleshooting Common Installation Issues with Ease
Installing WordPress can sometimes feel like navigating a labyrinth, but don’t worry—we’ve got your back! If you run into issues during the installation process, here are some common problems and their solutions that will help you get back on track.
1. Check Your Hosting Environment
Before diving into complex troubleshooting, ensure that your hosting environment meets the following requirements:
- PHP Version: Make sure you have at least PHP 7.4 or higher.
- MySQL Version: Verify that you’re running MySQL 5.7 or higher,or MariaDB version 10.3 or higher.
- HTTPS: A secure connection is essential for WordPress installations, so ensure SSL is enabled.
2. Database Connection Errors
If you encounter a “Error establishing a database connection” message, here’s what to check:
- Verify your database credentials in the
wp-config.phpfile. - Ensure that the database server is running smoothly and is accessible.
- check for any misspellings or incorrect information.
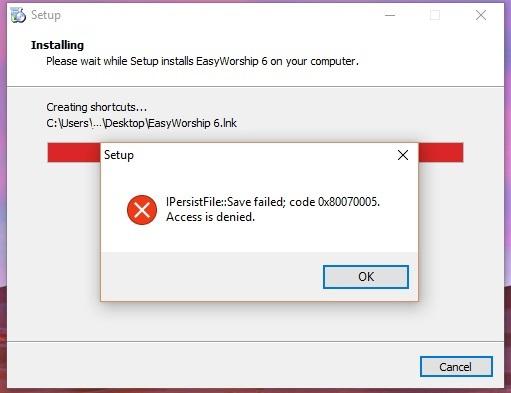
3. File Permission Issues
Improper file permissions can prevent WordPress from functioning correctly. To resolve this:
Use the following permissions:
| File/Folder | Permission |
|---|---|
| Folders | 755 |
| Files | 644 |
| wp-config.php | 440 or 400 |
These permission settings will help keep your installation secure while allowing necessary access.
4. Theme and Plugin Conflicts
Sometimes, a theme or plugin can cause issues during installation. If you suspect this:
- Try switching to a default theme like Twenty Twenty-One.
- Deactivate all plugins by renaming the
pluginsfolder via FTP. - Reactivate plugins one by one to find the culprit.
5. memory Limit Exhaustion
Running out of memory can cause installation problems.To increase your PHP memory limit:
- Edit your
wp-config.phpfile and add the following line: - Alternatively, contact your host to increase the memory limit if necessary.
define('WP_MEMORY_LIMIT', '256M');
By keeping these common installation issues in mind and following these troubleshooting tips, you’ll be well-equipped to conquer any challenges that come your way during your WordPress installation journey!
Creating a Backup Plan to Protect Your WordPress Site
When setting up your WordPress site, one of the most crucial steps you can take is creating a robust backup plan. This isn’t just about protecting your content; it’s about ensuring the longevity and security of your entire website. A solid backup strategy can save you from the headaches of lost data, hacked sites, or catastrophic crashes. Here are some steps to help you formulate a stellar backup plan:
- Choose the Right Backup Solution: There are numerous backup plugins available, such as UpdraftPlus, BackupBuddy, and Duplicator. Each has its features; take some time to explore which works best for your needs.
- Set Up Automated Backups: Manual backups can be forgotten in the hustle and bustle of managing your site. Setting up automated backups ensures that your data is consistently protected without having to lift a finger.
- Store Backups Off-Site: Always store your backups in a location seperate from your hosting environment. Cloud storage options like Google drive, Dropbox, or Amazon S3 are excellent choices to keep your data safe.
It’s not enough to just have backups; you also need to ensure you can restore them easily. Consider the following:
- Test Your Backups: Regularly test your backups to make sure they’re functional. There’s nothing worse than needing a backup and discovering it’s corrupted or incomplete.
- Maintain Regular Backup Schedules: Depending on how frequently enough your content changes, establish a backup schedule that suits your needs—daily, weekly, or monthly.
| Backup Type | Frequency | Storage Location |
|---|---|---|
| Database Backup | Daily | Cloud Storage |
| Full Site Backup | Weekly | External Hard Drive |
| content Backup | Monthly | Local Computer |
Lastly, remember that your backup plan should evolve as your site grows. Regularly review and update your strategy to accommodate changes in your site’s content and structure. By taking these proactive steps, you’ll be well-equipped to handle any disruptions that may come your way.
Frequently Asked Questions (FAQ)
Q&A: Step-by-Step Guide on How to Install WordPress (2 Methods)
Q1: Why should I use WordPress for my website?
A: Great question! WordPress is incredibly user-friendly and versatile. Whether you’re a blogger, a business owner, or looking to create an online store, WordPress has a wide array of themes and plugins to meet your needs. Plus,it’s SEO-friendly,which can help your website rank better in search engines!
Q2: What are the two methods to install WordPress?
A: Excellent inquiry! The two methods to install WordPress are:
- Using a Web hosting Provider’s One-Click Installation – This is the quickest and easiest method. Most hosting providers offer a one-click install option for WordPress, making it super convenient.
- Manual Installation via FTP – This method involves a few more steps but gives you more control.You’ll download WordPress from the official site, upload it to your server using FTP, and then set it up.
Q3: Which method is better for beginners?
A: If you’re just starting and want to get up and running quickly,I’d recommend the one-click installation method. It’s straightforward and doesn’t require technical know-how. However, if you’re a bit tech-savvy or want to learn more about how websites work, the manual method can be a great learning experience.
Q4: What do I need before I start the installation?
A: Before you dive in, make sure you have a domain name and web hosting. Many hosting providers offer packages that include both. Also, jot down your database name, username, and password if you’re going the manual route!
Q5: Can you give me a brief overview of the one-click installation process?
A: Absolutely! Here’s how it generally works:
- Log into your hosting account.
- Find the WordPress installer in your control panel (it’s usually prominently displayed).
- Click on it and follow the prompts—select your domain, fill in your site details, and hit install.
- within minutes, you’ll have your WordPress site ready to go!
Q6: What about the manual installation? Is it really that complicated?
A: Not at all! It just involves a few more steps. Here’s a quick rundown:
- Download the latest version of WordPress from wordpress.org.
- Upload it to your web server using an FTP client (like FileZilla).
- Create a MySQL database and user through your hosting control panel.
- Configure the
wp-config.phpfile with your database information. - Run the installation script by visiting your domain.
You’ll see, it’s not as daunting as it sounds!
Q7: What should I do after installing WordPress?
A: once you’ve installed WordPress, it’s time to customize! choose a theme that reflects your brand, install essential plugins for added functionality, and set up your basic pages—like About, contact, and Blog. Don’t forget to tweak your settings for SEO and security!
Q8: Should I consider security after installation?
A: Absolutely! Securing your WordPress site should be a top priority. Use strong passwords, keep your themes and plugins updated, and consider installing a security plugin. Regular backups are also a good practice to prevent data loss.
Q9: Where can I find more detailed resources on WordPress?
A: you’re in luck! The WordPress Codex is an extensive resource filled with tutorials, forums, and guides. There are also countless blogs and youtube channels dedicated to WordPress that can offer more in-depth insights.
Q10: I’m ready to start! Any final tips?
A: Go for it! Start with the method that feels right for you, and don’t hesitate to explore and experiment. WordPress has a supportive community, so if you hit a snag, help is just a search away. Happy blogging!
Final Thoughts
And there you have it—two straightforward methods to install WordPress and kickstart your journey into the world of website creation! Whether you chose the automatic installer or the manual method, you’re now equipped with the knowledge to set up your very own website.Remember, the first step is always the hardest, but you’ve proven that you can handle it! As you dive into the exciting possibilities of WordPress, don’t forget to explore themes, plugins, and customization options that can elevate your site’s look and functionality.
If you found this guide helpful, why not share it with a friend who’s also looking to start their own website? And, of course, we’d love to hear about your WordPress journey! If you run into any bumps along the way, feel free to revisit this article for a refresher. Happy blogging, and here’s to your success in the digital space!