Are you ready to take yoru website to the next level? If you’ve been searching for a simple yet effective way to connect with your visitors, look no further than Contact Form 7. this powerful plugin makes it easy to create customizable forms that can help you capture leads, gather feedback, or simply make it effortless for your audience to reach out to you. In this beginner’s guide, we’ll walk you thru the entire setup process step by step, ensuring you feel confident and empowered to create a seamless contact experience on your site. Whether you’re a seasoned web designer or just starting out, by the end of this guide, you’ll be equipped with all the tools you need to set up Contact Form 7 like a pro. Let’s dive in and get started on transforming your website into a more interactive and engaging space!
Understanding Contact Form 7 and Its Benefits for Your Website
Contact Form 7 is a powerful tool that seamlessly integrates with WordPress, allowing website owners to create and manage multiple contact forms effortlessly. Its user-amiable interface and rich feature set make it the preferred choice for beginners and seasoned developers alike. By leveraging this plugin,you can enhance your website’s communication capabilities,ensuring that your visitors can easily reach out to you with inquiries,feedback,or requests.
One of the standout benefits of Contact Form 7 is its customizability. You can create forms that reflect your branding and meet your specific needs without any coding skills. With its straightforward markup, you can easily add fields such as text boxes, email fields, and drop-down menus.This adaptability ensures that you collect the right facts from your users, making it easier to address their needs.
Another significant advantage is its spam protection features. By integrating with services like Akismet and Google reCAPTCHA, Contact Form 7 helps minimize unwanted spam submissions, allowing you to focus on genuine inquiries. This combination of features not only protects your website but also enhances the user experience by providing a cleaner, more professional interface.
Performance is also a key aspect of contact Form 7. The plugin is lightweight, ensuring that your website loads quickly even with multiple forms in place. A fast-loading site is crucial for retaining visitors and improving SEO rankings,so using this plugin can have a positive ripple effect on your online presence.
To give you an idea of how easy it is indeed to set up and use Contact Form 7, here’s a simple overview of its features:
Feature
Description
Easy Form Creation
Intuitive drag-and-drop interface for quick setup.
Customizable Design
Modify styles and layouts to match your website.
Spam Protection
Integration with Akismet and Google reCAPTCHA.
Multi-Form Support
create and manage multiple forms effortlessly.
Responsive Design
Forms work seamlessly on all devices.
using Contact Form 7 can considerably enhance your website’s functionality and user engagement. Its comprehensive feature set, ease of use, and effectiveness at reducing spam make it a must-have for any website looking to foster better communication. By integrating this plugin, you’re not just adding a contact page; you’re creating a direct line of communication with your audience, wich can lead to improved relationships and ultimately, greater success for your online endeavors.
Getting Started with WordPress: Your First Steps to Installing the Plugin
To kick off your journey with contact Form 7,the first step you need to take is to install the plugin through your WordPress dashboard. This simple process will enable you to create forms and manage submissions with ease. Here’s how to get started:
Log into your WordPress Dashboard: Begin by navigating to your WordPress admin area.
Go to Plugins: In the left sidebar,click on Plugins,then select Add New.
Search for Contact Form 7: In the search bar on the right, type in Contact Form 7 to find the plugin.
Install the plugin: Once you find it,click the Install Now button. After installation, this button will change to Activate.
Activate the plugin: Click Activate to enable the plugin on your website.
Now that you have successfully installed and activated the Contact Form 7 plugin, it’s time to create your first form. The plugin provides a user-friendly interface that makes this step straightforward:
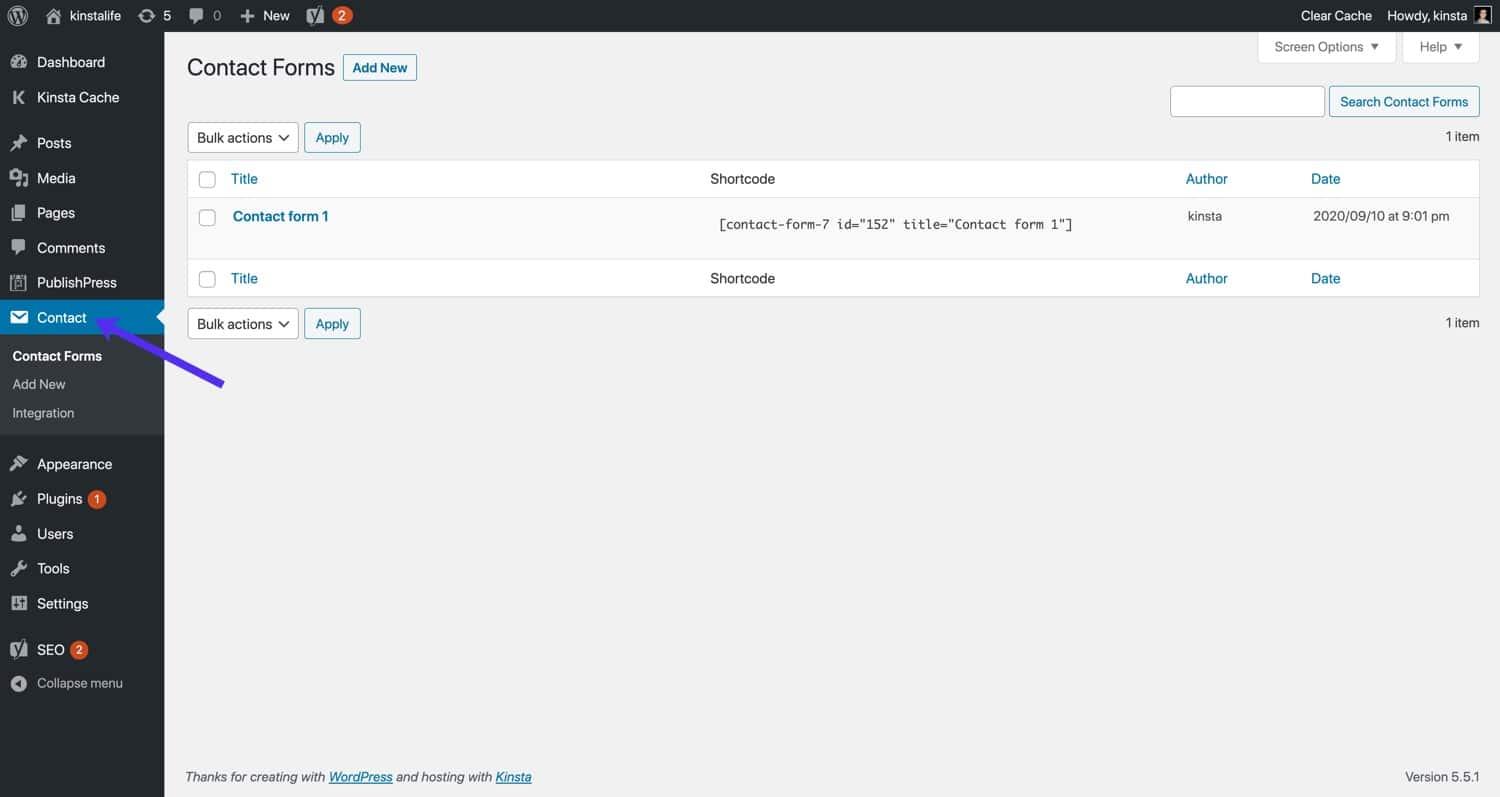
Navigate to Contact: A new menu item labeled Contact will appear in your dashboard. Click on it.
Create a New Form: You’ll see an option to add New. Click on that to start crafting your form.
Customize Your Fields: The form editor allows you to add various fields (like text boxes, checkboxes, etc.). Customize these according to your needs.
Save Your Form: Once you’re satisfied with your form’s layout and fields, hit the Save button.
after creating your form, you’ll want to insert it into a page or post. Each form is assigned a unique shortcode that makes this process seamless:
Form Name
Shortcode
contact Form 1
[contact-form-7 id=”123″ title=”Contact form 1″]
Quote Request
[contact-form-7 id=”456″ title=”Quote Request”]
To include the form in your content:
Copy the Shortcode: Locate the shortcode for the form you created.
Paste into Your Page/Post: Navigate to the page or post where you want the form to appear and paste the shortcode in the editor.
Publish: After placing the shortcode, click on Publish or Update to make it live!
With these steps, you’re on your way to enhancing your website with a functional and customizable contact form! Keep experimenting with different field types and settings to make the form work best for your audience.
Step-by-Step Guide to Installing Contact Form 7 Like a Pro
WordPress dashboard. Here, you can search for the Contact Form 7 plugin and install it directly from the repository. Just follow these simple steps:
Go to Plugins > Add New.
Type Contact Form 7 in the search bar.
Click Install Now on the plugin.
after installation, click Activate.
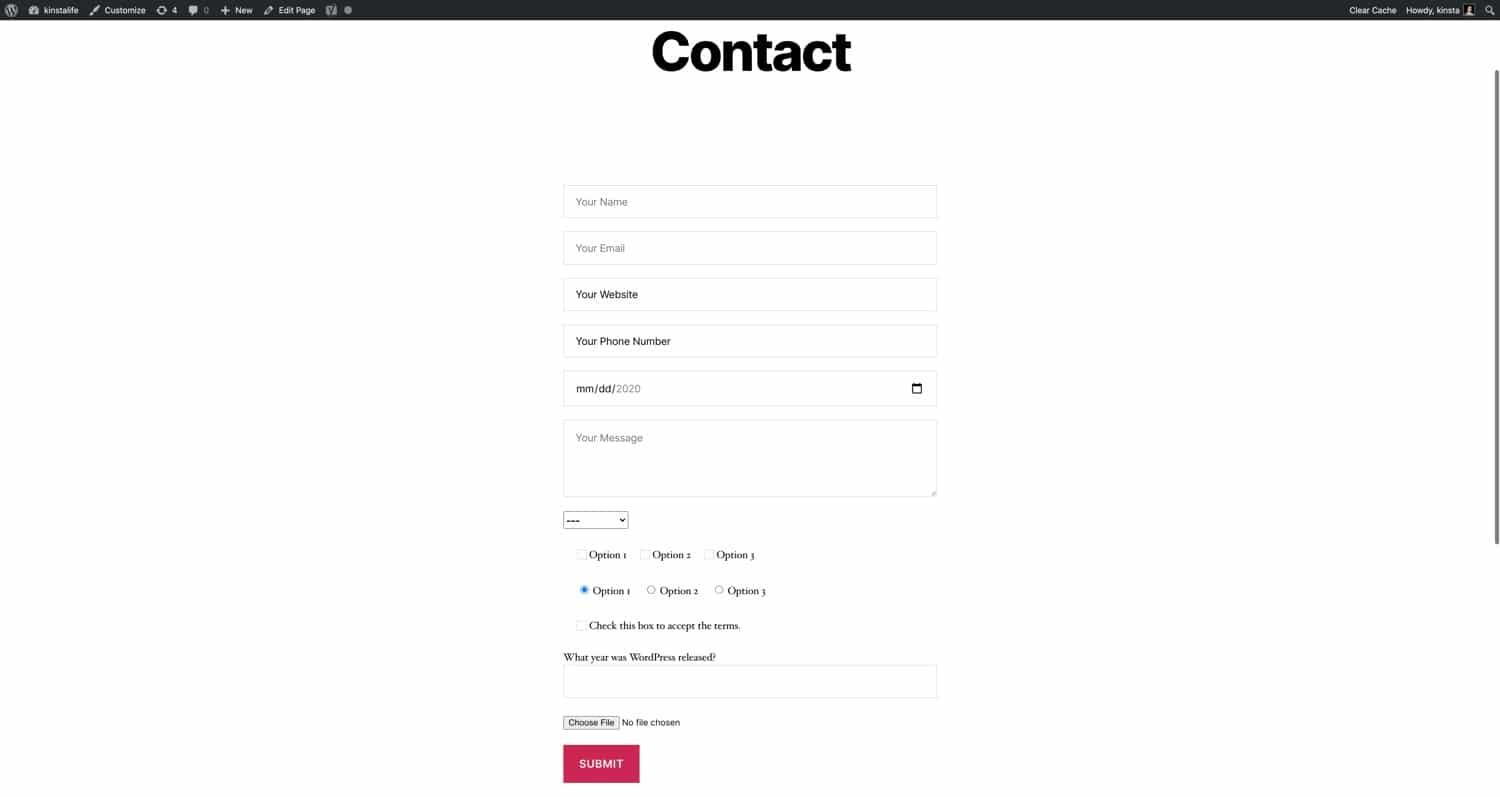
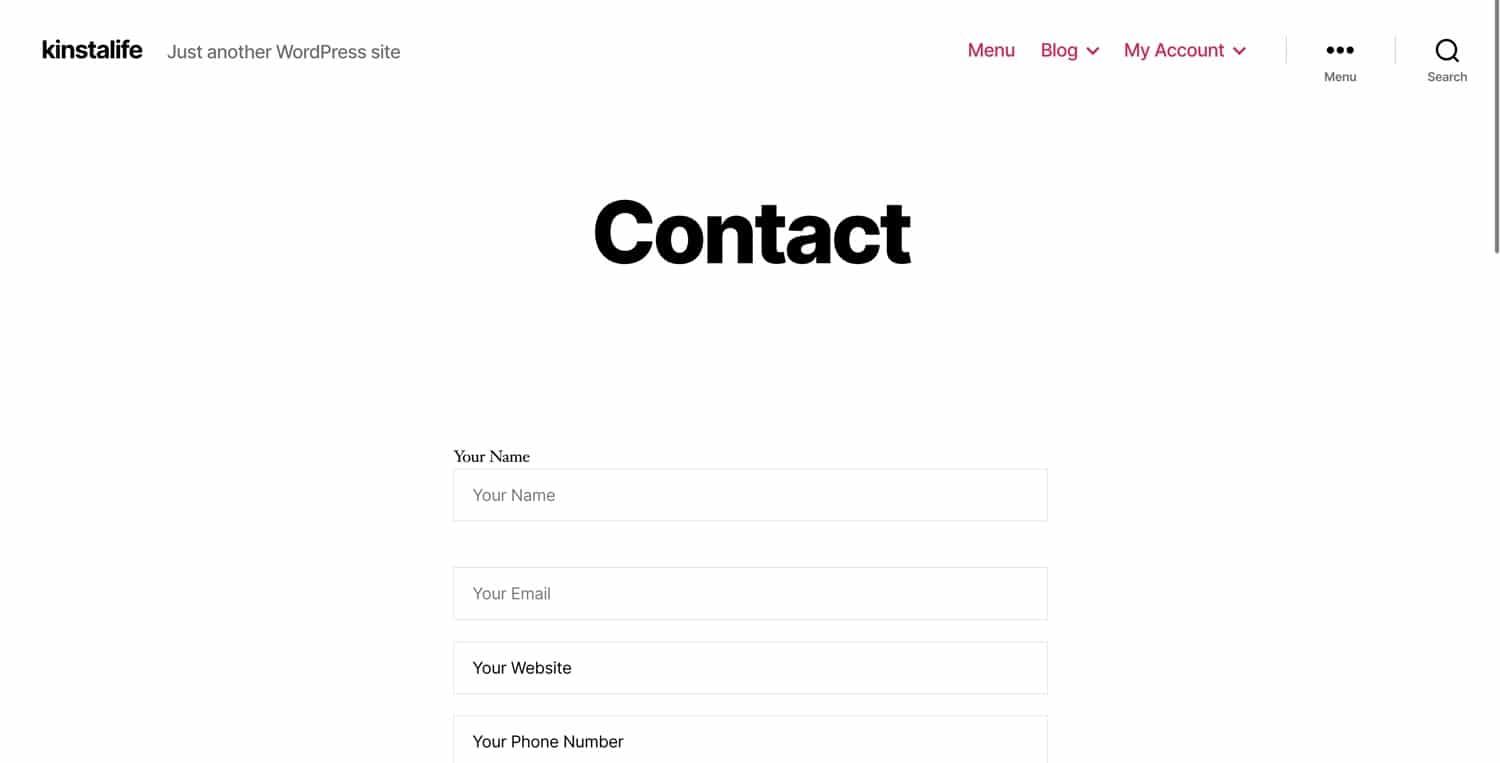
Once activated, you’ll find a new menu item for Contact Form 7 in your dashboard.Click on it to start creating your first form. You’ll see a default form already created for you, which includes fields for your name, email, subject, and message. This is a great starting point, but let’s customize it to fit your needs!
To edit the form, click on the form title. You’ll be taken to a form editor where you can add or remove fields. Such as, if you want to include a phone number field, you can simply click on the Phone tag button and the shortcode will be added to the form. This might look something like:
[tel* your-phone placeholder "Your Phone Number"]
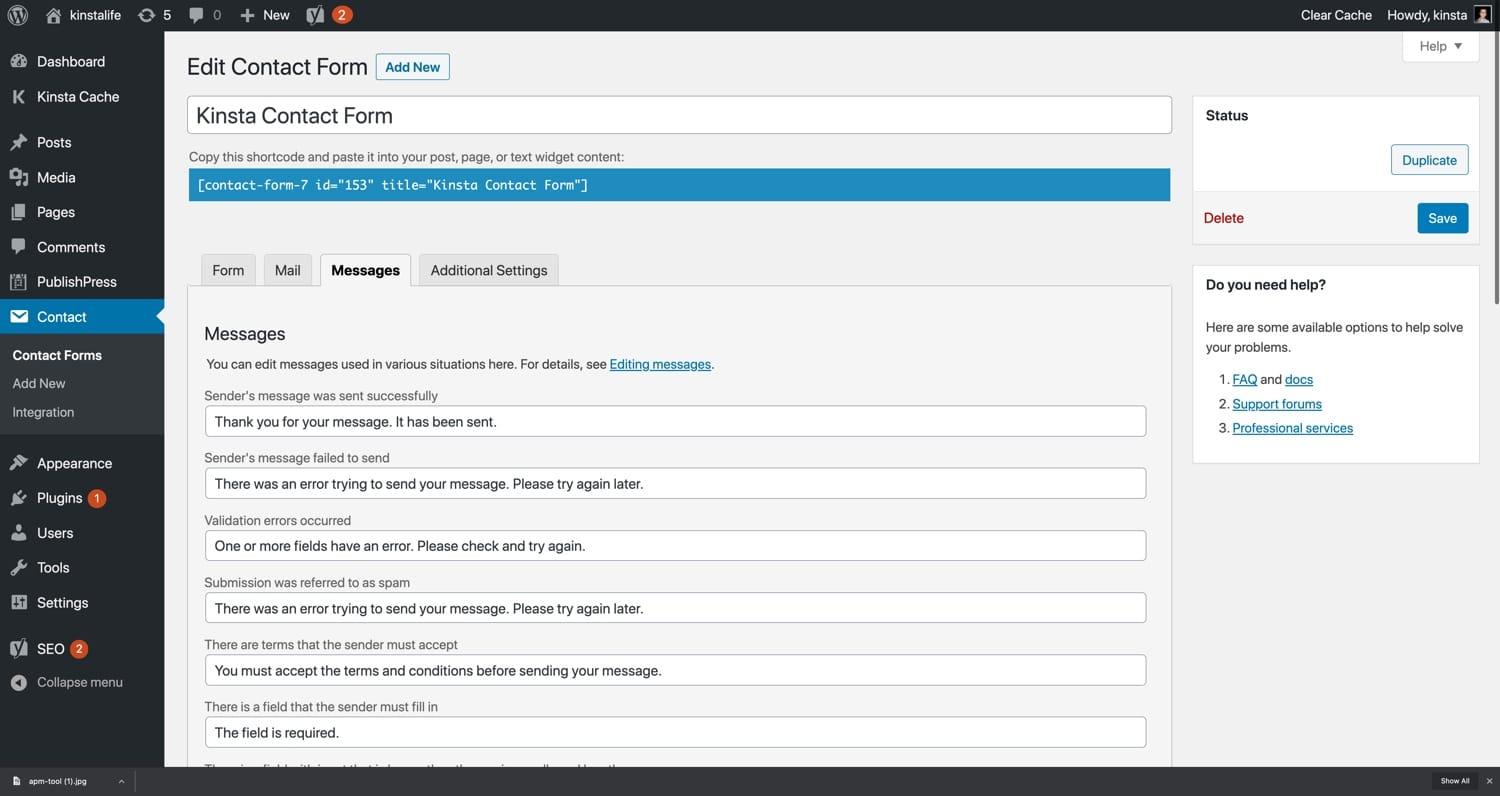
Once you’ve tailored your form to your liking, it’s time to configure the settings. Click on the Mail tab to specify where form submissions should be sent. Ensure that your email address is correctly entered and customize the email subject and message body to make them more personal. A well-crafted email can make a significant impression on potential clients!
Here’s a quick reference for common options:
Option
Description
To
Your email address where form submissions will be sent
From
Sets the email sender’s address
Subject
The subject line of the email notification
Message Body
The content of the email, including form fields
After you’re satisfied with your settings, click Save to keep your changes. Now, it’s time to display the form on your site! To do this, copy the shortcode provided at the top of the form editor. It will look something like this:
[contact-form-7 id="1234" title="Contact form 1"]
Paste this shortcode into any page or post where you want the form to appear. You can do this in the WordPress block editor or in the classic editor. Once you hit Publish, your contact form will be live and ready to recieve inquiries!
Creating Your First Form: Tips for Designing an Engaging Experience
Designing an engaging form is essential for capturing user interest and encouraging them to reach out. When creating your first form with Contact Form 7, focus on clarity and simplicity. Users should immediately understand what information is required and why. Consider breaking down fields into manageable sections if you have a lot of information to gather. This approach can make the form feel less overwhelming.
Use Clear Labels: Make sure each field is clearly labeled. A well-labeled form helps users to fill it out quickly and accurately.Avoid jargon and use plain language that resonates with your audience. For instance, instead of “Submit Inquiry,” consider using “Send Your Message” to create a more friendly tone.
Incorporate Visual Elements: Adding visual elements, such as icons or friendly graphics, can enhance the user experience. For example, you might use an envelope icon next to the email field or a phone icon next to the phone number field. This can make the form feel more inviting and less clinical.
To keep users engaged, consider implementing a progress indicator for longer forms. This way, users know how many steps are left, reducing the likelihood of them abandoning the form midway.
Form element
Best Practice
Text Fields
Limit to essential information to avoid overwhelm.
checkboxes
Use for preferences, ensuring they are clear and concise.
Drop-down Menus
Keep options relevant to minimize selection frustration.
Submit Button
Make it stand out with contrasting colors and clear action text.
Use Error Messages Wisely: If users make a mistake, provide helpful error messages that guide them to correct their entries. Instead of just saying “This field is required,” you could say, “Please enter your email address so we can get back to you!” This not only informs but also encourages users.
Lastly,consider a thank-you message or page that appears after submission. A simple ”Thank you for reaching out! We’ll get back to you soon.” can reinforce positive user experiences and encourage future interactions. engaging forms are not just about collecting information; they’re about fostering relationships!
Essential Fields for Your Contact Form: What You Should Include
When setting up your contact form, it’s crucial to include fields that not only gather essential information but also streamline communication with your audience. A well-structured form can significantly enhance user experience and lead to higher response rates. Here are the key fields you should consider incorporating:
Name: This is fundamental for personalizing your response. A simple text field will suffice, allowing users to input both their first and last names.
Email Address: Arguably the most important field, this ensures you have a way to get back to your users. Make sure to validate the email format to avoid any typos.
subject Line: A drop-down menu or text field for the subject provides context for the inquiry, helping you prioritize and categorize responses more efficiently.
Message: Give your users ample space to express their thoughts.A multi-line text area will encourage detailed communication.
Phone Number (Optional): Adding this field can be beneficial for urgent inquiries. However, keep it optional to respect user preferences.
Preferred Contact Method: A radio button section can allow users to choose their preferred method of communication, ensuring a more tailored follow-up.
To further enhance your form, consider implementing a captcha or a simple question to filter out spam submissions. This not only protects your inbox but also assures genuine communication from users.
Here’s a quick example of how a simple contact form could be structured:
Field Name
Type
Required
Name
Text
Yes
Email Address
Email
Yes
Subject
Dropdown
No
Message
Textarea
Yes
Phone Number
Text
No
Preferred Contact
Radio Buttons
No
With these essential fields, your contact form will not only be user-friendly but also efficient in gathering the necessary information. Remember, simplicity is key—too many fields can overwhelm users, leading to abandoned submissions. By focusing on these essential components, you’ll create an inviting pathway for communication that encourages engagement and feedback.
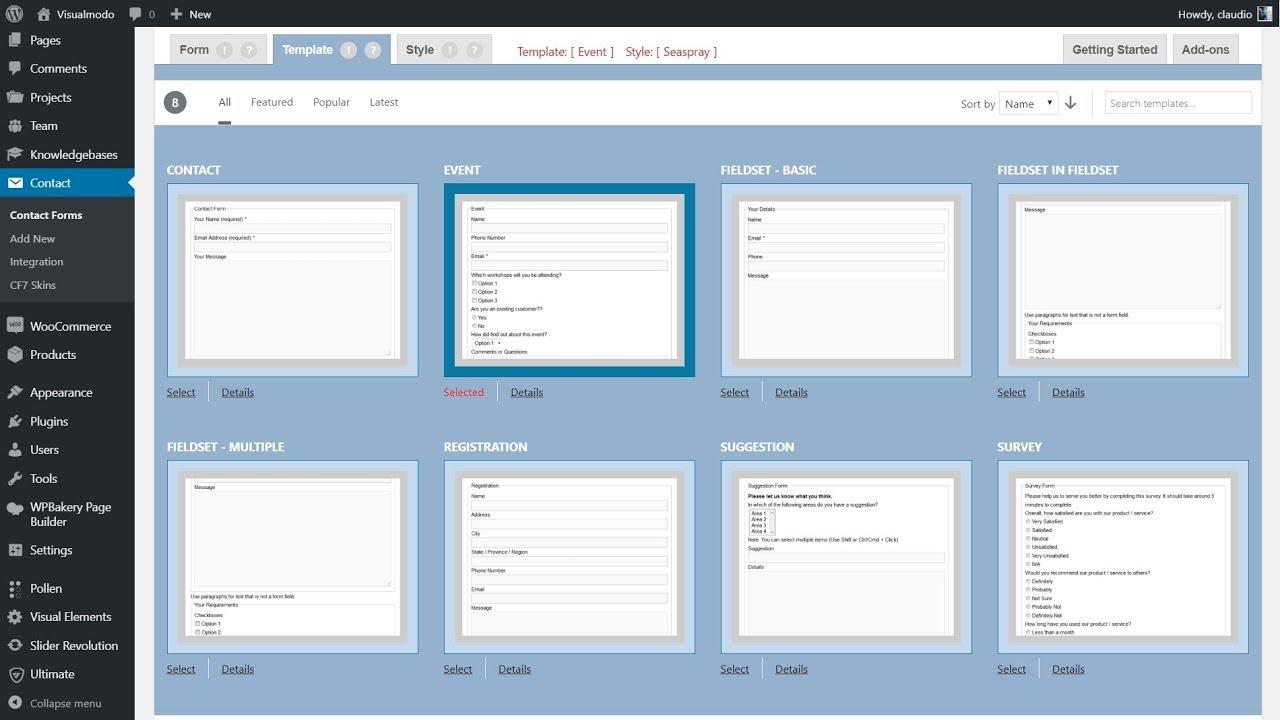
customizing Your Form: tricks to Make It Fit Your Brand
Making your contact form truly represent your brand is more than just a visual enhancement; it’s about creating an experience that resonates with your audience. with Contact Form 7, you have the power to customize your forms easily, ensuring they align perfectly with your brand identity. Here are some effective tricks to help you customize your form:
Color Schemes: Use colors that reflect your brand’s palette to create a cohesive look.Adjust the text and background colors of your form fields to harmonize with your website’s aesthetics.
Typography: Choose fonts that embody your brand’s personality. Whether you opt for a modern sans-serif or a classic serif, consistency in typography strengthens brand recognition.
Button Styles: customize your submit button to make it stand out. Use CSS to add hover effects or incorporate icons to draw attention. For instance, a colored button with rounded corners can create a friendly feel.
Another effective way to embody your brand is to utilize custom labels and placeholders in your fields. Instead of generic text,use personalized messages that reflect your brand voice,guiding users on what information they should provide. Here’s a quick example:
Default Placeholder
Custom placeholder
enter your name
What do we call you?
Enter your email
we promise not to spam: your email?
Don’t overlook the importance of images and logos. Adding a logo at the top of your contact form can immediately establish brand recognition. Additionally, consider including background images that align with your brand story while ensuring they don’t distract from the form’s functionality.
Lastly, don’t be afraid to play with the layout. by adjusting the width, alignment, and spacing of your fields, you can create a form that feels more integrated into your site. A well-spaced form encourages users to fill it out, leading to higher conversion rates. Experiment with the following:
Field Alignment: Left-align for a traditional look or center-align for a modern touch.
Field Width: Experiment with full-width fields for a clean, spacious feel.
Spacing: Use padding and margins effectively to avoid a cramped appearance.
By implementing these strategies, your Contact Form 7 can become an important part of your brand’s online presence, enhancing not just aesthetics but also user engagement. Customization is key to ensuring your form resonates with visitors,making them feel connected to your brand and more likely to reach out.
Setting Up email Notifications: Ensuring You Never Miss a Message
Setting up email notifications for your Contact form 7 submissions is a crucial step to ensure that you promptly receive every inquiry from your website visitors. With the right configuration, you can streamline your communication and respond to potential customers without delay.
Here’s how to configure email notifications effectively:
Access the Contact Form 7 Settings: Start by navigating to the WordPress dashboard. Go to “Contact” and select the form you want to edit.
Modify the Mail Settings: Click on the “Mail” tab within the form’s settings.Here, you can customize the email notifications.
Fill in Required Fields: Ensure that you provide valid email addresses in the “To” field. This is where the submissions will be sent.You might want to set it to your primary business email for quick responses.
Next, consider how you want the notifications to appear. The “From” field should reflect your website’s name, enhancing authenticity. Additionally,using the “Subject” line to include the sender’s name can make it easier to identify who is reaching out. For example:
Once you have filled in the necessary fields, remember to utilize the Mail (2) settings if you wish to send a confirmation email to the user. This adds a professional touch and enhances user experience.
Lastly, it’s vital to test your form after setting up notifications. Fill out the contact form yourself and check whether you receive the email as intended. If not, double-check your settings and ensure that your web host supports sending emails. Integrating SMTP plugins can also enhance email deliverability and reduce the chances of your messages landing in the spam folder.
Adding Anti-Spam Measures: Protect Your Form from Unwanted Submissions
When you’re setting up your contact form, it’s crucial to think about the potential for spam submissions. These unwanted entries not only clutter your inbox but can also hinder your ability to connect with real customers. Thankfully, there are several effective measures you can implement to safeguard your form and ensure genuine inquiries make it through.
One of the simplest yet most effective methods is to incorporate a CAPTCHA system. This mechanism requires users to complete a challenge, such as identifying certain images or typing out distorted text, which bots typically struggle to do. You can easily integrate Google reCAPTCHA with Contact Form 7 by following these steps:
Sign up for Google reCAPTCHA and obtain your site and secret keys.
Navigate to the Contact Form 7 settings in your WordPress dashboard.
Paste the keys into the relevant fields.
Add the reCAPTCHA shortcode to your form.
Another effective strategy is to utilize a Honeypot technique. This method involves adding an invisible field to your form that normal users will not see, but bots will fill out. If this field is detected as filled, you can automatically reject the submission. Implementing this can be done using a plugin like Contact Form 7 Honeypot,which requires minimal setup.
Here’s a quick comparison of popular anti-spam measures for your form:
Method
Pros
Cons
CAPTCHA
Easily deters bots, widely recognized
Can frustrate genuine users
Honeypot
seamless for users, simple setup
Some bots can bypass it
Question-based
Engaging for users, easy to customize
Can be bypassed if predictable
Additionally, consider implementing a time-based submission strategy. By requiring users to take a certain amount of time to fill out the form, you can filter out bots that submit instantly. Set a minimum time threshold using JavaScript to track how long the user spends on the form before submission.
always remember to monitor and analyze your submissions regularly. Keeping an eye on the patterns of incoming spam can help you tweak your anti-spam measures and enhance the effectiveness of your form over time.With these strategies in place, you can protect your contact form from pesky spam and focus on what truly matters—connecting with your audience!
Integrating Contact Form 7 with Other Plugins: Enhance Functionality
Integrating Contact Form 7 with other plugins can significantly enhance its functionality, making your forms more powerful and versatile. Whether you want to improve user experience, manage leads better, or automate email responses, there are a plethora of plugins that can help you achieve your goals.
Here are some popular plugins that work seamlessly with Contact Form 7:
Flamingo: This plugin acts as a message storage solution. With Flamingo, you can save all submitted messages in your WordPress database, allowing you to manage and reply to inquiries more efficiently.
Contact Form 7 – Dynamic Text Extension: It allows you to pass dynamic data to your forms. This is particularly useful for capturing information like page URLs or user IDs without requiring users to fill them in manually.
Contact Form 7 – PayPal Add-on: Want to take payments directly through your contact form? This add-on lets you integrate PayPal, making it easy for users to make payments while submitting their information.
WP Mail SMTP: Ensure that your emails are delivered properly by configuring SMTP settings. WP Mail SMTP helps solve common email deliverability issues and can be easily integrated with Contact Form 7.
For a more organized approach, consider using a plugin like WPForms in tandem with Contact Form 7. With it,you can create more advanced forms with conditional logic and visual builder features,giving your users a more tailored experience.
To give you a clearer overview of how these plugins complement Contact Form 7, check out the table below:
Plugin
Functionality
Benefits
Flamingo
Message Storage
Manage and reply to inquiries easily
Dynamic Text Extension
Dynamic Data Capture
Reduce user effort and enhance accuracy
PayPal Add-on
Payment Integration
Facilitates direct transactions
WP Mail SMTP
Email Deliverability
Improves chances of reaching inbox
By integrating these plugins, you can not only streamline your workflow but also provide a better experience for your users. The possibilities are endless, and with the right combinations, you can transform a simple contact form into a powerful tool for your business.
Troubleshooting Common Issues: Solutions for a Smooth Experience
Setting up Contact Form 7 can seem daunting, especially for beginners. However, many common issues can arise that might prevent your form from functioning properly. Here’s a rundown of typical problems and their straightforward solutions to ensure that your experience is as smooth as possible.
Form Not Sending Emails
If you notice that your form submissions aren’t making it to your inbox, consider these steps:
Check Spam Folder: Sometimes, emails end up in the spam folder. Make sure to check there first.
SMTP Plugin: Use an SMTP plugin like WP Mail SMTP to ensure reliable email delivery.
Email Configuration: Verify that the email address set in the form is correct and that the server settings allow outgoing emails.
Validation Errors
Validation errors can be frustrating, especially when they’re not clear. If you encounter issues with form entries, try the following:
Field Validation: Ensure that all required fields are filled out correctly.
Shortcodes: review your form’s shortcodes to confirm they are correctly formatted.
JavaScript Conflicts: Check for JavaScript errors in your browser console that might be hindering validation.
Styling Issues
sometimes, your form may not look right due to styling conflicts. to address this:
Custom CSS: You can add custom CSS to your theme to style the form as per your needs.
Theme Compatibility: Ensure that your theme is compatible with Contact Form 7 and check for any specific styling instructions.
Browser Tools: Use browser developer tools to inspect elements and adjust styles accordingly.
Table of Common Issues and Quick Fixes
Issue
Quick Fix
Form not sending emails
Check spam folder, use SMTP plugin, verify email settings
Validation errors
ensure fields are filled out, check shortcodes
Styling issues
Add custom CSS, check theme compatibility
These solutions should help you resolve many of the common issues faced when setting up Contact form 7. Remember, patience is key, and troubleshooting is a part of the learning process.
Best Practices for Managing Form Submissions: Keeping It Organized
Managing form submissions effectively is crucial for maintaining a seamless workflow and enhancing user experience. Here are some best practices to keep your submissions organized:
Use Labels Wisely: Clearly label your form fields to ensure users know what information is required. This will reduce confusion and help you gather the necessary data more efficiently.
Implement Validation: Utilize validation rules to ensure that the data submitted meets your requirements. This minimizes the chances of receiving incomplete or incorrect submissions.
Organise Submissions in Folders: Set up a systematic way to categorize submissions. for example, create folders for inquiries, feedback, and support requests. This makes it easy to find and respond to forms as needed.
Consider integrating a database or a cloud storage solution to automate the association process. This allows you to:
Access Data Anywhere: With cloud solutions, you can retrieve submission data from any device, ensuring you’re always connected to your leads.
Sort and Filter: Utilize filtering options to sort submissions by date, submission type, or status, allowing you to prioritize your responses.
Submission Type
Response Time
Action Required
Inquiry
24 hours
Follow-up email
Feedback
48 hours
Review and Acknowledge
Support Request
1 hour
Immediate Response
Lastly, regularly review your submission process. Solicit feedback from your team on what works and what doesn’t. Adapt your practices based on this feedback to continuously improve the experience for both your users and your staff.
final Touches: How to Test and Optimize Your contact Form
Once you’ve set up your contact form using contact Form 7, it’s time to conduct some testing to ensure everything is functioning as it should.Testing is crucial,as it helps to identify any issues that could lead to lost leads or frustrated users. Start by filling out the form yourself using various scenarios:
Complete Submission: fill in all fields correctly and submit the form to check if you receive the email as intended.
Partial Submission: Leave some required fields empty to see if the validation messages display correctly.
Invalid Data: Enter incorrect data,like a fake email address or a phone number,to test the field validation.
After submitting the form, pay attention to the following:
email Notifications: Ensure that the email notifications are triggering correctly. Check your spam folder if they don’t appear in your inbox.
User Experience: After submission, users should see a confirmation message. If not,modify your settings to include a success message.
Data Capture: Confirm that all user inputs are captured in the email sent to you.
Once you’ve tested the functionality, it’s time to optimize the form for better user engagement. Here are some effective strategies:
Simplify Fields: Only ask for essential information to encourage more users to complete the form.
Responsive Design: Ensure the form looks good on both desktop and mobile devices to cater to all users.
Custom Styling: Use CSS to make your form visually appealing and aligned with your website’s branding.
Consider monitoring your form’s performance with tools like Google Analytics. By tracking how many users are reaching the form and how many are completing it, you can pinpoint areas for improvement. If you notice a high drop-off rate at a particular point, it may indicate that a specific field is too confusing or unnecessary.
Optimization Strategy
Expected Outcome
Simplify Fields
Increased submission rates
responsive Design
Enhanced mobile usability
Custom Styling
Improved user engagement
Analytics Monitoring
Data-driven decisions
By following these tips and continually testing your contact form, you’ll ensure that it remains efficient and user-friendly, ultimately boosting your website’s communication effectiveness.
Frequently Asked Questions (FAQ)
Q&A: How to set Up Contact Form 7: Beginner’s Guide
Q: What is Contact Form 7, and why should I use it? A: Great question! Contact Form 7 is a popular WordPress plugin that allows you to create and manage multiple contact forms. It’s user-friendly, flexible, and totally free! If you want to make it easy for your visitors to reach out to you, this is the tool you need. Plus, it’s customizable, so you can tailor it to fit your website’s vibe perfectly!
Q: Is Contact Form 7 really easy to set up? A: Absolutely! If you’re a beginner, you might think it’s going to be elaborate, but it’s actually quite straightforward. The plugin has a simple interface that allows you to create forms in just a few clicks. Trust me, if you can fill out a form, you can create one!
Q: What do I need to do to install Contact Form 7? A: Installing Contact Form 7 is a breeze! Just log into your WordPress dashboard, go to Plugins > Add New, and search for “Contact Form 7.” Once you find it, click “Install Now,” and then “Activate.” Voila! You’re ready to start creating forms.
Q: How do I create my first contact form? A: After activating the plugin, go to the new “Contact” option in your dashboard. Click “Add New,” and you’ll see a default form ready to go! You can customize this form by adding or removing fields like name, email, message, etc. Just drag and drop, and you’re good to go!
Q: Can I customize the form fields? A: Yes, you can! That’s one of the best parts of Contact Form 7. You can add fields like text boxes, dropdowns, checkboxes, and more. Plus, you can label them though you like. Just think about what information you really want from your users and customize accordingly!
Q: What about spam? Can I prevent it? A: Definitely! Contact Form 7 has built-in spam protection features like CAPTCHA, Akismet integration, and custom validation. You can easily enable these features to help keep your inbox free from unwanted messages. It’s like having a personal bouncer for your forms!
Q: How do I manage the submissions I receive? A: good question! Contact Form 7 doesn’t store submissions in the WordPress database, but it sends them to your email. You can customize the email settings in the form setup so you can receive notifications whenever someone fills out your form. Just make sure your email is set up correctly to avoid missing any messages!
Q: Can I integrate Contact form 7 with other services? A: Yes, you can! Contact Form 7 works great with various third-party plugins that allow you to integrate with services like Mailchimp, CRM systems, and more. That way, you can automate your marketing efforts and keep everything organized.
Q: Any tips for making my contact form more effective? A: Absolutely! Keep it short and sweet. Only ask for the essentials—people are more likely to fill out a form if it doesn’t take too long. Also, don’t forget to add a thank-you message or redirect them to a confirmation page after submission. This shows you appreciate their effort and keeps them engaged!
Q: Where can I find more resources if I get stuck? A: The good news is that there’s a wealth of resources available online! The Contact form 7 documentation is super helpful, and there are plenty of tutorials and forums where you can ask questions. You’re never alone in this journey!
Q: Why should I get started with Contact Form 7 today? A: Don’t wait! Setting up Contact Form 7 could be the key to improving communication with your audience. It’s free, simple to use, and can significantly enhance your website’s functionality. So why not dive in and start connecting with your visitors more effectively? You’ll be glad you did!
Key Takeaways
Wrapping It Up: Your Journey to Effortless Communication
And there you have it! Setting up Contact Form 7 is not just a task on your to-do list; it’s a step toward enhancing your website’s communication and engaging with your audience like never before. With all the tips and tricks we’ve covered, you should feel empowered to create customized forms that suit your specific needs.
Remember, the beauty of Contact Form 7 lies in its flexibility—whether you’re collecting leads, feedback, or inquiries, you can tailor each form to match your vision. Don’t hesitate to experiment with the various features and settings. The more you explore, the more you’ll discover how this powerful plugin can streamline interactions with your visitors.
So, what are you waiting for? Dive in, set up your forms, and watch as your website transforms into a more interactive and user-friendly experience. if you ever hit a snag or have questions, the community around Contact Form 7 is vibrant and ready to help. Happy form-building!