
Are you ready to take your online learning platform to teh next level? If you’re running an educational website using Eduma, integrating a seamless payment solution can be a game changer. Enter Stripe—an innovative payment processing platform that makes handling transactions smoother than ever. Whether you’re selling courses, memberships, or digital downloads, Stripe offers an easy-to-use interface and robust features that can definitely help you maximize your revenue while minimizing hassle. In this step-by-step guide, we’ll walk you through the process of setting up Stripe in Eduma, ensuring you’re equipped to provide your users with a seamless checkout experience. let’s dive in and unlock the full potential of your online education business!
Getting Started with Stripe in Eduma
Integrating Stripe with Eduma can transform the way you handle payments for your online courses. With a seamless API and a user-amiable interface, Stripe offers a robust platform that ensures secure transactions for both you and your learners.
Step 1: Create a Stripe Account
The frist step is to sign up for a Stripe account. here’s how:
- Visit the Stripe website.
- Click on the Start now button.
- Fill in the registration form with the required details.
- Verify your email address to activate your account.
Step 2: Collect Your API Keys
After creating your account, you need to collect your API keys, which allow Eduma to communicate with Stripe:
- Log in to your Stripe dashboard.
- Navigate to the Developers section.
- Locate your API keys under the API keys tab.
- COPY the Publishable key and Secret key.
Step 3: Configure Eduma Settings
Now that you have your keys, it’s time to configure eduma:
- Head over to your WordPress admin panel.
- Go to Eduma Settings > Payments.
- Select Stripe as your payment method.
- Paste your API keys into the respective fields.
- Save your settings!
Step 4: Enable Payment Options
Ensure your payment options align with your business model:
- Decide whether you want to offer one-time purchases or subscriptions.
- Adjust the payment settings in the Payments section of Eduma.
- Consider enabling multi-currency if you serve international students.
Step 5: Test Your Integration
Before going live, it’s crucial to test your setup:
- enable Test Mode in your Stripe dashboard.
- Run a few test transactions using the provided test card numbers.
- Check if payments are reflected in your Eduma dashboard correctly.
Final Touches
Once you’ve tested successfully, switch to Live mode in Stripe. Remember to:
- Inform your users about the new payment method.
- Provide clear instructions on how to use Stripe during checkout.
- Monitor transactions regularly to ensure everything runs smoothly.

setting Up Your Stripe Account for Seamless Payments
Setting up your Stripe account is a vital step toward ensuring seamless transactions for your Eduma platform. With a user-friendly interface and robust features, Stripe makes the payment process straightforward. Here’s how to get started:
- Sign Up for stripe: Visit the Stripe website and click on the “Start now” button. Fill in the required facts, including your email and password.
- Verify Your Email: After signing up, check your inbox for a verification email from Stripe. Click the link to verify your account.
- Complete Your Profile: Log in to your Stripe account and complete your profile. Provide essential details like your business name, address, and phone number.
Once your account is set, it’s time to integrate it with Eduma. This connection allows you to accept payments effortlessly.Follow these steps:
- API Keys: Retrieve your unique API keys from the Stripe dashboard.You will need both the publishable and secret keys for integration.
- Navigate to Eduma Settings: In the Eduma platform, go to the payment settings section. Input your Stripe API keys in the designated fields.
- Configure Payment Options: Decide on the payment methods you want to offer, including credit cards, digital wallets, and more. Ensure these options align with your target audience’s preferences.
To further enhance your payment setup, consider configuring your webhooks. This will allow Stripe to send real-time updates regarding payment status directly to your Eduma site. Here’s a rapid overview of how to set it up:
| Webhook Event | Description |
|---|---|
| payment_intent.succeeded | Indicates that a payment was successful. |
| payment_intent.payment_failed | Indicates that a payment attempt failed. |
| charge.refunded | Indicates that a charge was refunded. |
After everything is in place, it’s crucial to conduct a test transaction.This will help you ensure that all components of the payment system are functioning correctly. Stripe offers a test mode where you can use test card numbers to simulate transactions without processing real payments.
By following these steps and paying attention to detail, you’ll have a fully functional Stripe account integrated with your Eduma platform, ready to handle payments seamlessly. Dive into the world of online transactions with confidence!

Integrating Stripe into your Eduma Platform
can considerably enhance your online course sales experience. With its user-friendly interface and robust features, Stripe offers seamless payment processing that can help you manage transactions effortlessly. Here’s how you can implement it step-by-step.
First, you need to create a Stripe account if you don’t already have one. Simply visit the Stripe website and follow the registration process. After setting up your account, you’ll be provided with API keys. These keys are essential for connecting your Eduma platform to Stripe.
Next, log in to your Eduma dashboard and navigate to the settings section. Look for the Payment Settings tab.Here, you will find options to configure your payment gateways. Choose Stripe as your preferred payment method.
Once you select Stripe, you will need to input your API keys from the Stripe dashboard. Make sure to enter both the Publishable Key and the Secret Key correctly. After saving your settings, you can proceed to customize your payment options, including:
- Currency Selection: Choose the currency that best suits your audience.
- Payment Confirmation: Customize the message your users will see after successful payments.
- Refund Policies: Clearly outline how refunds will be handled to instill trust in your customers.
To ensure everything works perfectly, it’s wise to run a few test transactions. Stripe offers a test mode where you can simulate payments without actual transactions. Use the test card numbers provided by Stripe to check if everything is functioning correctly.
After testing, switch back to live mode to start accepting real payments.It’s also beneficial to monitor your transactions through the Stripe dashboard. This tool provides valuable insights, allowing you to track sales performance and manage customer data efficiently.
Here’s a quick overview of the steps involved in integrating Stripe:
| Step | Description |
|---|---|
| Create an Account | Sign up on the Stripe website and configure your account. |
| Configure Eduma | Access Payment Settings and select Stripe as your gateway. |
| Input API Keys | enter your Publishable and Secret Keys from Stripe. |
| Customize Options | Set your currency, payment confirmation, and refund policies. |
| Run Tests | Use test mode to ensure the integration works flawlessly. |
| Go Live | Switch to live mode and start accepting payments! |
With these steps, you’re well on your way to effectively . By offering a reliable payment solution, you can focus on providing quality content and an exceptional learning experience for your users.
Configuring Payment Options to Boost User Experience
when it comes to enhancing user experience, offering flexible and convenient payment options is crucial. Integrating Stripe into your Eduma platform allows you to provide a seamless transaction process that users will appreciate.Here are some strategies to configure payment options effectively:
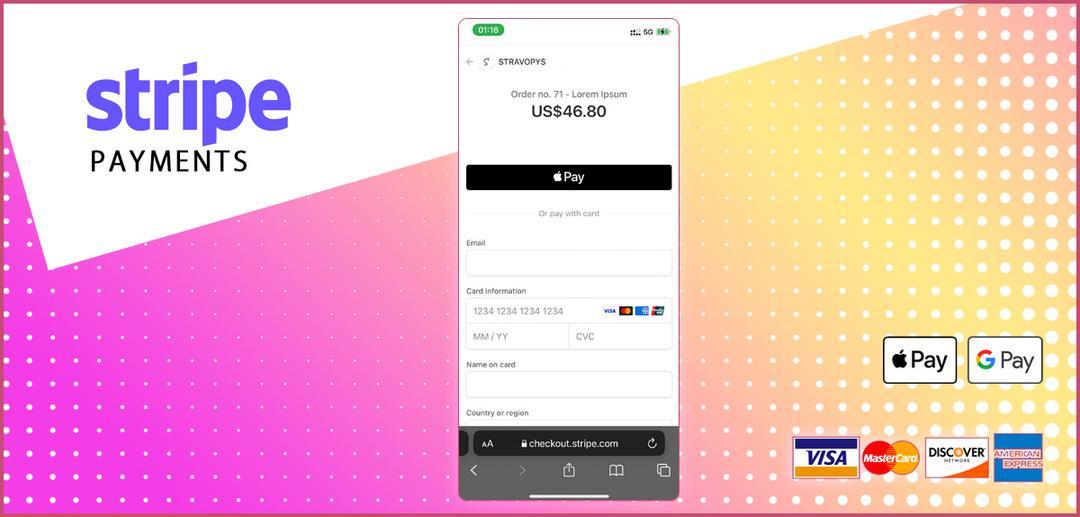
- Diverse Payment Methods: Enable various payment methods such as credit cards,debit cards,and digital wallets like Apple Pay and Google Pay. This ensures that users can choose their preferred method,reducing cart abandonment rates.
- Custom Currency Support: If your audience is global, make sure to support multiple currencies. This will allow international users to make payments without worrying about currency conversion.
- Subscription plans: For courses that require recurring payments, set up subscription options.Stripe simplifies this process, enabling you to offer monthly or annual plans easily.
- Discount Codes and Coupons: Implement a system for users to apply discount codes during checkout. This not only incentivizes users to complete their purchases but also enhances their overall experience.
Moreover, using Stripe’s customizable checkout interface can significantly improve your platform’s appearance and functionality. You can tailor the checkout form to align with your site’s branding, ensuring a cohesive user experience. Here’s a quick checklist for customizing your Stripe checkout:
- Choose your color scheme to match your website.
- Add your logo to enhance brand recognition.
- Include relevant messaging to reassure users of the security of their transactions.
| Feature | Description |
|---|---|
| Easy integration | Stripe’s API allows for quick implementation without extensive coding. |
| Secure Transactions | Stripe provides built-in fraud detection and compliance with PCI standards. |
| Mobile Optimization | Responsive design ensures a smooth payment experience on all devices. |
don’t forget to regularly review your payment processes and gather feedback from users. This will help identify any pain points in the payment experience, allowing you to make necessary adjustments. A user-friendly payment system not only boosts customer satisfaction but also fosters loyalty, leading to repeat business and positive word-of-mouth.
creating subscription Plans That Attract more Students
When it comes to attracting more students to your educational platform, the right subscription plans can make all the difference. By leveraging Stripe’s powerful payment processing capabilities within Eduma,you can create flexible and appealing plans that cater to varying student needs.
Start by understanding your target audience. What are the pain points of your potential students? Do they prefer monthly commitments, or are they looking for long-term subscriptions with cost savings? Here are some strategies to consider:
- Tiered Pricing: Offer multiple subscription levels to give students options. For example:
- Basic plan: Access to essential courses.
- Premium Plan: Access to all courses, including exclusive content and resources.
- Lifetime Plan: One-time payment for unlimited lifetime access.
Make sure to highlight the benefits of each plan clearly. Use engaging descriptions and visuals to showcase what students will gain. You can even include testimonials from current students who have successfully benefited from the courses offered. This builds credibility and trust.
Another effective technique is to offer time-limited promotions or discounts for new subscribers. Create urgency by stating that these offers are only available for a limited time. For example:
| Plan | Regular Price | Discounted Price | Duration |
|---|---|---|---|
| Basic | $29/month | $19/month | First 3 months |
| Premium | $49/month | $39/month | First 2 months |
| Lifetime | $299 | $249 | One-time offer |
consider providing a satisfaction guarantee. This can alleviate fears students may have about committing to a subscription. A simple “30-day money-back guarantee” can enhance trust and encourage more sign-ups.
With these strategies, combined with Stripe’s seamless integration for payments, you can create subscription plans that not only attract more students but also foster long-term engagement and satisfaction.Remember, the key is to make the process easy, clear, and beneficial for your students.

Managing Transactions and Tracking Payments Effectively
Efficiently managing transactions and tracking payments is crucial for any educational platform. With Stripe integrated into Eduma, educators and administrators can streamline their financial processes, ensuring that every payment is accounted for and easily managed. Here’s how you can enhance your transaction management using Stripe.
First and foremost, setting up your Stripe account within Eduma is the first step towards effective payment tracking. Once you’ve completed the integration, you can access a variety of features that facilitate not only payments but also refunds and chargebacks.This setup allows you to:
- Receive payments securely: Stripe offers robust security measures to protect sensitive information.
- Automate invoicing: Create and send invoices automatically,reducing manual workload.
- Manage subscriptions effortlessly: Handle recurring payments with ease,an essential feature for courses with ongoing fees.
Next, it’s important to track your transactions meticulously. Eduma provides a dashboard that gives you real-time insights into your payment history. You can view details such as:
| Date | Transaction ID | Status | Amount |
|---|---|---|---|
| 2023-10-01 | txn12345 | Completed | $99 |
| 2023-10-02 | txn12346 | Pending | $49 |
| 2023-10-03 | txn_12347 | Failed | $29 |
This overview not only keeps you informed but also helps in identifying any discrepancies. If a transaction fails, you can quickly investigate the issue, whether it’s due to insufficient funds or technical errors.
Moreover, utilizing Stripe’s reporting tools can significantly enhance your financial management. Regularly reviewing reports on sales, refunds, and chargebacks provides insights into your business performance. You can generate customized reports that focus on specific metrics such as:
- Total sales over a period: Identify peak times for your courses.
- Refund rates: Monitor how frequently enough students request refunds.
- Payment sources: Understand which payment methods are moast popular among your users.
By leveraging these tools, you’ll not only maintain a clear financial overview but also make informed decisions to optimize your offerings. remember, a well-managed financial system contributes to a sustainable and thriving educational habitat.

Ensuring Security and Compliance with Stripe
When it comes to handling sensitive payment information, security and compliance are paramount. With Stripe powering your Eduma platform, you’re choosing a robust solution designed to protect both your business and your customers. Let’s delve into the measures you can take to ensure that your payment processing remains secure and compliant.
Understand PCI Compliance
The Payment Card Industry Data Security Standard (PCI DSS) is essential for any business that processes credit card payments. Stripe simplifies this by taking on most of the compliance burden for you. Here’s how:
- Stripe handles the vast majority of sensitive card data, reducing your PCI scope significantly.
- utilize stripe Elements or Checkout to ensure that sensitive information is collected through secure stripe-hosted forms.
- Regularly review and update your integrations to align with the latest PCI compliance requirements.
Implement Strong Authentication
To further secure your Stripe account, consider enabling two-factor authentication (2FA). This adds an extra layer of protection by requiring a second form of verification aside from your password. here’s how to set it up:
- Log in to your Stripe dashboard.
- Go to the “Settings” section and find the “Two-step authentication” option.
- Follow the prompts to link your mobile device or authentication app.
Regular Monitoring and Reporting
Keeping an eye on your transactions is crucial for spotting any suspicious activity. Stripe offers comprehensive reporting tools that help you monitor your payments:
- Use the Dashboard to view real-time payment activity.
- Set up alerts for unusual transactions or account changes.
- Review your transaction history regularly to ensure everything looks as expected.
Stay Informed about Security Updates
Make it a habit to stay updated on the latest security best practices and updates from Stripe. Regularly check their blog or security documentation to learn about:
- New features that enhance security.
- Changes in compliance regulations that could affect your business.
- Best practices for securely managing user data.
Table: Key Security Features of Stripe
| Feature | Description |
|---|---|
| Encryption | All data is securely encrypted both in transit and at rest. |
| Fraud Detection | Machine learning algorithms analyze transactions for signs of fraud. |
| Dispute Management | Tools to efficiently manage chargebacks and disputes. |
By taking these proactive steps,you can enjoy peace of mind knowing that your Eduma platform is not just user-friendly,but also secure and compliant. Leveraging Stripe’s features ensures that both you and your customers are protected in the ever-evolving landscape of online payments.
Troubleshooting Common Issues with Stripe in Eduma
When integrating Stripe with Eduma, you might encounter a few hurdles. Here’s how to tackle some of the most common issues:
Payment Method Not Accepted
If customers are facing issues with their payment methods being declined, consider these factors:
- Check card Compatibility: Ensure that the payment methods you’ve enabled in your Stripe account are supported by your Eduma setup.
- Test Mode: If you’re using test mode, verify that the test cards you’re using are valid.
- Currency Settings: Make sure that the currency in your Stripe account matches the currency settings in Eduma.
inconsistent Payment Notifications
Sometimes, payment notifications may not show up as expected. Here’s how to resolve it:
- webhook configuration: Double-check your webhook settings in Stripe to ensure they point correctly to your Eduma site.
- SSL Certificate: Make sure your site has a valid SSL certificate, as Stripe requires HTTPS for webhook notifications.
- Debugging Logs: Use the Stripe dashboard’s logs to see if notifications are being sent and if there are any errors.
Refund Issues
If you’re having trouble issuing refunds, consider the following:
- Payment Status: Ensure that the payment is complete and eligible for a refund.
- Refund Limits: Check if there are any restrictions on refund amounts set in your Stripe account.
- Processing Time: Keep in mind that refunds may take a few days to process depending on the bank’s policies.
Customer Experience Errors
Lastly, if your customers are facing errors during checkout, here are some steps to consider:
- Browser Compatibility: Ensure that your site is compatible with all major browsers and devices.
- JavaScript Errors: Check for any JavaScript errors in the console that might potentially be interfering with the checkout process.
- Theme Conflicts: Switch to a default theme temporarily to see if the issue persists, which may indicate a conflict with your current theme.

Enhancing Your Marketing Strategy with Stripe Analytics
utilizing Stripe Analytics can significantly elevate your marketing strategy by providing insightful data that helps you make informed decisions.When integrated with Eduma, this powerful tool allows you to track key metrics related to your online courses, such as revenue growth, customer retention, and user engagement. here’s how you can leverage Stripe Analytics to your advantage.
Firstly, take advantage of the real-time reporting features. Stripe offers dashboards where you can visualize your income sources and user behavior. by keeping an eye on trends, you can identify which courses are performing well and which may need some marketing tweaks. This visibility enables you to:
- Focus your marketing efforts on high-performing courses.
- Adjust pricing strategies based on customer demand.
- Identify seasonal trends to time your promotions effectively.
another significant benefit of Stripe Analytics is its ability to segment your audience. Understanding different customer demographics helps in creating personalized marketing campaigns. You can analyze data on who your customers are, their purchasing patterns, and what drives them to enroll in courses. By doing so, you can tailor your content marketing and email campaigns to meet their specific needs.
To see the impact of your marketing initiatives,consider implementing A/B testing with Stripe Analytics. As a notable example, you could experiment with different pricing models or promotional offers and track the results through Stripe’s insights.This method allows you to determine what resonates best with your audience, leading to higher conversion rates.
Utilizing Stripe’s funnel analysis tools can also help you visualize the customer journey from the moment they land on your course page to when they finalize their purchase. Analyzing drop-off points in the funnel can provide critical insights into:
| Funnel Stage | Drop-off Percentage | Advancement Strategies |
|---|---|---|
| Landing Page | 30% | Enhance SEO and CTA |
| Course Description | 20% | Improve content and visuals |
| Checkout | 15% | Simplify payment options |
make use of the cohort analysis feature to track the behavior of specific groups over time. This is especially useful for understanding how different cohorts respond to your marketing campaigns. By analyzing customer retention rates and course completion statistics, you can refine your content delivery and engagement strategies to improve overall satisfaction and retention.
By integrating Stripe Analytics into your Eduma platform, you create a feedback loop that continuously informs your marketing strategy, ensuring that every decision you make is backed by data. Embrace these insights, and watch as your marketing efforts transform into actionable strategies that drive growth and success.

Maximizing Revenue: Tips for Optimizing Your Payment Process
When it comes to streamlining your payment process, Stripe offers a powerful solution that can help you maximize revenue. By integrating Stripe with Eduma, you gain access to a suite of features designed to enhance the user experience and simplify transactions. Let’s dive into some practical tips you can implement to ensure you’re getting the most out of Stripe.
First and foremost, make sure your payment gateway is user-friendly. A seamless checkout experience can significantly reduce cart abandonment rates. Consider implementing the following:
- Customizing the checkout form to minimize unnecessary fields.
- Enabling guest checkout to avoid losing potential customers who are reluctant to create an account.
- Providing multiple payment options,including credit cards,debit cards,and digital wallets.
Next,it’s essential to optimize your pricing strategy. Clear and transparent pricing can help build trust with your customers.Here are a few strategies to consider:
- Offer tiered pricing plans to cater to different customer needs and budgets.
- Include discounts for early sign-ups or long-term commitments to encourage immediate purchases.
- Display pricing clearly on your website, ensuring it’s visible without being overwhelming.
Another key aspect to consider is the security of your payment process. Customers are more likely to complete a purchase when they feel their information is safe. implement the following security measures:
- Utilize Stripe’s built-in fraud detection tools.
- Ensure your site is SSL certified to protect sensitive data.
- Regularly update your payment scripts and plugins to safeguard against vulnerabilities.
Lastly, don’t overlook the importance of analytics. By analyzing payment data, you can identify trends and areas for improvement. Use Stripe’s reporting tools to track key metrics such as:
| Metric | importance |
|---|---|
| Conversion Rate | Measures the percentage of visitors who complete a purchase. |
| Average Order value (AOV) | Indicates how much each customer spends on average. |
| Chargeback Rate | Monitors the frequency of disputed transactions. |
By focusing on these elements, you’re not only optimizing your payment process but also setting the foundation for increased revenue and customer satisfaction. Make the most of Stripe’s capabilities within Eduma, and watch your business thrive!

Supporting Your Users: Providing Help and Resources
Integrating Stripe into Eduma can seem daunting, but you’re not alone on this journey.We’re here to equip you with a wealth of resources that can make the process smoother and more intuitive. Start by checking out our FAQ page, where you can find answers to common questions and troubleshooting tips.
To further assist you, we’ve compiled a list of helpful resources:
- User Documentation: Our comprehensive guides cover everything from initial setup to advanced features.
- video Tutorials: Visual learners can benefit from step-by-step video guides available on our YouTube channel.
- Community Forums: Join the conversation with other users. Share your experiences and gain insights from the community.
- Customer Support: If you encounter any issues, don’t hesitate to reach out to our support team. We’re here to help!
In addition to these resources, consider taking advantage of our live webinars. These sessions cover various topics, including best practices for using Stripe effectively within Eduma. You can ask questions in real time, making it a fantastic opportunity to deepen your understanding.
For those who prefer a more structured approach, our Step-by-Step Checklist is an excellent way to ensure you don’t miss any critical steps while integrating Stripe:
| Step | Description |
|---|---|
| 1 | Create a Stripe Account |
| 2 | Configure Payment Settings |
| 3 | Integrate Stripe with Eduma |
| 4 | Test Transactions |
| 5 | Launch to Users |
We believe that providing the right tools and resources is crucial to your success. With these aids at your disposal, you can effortlessly navigate the integration process and enhance your users’ experience.Remember, the more informed you are, the more empowered you will feel to make the most out of Stripe’s features within Eduma.
Future-Proofing Your Payment System with Stripe Updates
As digital landscapes evolve, so too do the tools we use to manage financial transactions. Staying ahead with updates from Stripe not only enhances your payment processes but also secures your business against future challenges. Implementing Stripe in Eduma is a proactive step towards future-proofing your payment system.
One of the best features of Stripe is its continuous innovation. Regular updates ensure that you’re equipped with the latest security measures and payment options. Here’s why keeping up with these updates is crucial:
- Enhanced Security: Stripe frequently updates its encryption protocols and fraud detection algorithms, protecting your users’ sensitive data.
- Compliance with Regulations: With ever-changing financial regulations, Stripe ensures that your payment system adheres to local and global compliance standards.
- New Payment Methods: Stripe consistently expands its payment options, allowing you to cater to a broader audience by accepting various currencies and payment methods.
Integrating Stripe updates into your Eduma platform can be a seamless process. Begin by regularly checking the Stripe dashboard for notifications about new features or improvements. Here’s a simple plan to keep your system up to date:
| Task | Frequency |
|---|---|
| Review Stripe Release Notes | Monthly |
| Test New Features | After Each Update |
| Conduct User Feedback Surveys | Quarterly |
Additionally, consider leveraging Stripe’s developer resources to implement custom solutions that fit your specific needs. By utilizing features like webhooks, you can automate processes and ensure your payment system remains responsive to changes in user behavior and preferences.
Incorporating these updates isn’t just about keeping pace; it’s about enhancing user experience and maintaining trust. As your customers engage with a reliable and efficient payment system, they’re more likely to return. Remember, a robust payment system lays the foundation for long-term customer relationships.
Frequently Asked Questions (FAQ)
Q&A: How to Use Stripe in eduma: A Step-by-Step Guide
Q1: what is eduma, and why should I use it for my online courses?
A: Eduma is a robust WordPress theme designed specifically for educational purposes. It seamlessly integrates with Learning Management Systems (LMS) and offers a user-friendly interface for both educators and students. If you want to create and sell online courses, Eduma provides all the tools you need, including customization options, course management, and payment processing capabilities. Plus, with its integration with Stripe, you can easily accept payments, which is essential for monetizing your courses!
Q2: Why should I choose Stripe for payment processing in Eduma?
A: Stripe is a powerful payment processing platform that is widely used and trusted by businesses worldwide. it offers a simple setup,low transaction fees,and supports various payment methods,including credit cards and mobile wallets. By integrating Stripe with Eduma, you ensure a seamless payment experience for your students, which can significantly boost your sales and improve customer satisfaction.
Q3: How do I get started with setting up Stripe in Eduma?
A: Great question! First, you’ll want to create a Stripe account if you haven’t already. Simply go to the Stripe website, sign up, and verify your identity. Once you have your account set up, the next step is to integrate Stripe with your Eduma theme. This typically involves installing a payment plugin and connecting it to your Stripe account. Don’t worry; I’ll walk you through the process in the following steps!
Q4: Can you outline the steps for integrating Stripe into Eduma?
A: Absolutely! Here’s a quick step-by-step guide:
- Create a Stripe Account: Visit the Stripe website and sign up for a free account.
- Install the Required Plugin: In your WordPress dashboard, go to Plugins > Add New, and search for “WooCommerce Stripe Payment Gateway.” Install and activate it.
- Configure WooCommerce Settings: Once the plugin is active,navigate to WooCommerce > Settings > Payments. Enable the Stripe payment method.
- Connect to Stripe: Click on the ‘Manage’ button next to Stripe, then enter your Stripe API keys.You can find these in your Stripe dashboard under Developers > API keys.
- Test the Integration: It’s important to test that everything is working properly. Use Stripe’s test mode to make sure payments are processing correctly before going live.
- Go Live: Once you’ve tested everything, switch from test mode to live mode in your Stripe account, and you’re ready to start accepting payments!
Q5: what if I run into issues during the setup process?
A: No worries! If you encounter any issues, the Eduma support team is fantastic and can help you troubleshoot. Additionally, Stripe has a comprehensive support center with plenty of resources and guides. You can also reach out to forums and community groups for further assistance. Remember, every challenge is just an opportunity to learn!
Q6: Are there any fees associated with using Stripe?
A: Yes, Stripe charges a small fee for each transaction, typically around 2.9% + 30 cents per successful card charge in the US. However, these rates can vary based on your location and the type of transaction.it’s essential to factor these fees into your pricing strategy when selling your courses, but the convenience and security that Stripe offers frequently enough outweigh the costs.
Q7: How can I ensure the best user experience for my students during the payment process?
A: Here are a few tips to enhance the user experience:
- Keep it Simple: Make the checkout process as straightforward as possible.
- Use Clear Calls-to-Action: Ensure that buttons for purchasing or enrolling in courses are easily visible.
- Optimize for Mobile: A significant number of users will be accessing your site via mobile devices, so make sure your payment process is mobile-friendly.
- Provide Multiple Payment Options: While Stripe supports many payment methods, consider offering other options if your audience prefers them.
Q8: Is there anything else I should know before getting started?
A: Just remember that creating and selling online courses is not only about the technical setup. Focus on delivering high-quality content and engaging with your students. Building a community around your courses will help you retain students and encourage repeat business. Happy teaching!
Conclusion
By integrating Stripe with Eduma, you’re setting yourself up for success in the world of online education. Follow these steps, and you’ll be on your way to creating a seamless payment experience for your students. Ready to take the plunge? Let’s get started!
The Way Forward
And there you have it! You’re now equipped with all the tools you need to seamlessly integrate Stripe into your Eduma platform. With this step-by-step guide,setting up payment processing can be a breeze,allowing you to focus more on what really matters: delivering top-notch educational content to your learners.
Remember, using Stripe not only streamlines your transactions but also enhances the overall experience for your users. They’ll appreciate the ease of payment,and you’ll love the peace of mind that comes with secure,reliable transactions.
So, why wait? Dive in and start implementing these steps today! Transform your Eduma site into a professional, user-friendly hub for education that can handle payments effortlessly. If you have any questions or need further assistance, don’t hesitate to reach out—we’re here to help you succeed. happy teaching!