Are you ready to give your website a fresh new look? Changing your logo is one of the simplest yet most impactful ways to brand your site and make it truly yours. If you’re using the Eduma theme for your WordPress site, you’re in luck! This user-pleasant theme makes logo customization a breeze, even if you’re not a tech whiz. In this step-by-step guide, we’ll walk you through the process of changing your logo with ease. Whether you’re looking to enhance your brand’s identity or simply want to update your site’s aesthetics, we’ve got you covered! Let’s dive in and transform your website’s appearance together!
Understanding the Importance of Your Logo in Eduma Theme
Your logo is more than just a pretty design; it’s the visual cornerstone of your brand identity. In the eduma theme,having a well-crafted logo is essential as it sets the tone for your educational platform and communicates your values at a glance. A thoughtfully designed logo can leave a lasting impression and build trust with your audience, making it a crucial element of your online presence.
Here are a few reasons why your logo matters:
- Brand Recognition: A distinct logo helps users easily recognize your brand amidst a sea of competitors. It’s the first thing people notice and remember.
- professionalism: A polished logo conveys professionalism and credibility, which is vital for educational platforms where users look for trustworthiness.
- Emotional Connection: The right logo can evoke emotions and resonate with your audience, creating a connection that goes beyond mere transactions.
- versatility: A well-designed logo works across various media, from your website to social media profiles, marketing materials, and more.
A logo in the Eduma theme should also be aligned with the color palette and design elements of your site. This cohesion not only enhances the visual appeal but also reinforces your brand’s messaging. Choosing the right colors, fonts, and styles is essential, as these elements work together to create an image that speaks to your target audience.
When updating your logo in the Eduma theme,consider these design principles:
| Design Principle | Description |
|---|---|
| Simple | A clean and straightforward design is more memorable and versatile. |
| Scalable | Your logo should look good at any size, from a website header to a business card. |
| Relevancy | Ensure your logo reflects the essence of your educational brand. |
Ultimately,changing your logo is not just about aesthetics; it’s about making a statement. It’s an opportunity to refresh your brand identity and align with your mission and vision. By carefully considering the role of your logo within the Eduma theme, you’re not only enhancing your site’s appearance but also reinforcing your brand’s value proposition to potential users.
Exploring the Eduma Theme Customization Options
Customizing your Eduma theme is essential for creating a unique online presence that resonates with your audience. One of the first steps many users take is changing the logo, as it is a key element of brand identity. Luckily, the Eduma theme makes this process straightforward and accessible, even for those who are not tech-savvy.
To change your logo, you’ll want to navigate to the theme options in the WordPress dashboard.Here are the steps to follow:
- Login to your WordPress dashboard.
- Go to Appearance > Customize.
- select Site Identity.
- Click on ‘Select Logo’ to upload your new logo image.
- Adjust the logo size and positioning in the preview panel if necessary.
- Hit the ‘Publish’ button to save your changes.
Choosing the right logo is crucial. Aim for a design that is clean and professional. remember that your logo will appear across various devices, so ensure it’s responsive and looks great on both mobile and desktop views. Consider using a transparent background for versatile use.
Eduma also offers additional customization options that allow you to enhance your logo further:
| Customization Option | Description |
|---|---|
| Logo Size | Adjust the dimensions to fit your site perfectly. |
| Header Style | Choose from different header layouts to better showcase your logo. |
| Floating Logo | Make your logo float as users scroll for enhanced visibility. |
Once your logo is set, don’t forget about the importance of branding consistency. Use similar colors and styles throughout your website to create a cohesive look. This helps reinforce your brand identity and builds trust with your audience. You can also update other visual elements like the header and footer to complement your new logo.
Experimenting with different designs and styles can help you find the perfect logo for your site. don’t hesitate to gather feedback from friends or colleagues to see what resonates best. With the Eduma theme’s customization options, you have the flexibility to create a site that truly represents your brand.
Preparing Your Logo for Upload: Best Practices
When you’re ready to upload your logo to the eduma theme, ensuring it’s perfectly prepared can make a world of difference in how it represents your brand. Here are some best practices to keep in mind:
- Choose the Right File Format: For logos, the most common formats are PNG, JPEG, and SVG. PNG is ideal for web use, especially when you need a transparent background.
- Optimize File Size: Large files can slow down your website. Use tools like TinyPNG or ImageOptim to compress your logo without sacrificing quality.
- Maintain Consistent Dimensions: Stick to a set size for your logo to ensure it appears uniform across your site. Consider using dimensions that align with the theme’s design guidelines.
- use High Resolution: A logo should look crisp and clear even on high-definition screens. Aim for a resolution of at least 300 DPI for best results.
After creating an ideal logo, it’s essential to test how it appears on your website. Here are some rapid tips:
- Check for Visibility: Ensure your logo is easily visible on different backgrounds. Test it against both light and dark color schemes.
- Responsive Design: Make sure your logo looks good on all devices, from mobile phones to desktop computers. Use CSS to adjust the size where necessary.
- Seek Feedback: Don’t hesitate to gather opinions from colleagues or friends. A fresh pair of eyes can catch details you might overlook.
If you’re unsure about the dimensions or sizes, here’s a simple guide:
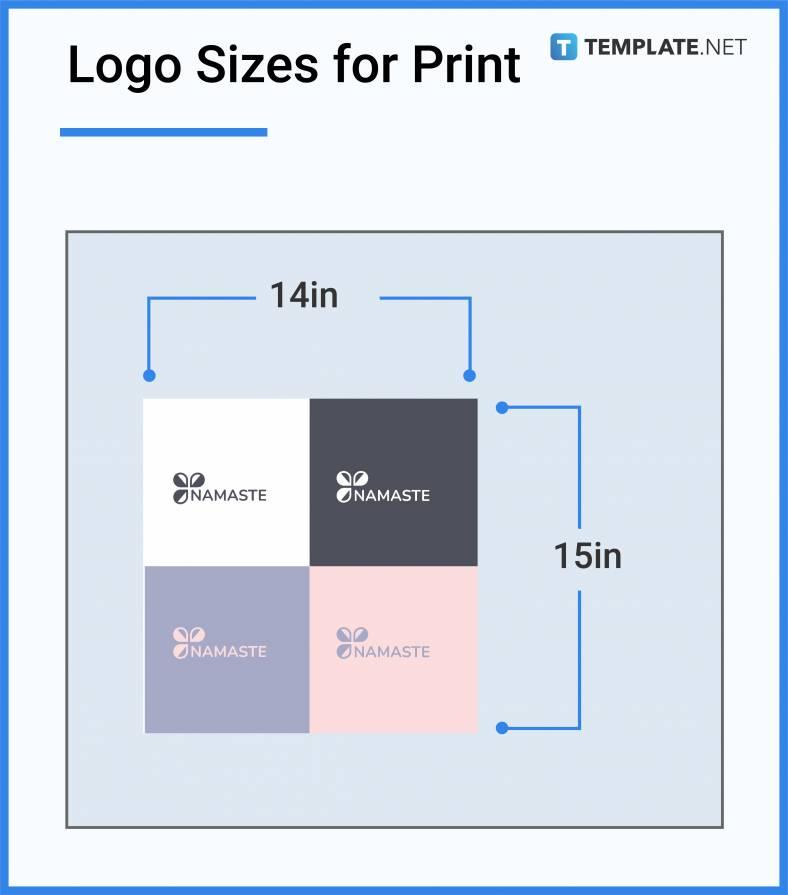
| Logo Type | Recommended Size (px) |
|---|---|
| Header Logo | 250 x 100 |
| Footer Logo | 150 x 60 |
| Mobile Logo | 120 x 50 |
By adhering to these best practices, you not only enhance your brand’s visual identity but also ensure a seamless integration within the Eduma theme. A well-prepared logo can significantly impact user engagement and brand recognition, making it worth the effort you put into getting it just right.
Navigating to the Logo Settings in the wordpress Dashboard
To change the logo in the Eduma theme, the first step is to access the WordPress dashboard. Once you’re logged in, you’ll want to look for the Appearance menu on the left sidebar. This is your gateway to all your theme-related settings, including logo customization.
Click on Appearance, and then select Customize. This will take you to the WordPress Customizer where you can make real-time changes to your site’s appearance. On the left side of the Customizer, you will find various options to personalize your site.
In the customizer, look for the section labeled Site Identity. This is where you can update your logo, site title, and tagline.Click on site Identity, and you’ll see options to upload your logo. If you already have an image in your media library, you can select it from ther, or you can upload a new one by clicking the Upload button.
Once you’ve selected your logo, you can adjust its size right in the Customizer to ensure it looks perfect on your site. It’s important to choose an image that aligns with the overall aesthetic of your website. A clear and vibrant logo can significantly boost your brand’s visibility and professionalism.
After you’ve uploaded and adjusted your logo,make sure to click the Publish button at the top of the Customizer to save your changes. It’s a simple step, but it’s crucial; or else, your new logo won’t be visible to your visitors.
Don’t forget to check how your logo appears on various devices! You can use the preview options in the Customizer to see how it looks on desktop, tablet, and mobile views. Making sure your logo is responsive will enhance user experience and keep your brand consistent across all platforms.
Replacing Your Logo: A Step-by-Step Walkthrough
Changing your logo in the Eduma theme is a straightforward process that can significantly enhance your website’s branding. Here’s how you can seamlessly update your logo to reflect your unique identity.
First, you need to access your wordpress dashboard. Once you’re logged in, navigate to the Appearance section in the menu on the left. From there, click on Customize. This will take you to the WordPress Customizer where you can modify various elements of your theme.
Within the customizer, look for the option labeled Site Identity. Click on it, and you will find settings related to your site’s title, tagline, and, crucially, your logo. Here’s what to do next:
- Remove the Old Logo: If there’s an existing logo, click on it to remove it.
- Add New Logo: Select the Change logo button to upload a new image from your computer or choose one from your media library.
- Adjust Size: After uploading, you can crop the image and adjust the size to fit your preferences.
After selecting your new logo, it’s critically important to preview how it looks on your site. The Customizer allows you to see real-time changes, so take advantage of this feature to ensure your logo aligns perfectly with your overall design.
Once you’re satisfied with the look of your new logo,don’t forget to save your changes! Click the Publish button at the top of the Customizer to make your logo live on your site.
If you encounter any issues with the logo size or alignment, you can adjust these settings under Header Settings or Layout Options, depending on your theme’s specific configurations. This way, you can ensure that your logo stands out and enhances your brand’s presence on your website.
lastly, consider testing your site on various devices after making the change to ensure that your logo maintains its quality and visibility across all platforms.A responsive design is key to a professional look!
Adjusting Logo Size and Position for Optimal Display
To ensure your logo captures attention and fits seamlessly within your website’s layout, adjusting its size and position is crucial. The Eduma theme provides a user-friendly interface to make these adjustments effortlessly.You want your logo not just to be visible but to complement the overall aesthetic of your site.
First, let’s tackle the size of your logo. A logo that is too large can dominate the header, while a small logo might go unnoticed.Here’s how to find the right balance:
- Navigate to the Customizer under Appearance > Customize.
- Select the Site Identity section.
- Here, you can upload your logo. Use high-resolution images but keep the dimensions appropriate—ideally around 250px to 300px wide.
Next, you can adjust the position of your logo.Positioning can significantly affect how users perceive your brand. You can achieve this by tweaking the header layout:
- Within the Customizer, look for the Header Options.
- Choose between left, center, or right alignment based on your site’s design.
- If you want to create a more personalized look, consider using CSS for positioning tweaks. A little custom CSS can go a long way.
Here’s a simple CSS snippet you can use to adjust your logo’s position:
    .site-logo {
        margin-top: 20px; /* Adjusts the top margin */
        margin-bottom: 20px; /* Adjusts the bottom margin */
    }
If you’re unsure which size and position work best, consider conducting a quick A/B test. Create two versions of your header with different logo sizes and placements,then analyse visitor interaction. This will help you determine which option resonates best with your audience.
Lastly, don’t forget to check how your logo looks on mobile devices.The Eduma theme is responsive, but slight adjustments may be necessary.Use the responsive settings in the Customizer to preview and adjust the logo for tablets and smartphones to maintain a polished look across all devices.
Previewing Changes: Ensuring Your logo Looks Perfect
After uploading your new logo in the Eduma theme, it’s crucial to preview the changes to ensure everything looks just right.You’ve put a lot of thought into your branding, and the logo is a key part of that identity. So, let’s make sure it shines on your website.
First, navigate to the Customization section in the WordPress dashboard. Here, you’ll find a live preview of your site, allowing you to see how your logo integrates with your overall design. Pay attention to the following aspects:
- Size: Does the logo fit well within the header? A logo that’s too big or too small can throw off the balance of your site.
- Alignment: Ensure the logo is centered or aligned according to your design preferences. A misaligned logo can lead to an unprofessional appearance.
- Color Contrast: Check how your logo interacts with the background. A logo that blends in too much can lose its impact.
Additionally,consider how the logo looks on different devices. You can use the responsive design tools within the customizer to switch views between desktop, tablet, and mobile. This ensures your logo maintains its integrity across all screen sizes.
If you’re not satisfied with how your logo appears during the preview,don’t hesitate to make adjustments. You may need to tweak the dimensions or explore different placements until it’s just right. Experimentation is key!
Lastly, once you’re happy with the preview, don’t forget to publish your changes. This step will make your logo visible to your visitors, adding the final touch to your website’s branding.
| Logo Element | Recommended Action |
|---|---|
| Size | Adjust dimensions if needed |
| Alignment | Center or align as per design |
| Color Contrast | Ensure visibility against background |
Troubleshooting Common logo Upload Issues
Changing your logo in the Eduma theme should be a straightforward process, but sometimes, you might run into a few hiccups. Here are some common issues you might face and how to resolve them:
- File Format Errors: Ensure that your logo is in the correct format. The Eduma theme typically supports JPEG, PNG, and SVG files. If your logo is in a different format, consider converting it using online tools.
- Image Size Problems: large image files can fail to upload. Aim for a logo size under 1 MB and dimensions that fit well within the header space. If needed, use image editing software to resize your logo before uploading.
- Browser Compatibility: Sometimes, the problem might be as simple as your browser. If the upload button isn’t responding, try clearing your cache or switching to a different browser altogether. Chrome and Firefox tend to work best with WordPress.
If you’re still facing difficulties after checking these common issues, consider the following troubleshooting steps:
- Plugin Conflicts: Deactivate all plugins temporarily to see if one of them is causing the issue.Sometimes, a plugin can interfere with the standard functionality of your theme.
- Theme Updates: Ensure that your Eduma theme is up to date. Sometimes, outdated themes may have bugs that have already been fixed in newer versions. Check for updates in your WordPress dashboard.
- Check Permissions: Make sure that your WordPress installation has the correct permissions set. If file permissions are too restrictive, it can prevent uploads. Generally, directories should be set to 755 and files to 644.
In certain cases, you may need to delve into your server settings:
| Issue | Solution |
|---|---|
| File Upload Limit Exceeded | Increase the upload_max_filesize in your php.ini file. |
| Memory Limit Errors | Boost the memory_limit in your php.ini file to at least 256M. |
| Server Timeout | Check with your hosting provider to see if they can increase your timeout settings. |
By following these tips and solutions, you should be able to overcome any obstacles you encounter while changing your logo in the Eduma theme. Remember, a professional logo is vital for establishing your brand identity, so don’t hesitate to troubleshoot until you find the right solution!
Saving and Publishing Your Changes for All to See
Once you’ve made all the necessary changes to your logo in the Eduma theme, it’s time to ensure those changes are saved and visible to your website visitors. this step is crucial, as it finalizes your updates and allows you to showcase your new branding without delay.
Before you hit that publish button, double-check the following:
- Preview Your Changes: Always preview your logo changes on different devices. This ensures that it displays correctly on desktops, tablets, and smartphones.
- clear Cache: If you’re using a caching plugin, make sure to clear the cache. This will prevent the old logo from appearing due to stored data.
- Check for Responsive design: Ensure that your logo is responsive. It should resize appropriately across various screen sizes.
Once you are satisfied with how everything looks, navigate to the settings where you can save your changes. In the Eduma theme, this is typically found within the Customizer or Theme Options. Here’s how to do it:
| Step | Action |
|---|---|
| 1 | Click on the “Publish” button to apply your logo changes. |
| 2 | Confirm any prompts that may appear to ensure the changes are saved. |
| 3 | Visit your site to verify the new logo is live. |
After publishing, take a moment to explore your site. Navigate through various pages to confirm that your new logo appears seamlessly throughout. If everything checks out, give yourself a pat on the back! You’ve successfully enhanced your website’s branding.
Remember, regularly reviewing your logo and overall brand presentation can keep your site looking fresh and engaging. Don’t hesitate to make adjustments as your brand evolves. Keeping your online presence updated is key to attracting and retaining visitors.
Enhancing Your Brand with Custom Logo Variations
Enhancing your brand identity is essential in today’s competitive landscape, and one of the most effective ways to do this is by utilizing custom logo variations.With the Eduma theme, you have the flexibility to adjust your logo to fit various contexts, ensuring it resonates with your audience while maintaining brand consistency.
Here are some ways to effectively use custom logo variations:
- Color Adjustments: Tailor your logo’s colors to align with seasonal promotions or events. As an example, a vibrant palette can be used for summer campaigns, while muted tones may fit the holiday season.
- Size and Placement: Depending on where your logo appears—be it in the header, footer, or on social media—you might need to adjust its size and placement to ensure it’s visible and appealing.
- Alternate Formats: Utilize different formats of your logo (like horizontal vs. vertical) to maximize impact across various platforms, ensuring your brand remains recognizable no matter where it appears.
If you’re ready to dive into the specifics of changing your logo in the Eduma theme, it’s essential to know which variations will best enhance your brand’s visual narrative. A well-thought-out logo variation strategy can transform the way your audience perceives your brand.
| Logo Variation | Best Use Case |
|---|---|
| Full-Color Logo | Website Header & branding Materials |
| Monochrome Logo | Simplified Branding for Dark Backgrounds |
| Icon Only | Social Media Profiles & Favicons |
By exploring these variations and implementing them strategically, you can create a cohesive visual experience that reinforces your brand’s message. Whether it’s a slight tweak in color or a complete redesign, remember that your logo is often the first impression your audience receives. Make it count!

Maintaining Consistency Across Your Website Design
when it comes to website design,consistency is key. A coherent visual identity not only enhances user experience but also reinforces brand recognition. Every element, from your logo to your color palette, should work harmoniously to convey your message effectively.
One of the first steps in achieving this consistency is ensuring that your logo is prominently displayed and aligned with your overall design theme. In the Eduma theme, changing your logo is a straightforward process that can significantly impact how your brand is perceived. Here’s how you can seamlessly integrate your new logo:
- Access the WordPress dashboard: Log into your WordPress admin area.
- Navigate to Theme Options: Go to Appearance > Customize to open the theme customizer.
- Locate Site identity: Find the Site Identity section to upload your logo.
- Select Your Logo: Click on Choose Logo to upload a new file or select one from your media library.
- Adjust Logo Size: Use the available options to resize or adjust the logo if necessary.
- Publish changes: Once you’re satisfied, hit the Publish button to save your changes.
Remember, the logo should reflect your brand’s personality. Whether it’s modern and sleek or whimsical and fun, it should be consistent with the overall theme of your website. Consider the color scheme, typography, and imagery that you use throughout your site; these elements should be in sync with your logo to create a unified look.
For further consistency, consider creating a style guide that outlines your color palette, font choices, and logo usage. This guide will serve as a reference for anyone involved in your website’s design, ensuring that all elements align with your brand’s vision.
| Element | Consistency Tips |
|---|---|
| Logo | Use the same logo across all platforms. |
| Color Palette | Stick to a defined set of colors for all graphics. |
| Typography | select two to three fonts and use them throughout. |
Ultimately, maintaining a consistent design across your website will not only elevate your brand’s professionalism but also enhance user trust and engagement. Invest the time to ensure each element, including your logo, is perfectly aligned with your brand’s identity. This attention to detail can make all the difference in the eyes of your visitors.

final Tips for a Seamless Logo Integration Experience
Integrating your new logo into the Eduma theme can be a smooth process if you keep a few key concepts in mind. Here are some final recommendations to ensure everything goes off without a hitch:
- Keep your logo size in mind: Before uploading, ensure your logo meets the recommended dimensions for the eduma theme. A logo that’s too large may disrupt your layout, while a tiny one may not attract the attention it deserves.
- Use high-quality images: Always opt for high-resolution files in formats like PNG or SVG. This ensures your logo looks crisp on all devices, maintaining a professional appearance across your site.
- Test responsiveness: after integrating your logo, view it on different devices. Ensure it scales appropriately on mobiles and tablets, preserving clarity and aesthetics across the board.
- Consider your website’s color palette: Ensure your logo complements the existing colors of your site.A harmonious color scheme will enhance your brand identity and provide a better user experience.
Additionally, don’t forget to leverage the Eduma theme’s customization features. You can adjust the logo’s position, size, and more, creating a unique look that aligns perfectly with your vision. Experiment with settings in the Customizer until you find the perfect fit.
Here’s a quick reference table to help you choose the best logo format:
| Format | Best for | Notes |
|---|---|---|
| PNG | Web use | Supports clarity, great for logos with intricate designs. |
| SVG | Scalability | Perfect for logos, as they maintain quality at any size. |
| JPG | Photographs | Not ideal for logos; loses quality when resized. |
Lastly, always remember to clear your cache after making changes. this ensures that your new logo appears without glitches or delays for all visitors. Regularly revisit your logo integration to keep it fresh and aligned with any branding updates.
Frequently Asked Questions (FAQ)
Q&A: How To Change Logo in Eduma Theme: Step-by-step Guide
Q1: Why should I change the logo on my Eduma theme site?
A: Changing the logo on your Eduma theme site is essential for branding! A well-designed logo not only enhances your website’s visual appeal but also helps build recognition and trust with your audience. It’s the first thing visitors notice, so why not make it memorable?
Q2: Is changing the logo in Eduma difficult?
A: Not at all! In fact, it’s super simple. The Eduma theme is designed with user-friendliness in mind, making it easy for anyone—even those with minimal tech skills—to update their logo in just a few clicks. You’ll be amazed at how quickly you can personalize your site!
Q3: What do I need before I start?
A: Before you dive in, make sure you have your logo ready! whether it’s a custom design or a brand you’ve created, ensure it’s in a web-friendly format (like PNG or JPG) and the right dimensions for your site. Also, have access to your WordPress dashboard handy.
Q4: Can you walk me through the steps?
A: Absolutely! Here’s a quick step-by-step guide:
- Log in to your WordPress dashboard.
- Navigate to Appearance > Customize.
- Look for the ‘Site Identity’ section. This is where you can upload your new logo.
- Click on ‘Select Logo.’ Choose your new logo file and click ‘Select.’
- Adjust the logo settings if needed. You can crop or resize it directly in the editor, ensuring it fits perfectly.
- Don’t forget to save! Hit the ‘Publish’ button at the top to make your changes live.
Q5: What if I want to change the logo size?
A: great question! After uploading your logo, you can customize its size directly in the ‘Site Identity’ section. If you want more precise control, you can also use CSS to adjust the dimensions further. A little tweaking can make a big difference!
Q6: Will changing my logo affect my current branding?
A: Changing your logo can refresh your brand’s image, but it’s crucial to keep your audience in mind. If you’re updating to a more modern design or aligning with a new vision, it can enhance your branding rather than detract from it. Just make sure it still resonates with your audience and reflects your values!
Q7: Can I revert to the old logo if I don’t like the new one?
A: Absolutely! WordPress allows you to go back to your previous settings easily. Just navigate back to the ‘Site Identity’ section and select your old logo, or simply re-upload it. it’s all about giving you the freedom to experiment without the fear of losing your original branding!
Q8: Any final tips for a successful logo change?
A: Definitely! Make sure your logo is high-quality, relevant, and aligns with your brand message. Test how it looks on different devices to ensure it’s visually appealing everywhere. And remember, your logo is just one part of your branding—consistency across your site is key!
Q9: Where can I find more resources about the Eduma theme?
A: You’re in luck! The Eduma theme comes with extensive documentation, tutorials, and a supportive community. Check their official website, forums, or even YouTube for helpful guides and tips on maximizing your theme’s potential.
Q10: I’m ready to change my logo! Any last encouragement?
A: Go for it! Changing your logo can be a small step with a huge impact. It’s a fantastic opportunity to showcase your brand’s personality and connect with your audience. Dive in, have fun with it, and watch your site transform! you’ve got this!
Insights and Conclusions
And there you have it! Changing the logo in the Eduma theme is a breeze when you break it down step by step. Whether you’re aiming to reinforce your brand identity or simply want a fresh look, updating your logo can make a critically important impact on your website’s overall appeal.
Remember, your logo is often the first thing visitors see, so it’s worth taking the time to get it just right.If you follow this guide, you’ll not only enhance your site’s professionalism but also create a lasting impression on your audience.So, why not take a moment right now to implement what you’ve learned? Your website is your digital storefront, and a captivating logo can draw in visitors like a moth to a flame. If you have any questions or run into any hiccups along the way, don’t hesitate to reach out or drop a comment below. Happy customizing, and here’s to making your Eduma site shine with your unique brand!