

Are you tired of scrolling endlessly through your WordPress media library, trying to find that one image from last summerS vacation or the perfect graphic for your latest blog post? You’re not alone! Managing a growing collection of photos, videos, and documents can quickly become overwhelming, especially when they’re all jumbled together. But what if I told you there’s a simple way to bring some order to the chaos? enter WordPress media folders! in this article, we’ll explore how to add media folders to your WordPress site, making it easier than ever to organize your media library like a pro. Say goodbye to confusion and hello to efficiency—let’s dive into the world of neatly organized media that will have you reclaiming your time and boosting your productivity in no time!
Understanding the Importance of media Organization in WordPress
When it comes to managing your WordPress site, the organization of your media library plays a crucial role in efficiency and productivity. A well-organized media library not only saves time but also enhances the overall user experience for both you and your visitors. Imagine being able to find that perfect image or video in seconds, rather than sifting through countless files. This is where the importance of media organization truly shines.
By implementing a structured approach to your media files, you can:
- Boost productivity: Quickly locate files without unnecessary delays.
- Enhance SEO: Properly organized media can improve your site’s search visibility.
- Avoid clutter: keep your media library clean and manageable.
- Facilitate collaboration: Easier for team members to find and use media assets.
One effective way to achieve this is by using media folders. By categorizing your images,videos,and documents into specific folders,you can create a more intuitive structure. Such as, you might have separate folders for:
- Blog Posts
- Product images
- Marketing Materials
- Videos
This way, when you need to insert a media file, you can quickly navigate to the right folder, saving precious time. Additionally, it minimizes the risk of accidentally uploading duplicate files or misplacing crucial assets.
To further illustrate how media organization can streamline your workflow, consider the following table showcasing the differences between an organized and a disorganized media library:
| Organized Media Library | Disorganized Media Library |
|---|---|
| Easy file retrieval | Time-consuming searches |
| Clear file categorization | Chaotic file storage |
| Improved site performance | Potential loading issues |
| Better teamwork | Frustrated collaborators |
Choosing the right plugin for media organization can also make a important difference. Look for features that allow you to create custom folders, tag files, and easily drag-and-drop items. This added layer of functionality will help you maintain a clean media library and keep your workflow smooth.
investing time in organizing your media library is definitely worth it. By embracing a structured approach, you’ll not only create a more efficient work habitat but also contribute to the overall success of your WordPress site. so go ahead, take control of your media files and watch how it transforms your content management experience!
Exploring the Default WordPress Media Library Setup
The default WordPress Media library is a powerful tool that allows users to upload, manage, and display images, videos, and other media files on their websites. However, it can sometimes feel overwhelming, especially as your library grows. Understanding the setup can help you utilize it more effectively and streamline your workflow.
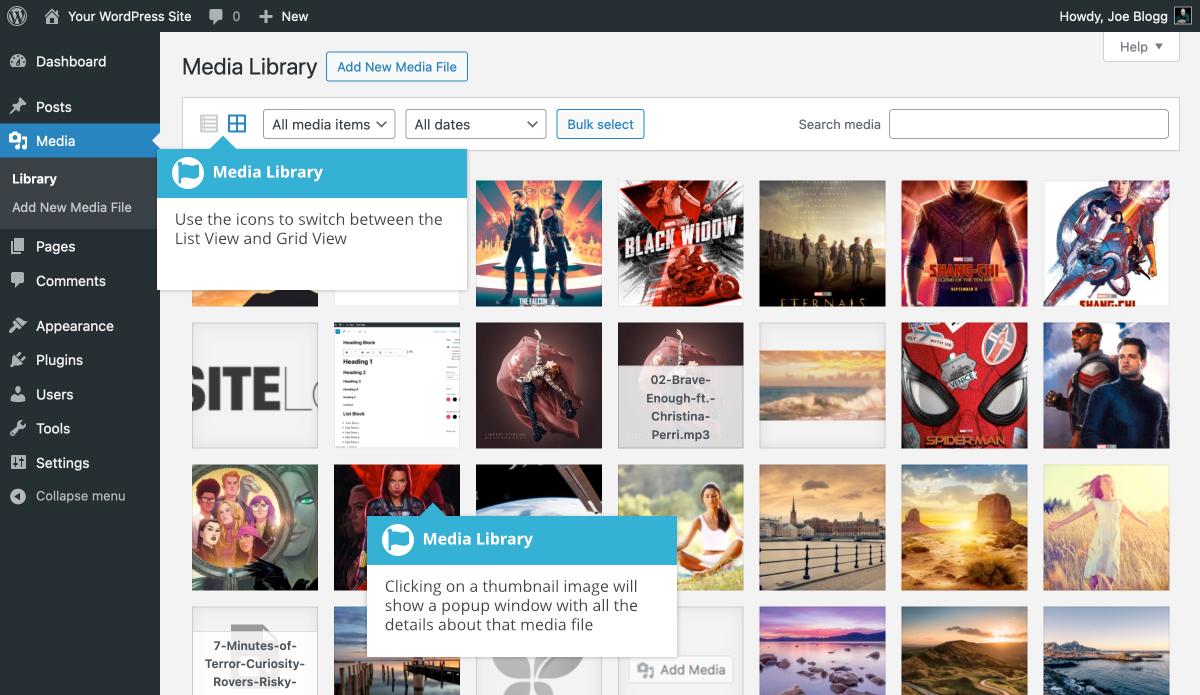
When you first access the Media Library, you’ll notice a simple interface displaying your media files. By default, your files are organized by upload date, making it easy to find recent items. However, this doesn’t help much when you’re searching for specific images or videos from months ago. This is where the need for a better organizational structure becomes apparent.
One of the key features of the Media Library is the ability to filter your media by type.You can easily switch between images, videos, and audio files. Here are some tips to enhance your experience:
- use the search bar: Quickly locate media by entering keywords related to the file name or content.
- Utilize the “Grid” and “List” views: Choose the layout that suits your preference for managing files.
- Bulk select files: Make adjustments or delete multiple files at once to save time.
While the default setup is functional, it lacks advanced organizational features that many users desire. For example,creating folders within the Media Library is not natively supported by WordPress.this frequently enough leads to a cluttered and chaotic library,which can hinder productivity. Thankfully, there are plugins available that can help you create a structured folder system, allowing you to sort files by categories, projects, or any criteria that suits your workflow.
Here’s a simple comparison of some popular plugins that can definitely help with media organization:
| Plugin name | Features | Price |
|---|---|---|
| FileBird | drag and drop folder management | Free/Premium |
| WP media Folder | Folder creation, media sorting | Premium |
| Media Library organizer | Tags and categories for files | Free |
Integrating one of these plugins can considerably improve the way you manage your media files, making it easier to find what you need without sifting through endless lists. By categorizing your media, you can not only enhance efficiency but also create a more professional appearance on your website.
The Benefits of Using Folders for Your Media Files
In the world of digital content creation,organization is key—especially when it comes to managing your media files. Using folders in your media library can transform how you handle images, videos, and audio clips, making your workflow smoother and more efficient.
1. Enhanced Accessibility: Organizing files into folders allows you to find what you need quickly. instead of scrolling through endless lists, you can navigate directly to the specific folder, saving precious time.this can be especially beneficial when working on large projects with numerous assets.
2. Improved Collaboration: If you’re working with a team, having a well-structured media library ensures that everyone knows where to find the files they need. This reduces confusion and makes collaboration much easier. Team members can simply access the appropriate folder to retrieve or upload the necessary media.
3. Decreased Clutter: A cluttered media library can lead to frustration and inefficiency. By categorizing your files into folders, you can minimize digital chaos. For instance, you might create folders for Images, Videos, Audio, and even specific projects or campaigns.
| Folder Type | Purpose |
|---|---|
| Images | Store all graphics and photos |
| Videos | Keep all video assets in one place |
| Audio | Organize music and sound effects |
| Projects | Group files by specific campaigns or topics |
4. Easier Maintenance: With folders, maintaining your media library becomes less daunting.You can regularly audit specific folders and delete outdated or unused files without having to sift through everything. This not only keeps your library tidy but also optimizes storage space.
5. Better SEO Management: Organizing your images and files into relevant folders can also contribute positively to your SEO efforts. When your media files are categorized and easily accessible,it becomes simpler to optimize them with appropriate tags and descriptions,enhancing your site’s searchability.
By implementing a folder system in your WordPress media library, you’ll experience a more organized and efficient workflow. It’s a simple change that can lead to significant improvements in productivity and collaboration, making your content management process smoother than ever.
Choosing the Right Plugin for Media Folder Management
When it comes to organizing your media library in WordPress, selecting the right plugin for media folder management is crucial. There are several options available, each offering unique features that cater to different needs. Here’s what you should consider to make an informed choice:
- user Interface: Look for a plugin that boasts an intuitive and user-amiable interface. A clean layout will make it easier to navigate your media folders and find what you need without hassle.
- Compatibility: Ensure the plugin is compatible with your current WordPress version and other plugins you’re using.Compatibility issues can lead to conflicts that disrupt your workflow.
- Features: Different plugins offer various features such as drag-and-drop functionality, bulk actions, and filtering options. Choose one that aligns with your media management needs.
- Support and Updates: Opt for plugins that provide regular updates and customer support. This ensures your plugin remains functional and secure over time.
Another important aspect to consider is performance.A plugin that slows down your site can negatively impact user experience. Look for plugins that are optimized for speed and efficiency. You might also want to check user reviews and ratings to gauge the experiences of others.
Here’s a quick comparison table of some popular media folder management plugins:
| Plugin Name | Key Features | Price |
|---|---|---|
| Media Library Organizer | Drag-and-drop, Folder Management, Bulk Upload | Free |
| WP Media Folder | Custom Folders, Cloud Integration, Category Support | $79/year |
| FileBird | Folder Creation, WPML Compatibility, Easy Navigation | $39/one time |
By taking the time to evaluate your options thoroughly, you’ll find a plugin that enhances your media library management and saves you time in the long run.Remember that the right tool not only organizes your media but also makes your overall content creation process smoother and more enjoyable.
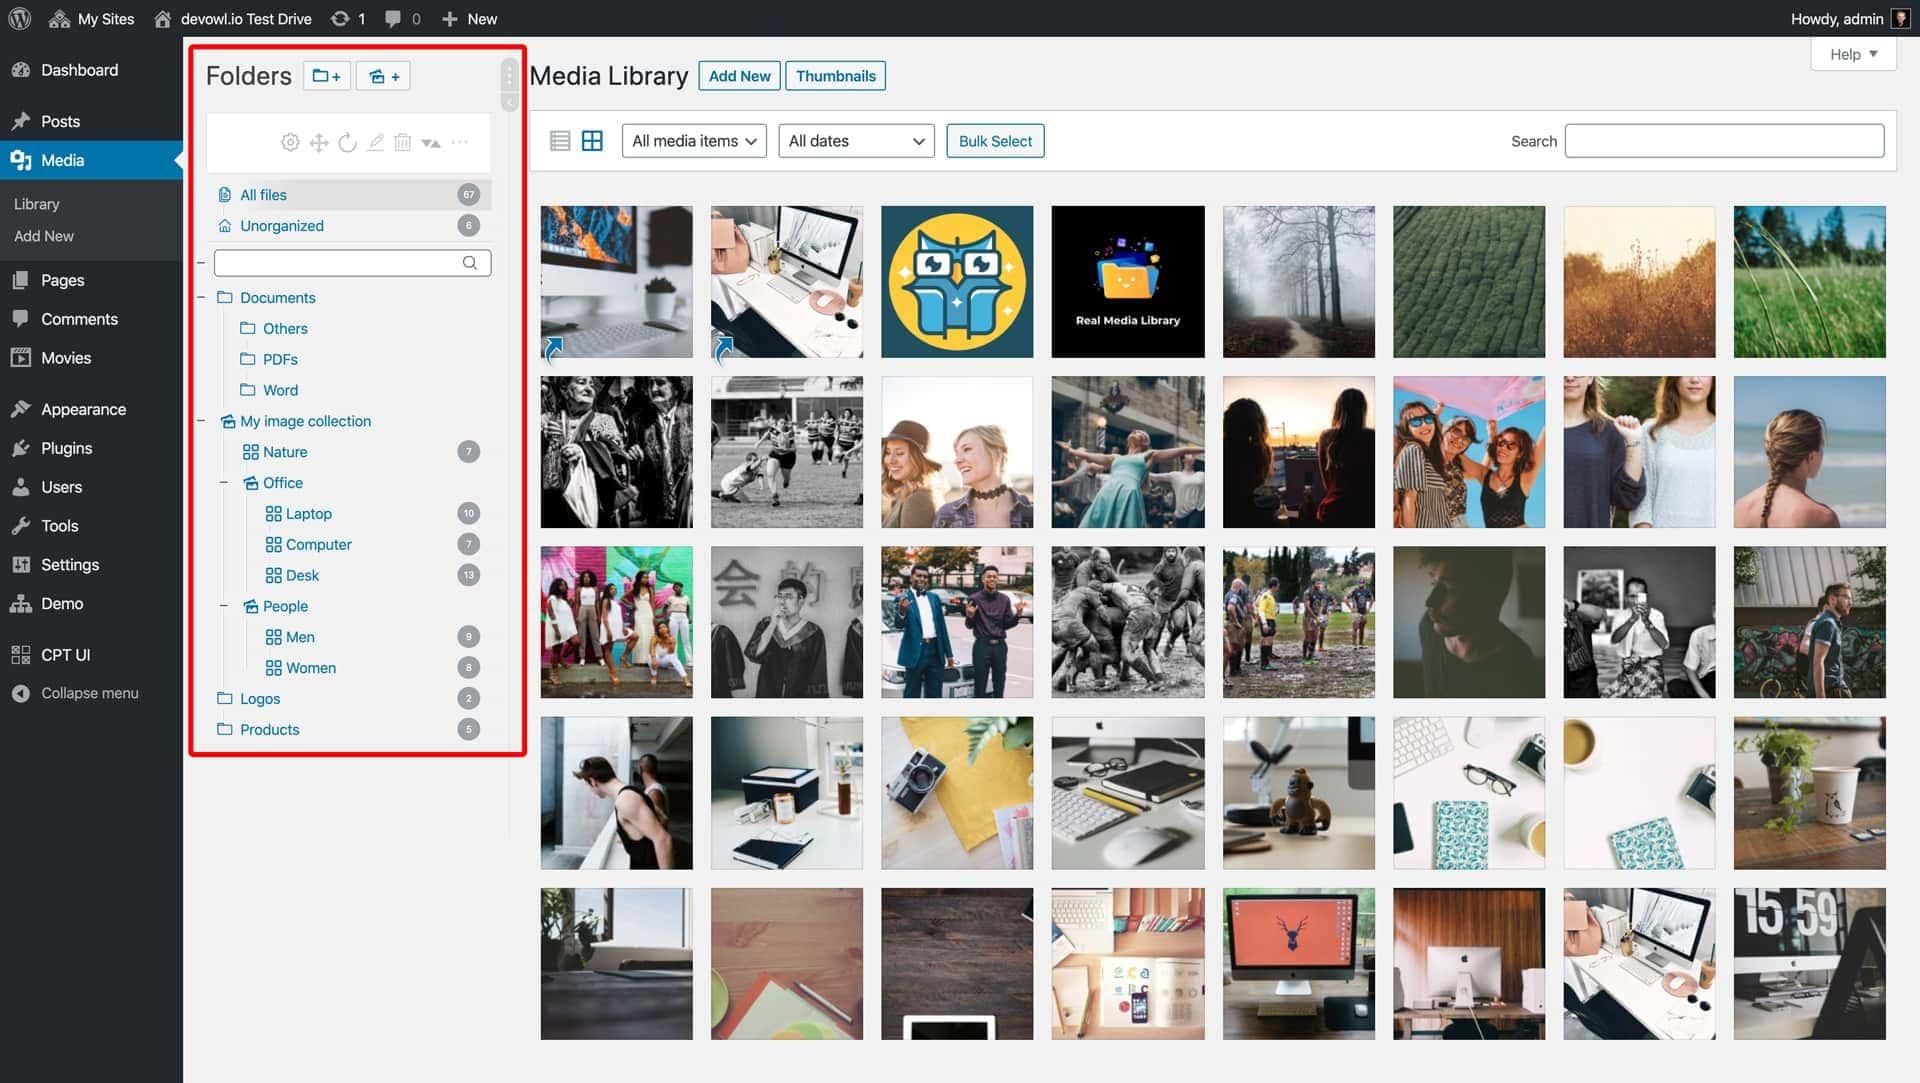
Step-by-Step Guide to Setting Up Media Folders
Organizing your media library in wordpress can seem like a daunting task, but with a step-by-step approach, you’ll find it manageable and even enjoyable. By setting up media folders, you can streamline your content management, making it easier to locate and use your images, videos, and documents. Here’s how to get started!
The first step is to select a reliable media folders plugin. There are several great options available, and each offers unique features. Some popular choices include:
- FileBird: Intuitive drag-and-drop interface.
- WP media Folder: Seamless integration with WordPress.
- Media Library Organizer: Simple and straightforward setup.
Once you’ve chosen a plugin that suits your needs, install and activate it through the WordPress admin dashboard.
After activation, navigate to the media library where you’ll find your new folder option. Here’s how to create your folders:
- Click on the “Add New Folder” icon.
- Enter a name for your folder that reflects its contents, like “Images”, “Videos”, or “Documents”.
- Hit “Create” to finalize your folder.
You can create as many folders as needed to keep everything organized.
Now that you have your folders set up, it’s time to start organizing your media files. Drag and drop files into the appropriate folders or use the bulk action options to move multiple files at once. This will save you a lot of time and prevent clutter in your media library.
To further enhance your organization, consider using tags and categories within your folders. This can help you quickly filter through media files. Here’s an example of how you might categorize:
| Folder | Tags |
|---|---|
| Images | Nature, Events, Products |
| Videos | Tutorials, Promotions |
| Documents | Reports, Guides, Policies |
This way, you can quickly find what you need without sifting through endless files.
Lastly, don’t forget to regularly review and maintain your media folders. As you add new content, take the time to delete any outdated or unused files. This not only keeps your library organized but also improves your website’s performance. Consider setting a monthly reminder to tidy up!
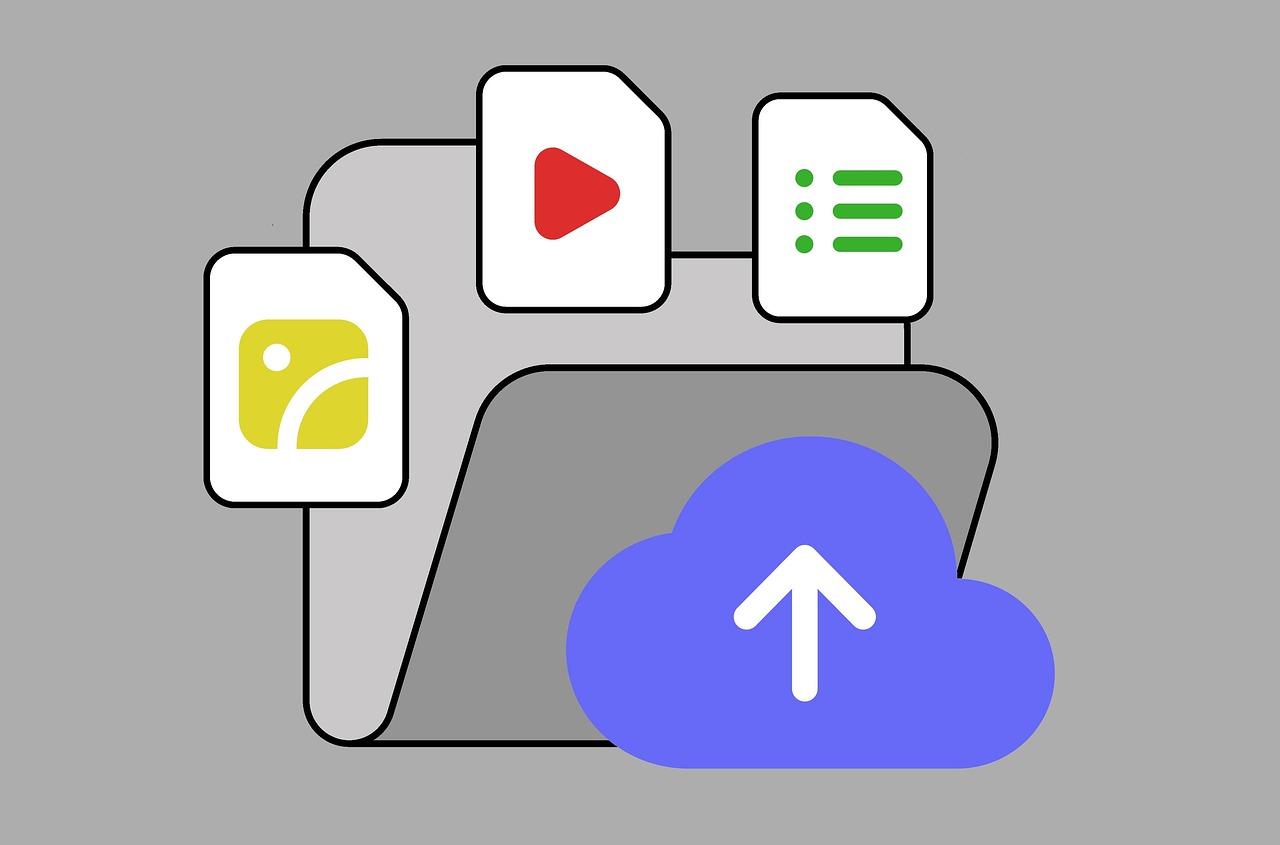
![]()
Best Practices for Naming and Categorizing Your Media
When it comes to managing your media library in WordPress,effective naming and categorization can make all the difference. A well-organized library not only helps you find files quickly but also enhances your overall workflow. Here are some best practices to keep in mind:
- Use Descriptive Names: Name your files in a way that clearly describes the content. Instead of generic titles like “IMG_1234.jpg,” opt for something like “2023_Spring_Sale_Flyer.jpg.” This practice improves searchability and makes it easier for you and others to locate specific files.
- Implement Consistent Naming Conventions: Establish a naming convention that works for your site and stick to it. This could include elements such as dates, keywords, or project names. For instance, using underscores to separate words (e.g., “event_promo_march_2023.jpg”) can enhance readability.
- Utilize Categories and Tags: Just like posts, your media files can benefit from categorization. Create specific categories for images, videos, and documents. Tags can be used for finer distinctions, allowing you to group similar items together. Such as,use categories like “Blog Images,” “Product Photos,” and “Video Content.”
To see how categories and tags can be effectively structured, refer to the table below:
| Category | Examples |
|---|---|
| blog Images | Header Images, Featured Photos |
| Product Photos | Clothing, Electronics, Accessories |
| Video Content | Tutorials, Webinars, Trailers |
Additionally, don’t forget about alt text. Including descriptive alt text for each media file not only improves accessibility but also boosts your SEO. Make sure to include relevant keywords naturally within the alt text while still describing the image accurately.
- Review and Clean Up Regularly: Take time to periodically review your media library. Remove any outdated or irrelevant files, and ensure that the naming conventions and categories are still aligned with your current content strategy.
- Leverage Folders and Plugins: Consider using plugins that allow you to create folders within your media library. This can definitely help you implement a hierarchical structure, making navigation even easier.
Tips for Efficient Media Uploading and Management
Managing your media library in WordPress can often feel overwhelming, especially as your collection grows. However, with a few practical strategies, you can transform your media upload and management process into a seamless experience.here are some tips to consider:
- Organize Folders by Category: Create dedicated folders for specific categories,such as “Images,” “Videos,” and “Documents.” This not only helps in quick retrieval but also enhances the flow of your content creation process.
- utilize Descriptive Filenames: Before uploading media files, rename them descriptively. Instead of generic names like “IMG_001.jpg,” use “2023_Summer_Sale_Banner.jpg.” This makes it easier to search for files later.
- Regularly Clean Up Your Library: Periodically review your media library to remove unused files. A clutter-free library improves load times and makes it easier to locate what you need.
- take Advantage of Tags: Use tags to add another layer of organization. As a notable example, if you have images related to multiple blog posts, tagging them can simplify the search process.
Another effective way to manage your media is by integrating plugins. Some popular plugins offer robust solutions for creating folders and subfolders within your media library, simplifying the process even further. Here’s a quick comparison:
| Plugin Name | Key Features | Price |
|---|---|---|
| WP Media Folder | Drag and drop interface, folder management | $39 |
| media Library Assistant | Enhanced search, bulk uploader | Free |
| FileBird | Folder tree structure, easy navigation | $29 |
Lastly, consider establishing a naming convention for your media folders and files, which can significantly enhance efficiency. A simple format like “Year_Category_Description” can help maintain a consistent structure, making it easier for you and your team to locate materials without a hassle.
By implementing these strategies, you’ll not only save time but also enhance your productivity when it comes to content creation. A well-organized media library leads to a smoother workflow, allowing you to focus on what truly matters—creating compelling content for your audience.
How to keep Your Media Library Clean and Up-to-Date
keeping your media library tidy and current can feel overwhelming, especially as your website grows.But with a few straightforward strategies,you can maintain a clean and efficient library that enhances your workflow and improves user experience.
One effective way to manage your media files is by implementing folders or categories.organizing your files into specific folders allows you to quickly locate images, videos, or documents without sifting through countless entries.Consider creating folders based on:
- Content Type: Images, Videos, documents
- Project or Campaign: Specific events, promotions, or themes
- Date: Year or month to easily track when files were uploaded
Additionally, keeping your files properly named is crucial. Use descriptive and relevant filenames that accurately reflect the content. This not only helps in organizing but also improves SEO. Such as, instead of using a generic name like “IMG_1234.jpg,” opt for “2023-spring-sale-banner.jpg.” This makes it much easier to find files later on and optimizes them for search engines.
Regularly reviewing and deleting unused files is another important step in maintaining a clean media library. Set a schedule—perhaps monthly or quarterly—to go through your media files and remove anything that’s no longer needed. This helps in freeing up storage space and simplifies navigation.
Moreover, consider using plugins that facilitate media organization. Tools like filebird or WP Media Folder can help you create a structured folder system within your WordPress media library. With these plugins, you can drag and drop files into folders, making organization simple and intuitive.
| Plugin Name | Features |
|---|---|
| FileBird | Drag & drop interface, folder management, premium support |
| WP Media Folder | Folder creation, category filtering, integration with page builders |
Lastly, keep your media library up-to-date by regularly updating your plugins and themes. outdated software can lead to various issues, including slow performance and security vulnerabilities. Scheduling routine maintenance checks ensures that everything runs smoothly, allowing you to focus on creating compelling content for your audience.
Solving Common Issues with Media Folders in WordPress
When organizing your media in WordPress, you might encounter a few common challenges that can hinder your workflow. Fortunately, these issues are frequently enough easy to resolve with a little bit of understanding and the right tools.
Missing Media Files: One of the most frustrating problems is discovering that your media files have gone missing. This can happen for various reasons, such as changes in file paths or deletions by mistake. To fix this, check the Media Settings in your WordPress dashboard. Ensure that the uploads folder is correctly set, and consider using a plugin like Media Library Assistant to help locate and restore lost files.
Overwhelmed by Clutter: If your WordPress media library feels more like a chaotic storage room than an organized archive, it’s time to take action. Utilizing media folders is essential for keeping things neat. Create folders for different categories such as images, videos, and documents. You can even set up subfolders for specific projects or campaigns. This structure not only simplifies file retrieval but also improves overall website performance.
Slow Loading Times: A media library bursting with files can lead to slow loading times, which affects user experience and SEO rankings. To mitigate this, compress images before uploading them. There are several plugins available, like smush and EWWW Image Optimizer, that can automate this process, ensuring your files are optimized for the web without sacrificing quality.
Confusion Over File Versions: Keeping track of multiple versions of the same file can be a headache. To avoid confusion, adopt a versioning system by clearly naming files with dates or version numbers.for example, instead of “image.jpg,” use “image-v1-2023-10.jpg.” This makes it easier to identify the latest version at a glance.
Access Issues: sometimes, users may face difficulties accessing certain media files, especially if permissions are not set correctly.To rectify this,check your file permissions in the File manager of your hosting control panel. Ensure that the folders are set to 755 and files to 644. This grants necessary access while keeping your files secure.
By addressing these common issues, you can significantly enhance your media management process in WordPress. An organized media library not only boosts your productivity but also contributes to a seamless user experience on your website.
Enhancing Your Workflow with Bulk Actions and Shortcuts
Managing media in WordPress can sometimes feel overwhelming, especially as your library grows.Fortunately, by utilizing bulk actions and shortcuts, you can streamline your workflow and make the process more efficient. As an example, when organizing your media files into folders, you can select multiple items at once to apply changes or move them to a different folder without having to handle each file individually. This not only saves time but also reduces the likelihood of errors.
Here are some bulk actions you can take advantage of:
- Delete: Remove multiple files at once that you no longer need.
- Move to Folder: Quickly relocate several items to a designated folder for better organization.
- Edit: Apply changes, such as alt text or titles, to multiple media files concurrently.
Along with bulk actions, mastering keyboard shortcuts can dramatically enhance your productivity. Familiarize yourself with the following shortcuts to navigate your media library more efficiently:
- Ctrl + A: Select all items on the page.
- Ctrl + C: Copy selected items.
- Ctrl + V: Paste copied items in the chosen location.
Integrating these techniques not only minimizes clicks and saves you precious time but also allows you to maintain a cleaner and more organized media library. Imagine being able to clear out old files or relocate new images to their designated folders with just a few keystrokes!
If you’re considering implementing folders in your media library, here’s a quick overview of the benefits:
| Benefit | Description |
|---|---|
| Improved Organization | Easily categorize your images and media files. |
| Increased Efficiency | Quick access to specific files reduces search time. |
| Enhanced Collaboration | Team members can find resources faster when files are organized. |
Ultimately, the power of bulk actions and shortcuts in wordpress will transform your media management. By taking a moment to implement these strategies, you’ll enjoy a more streamlined and effective workflow, allowing you to focus on creating and sharing content that resonates with your audience.
Maximizing Your Media Librarys Potential with Tags and Metadata
When it comes to organizing your media library in WordPress, the right use of tags and metadata can significantly enhance your workflow and improve your site’s overall efficiency. Utilizing these features allows you to easily locate and manage files, making your media library more user-friendly and accessible.
Tags are one of the simplest yet most effective ways to categorize your media files. By assigning relevant tags to your images, videos, and documents, you can create an organized system that enables quick searches. Such as:
- Use descriptive tags like “travel,” “wedding,” or “event” to group similar content.
- Incorporate location-based tags if your media is tied to specific places.
- Consider adding tags related to the project or campaign for easier retrieval.
Complementing your tags with detailed metadata takes organization to the next level. Metadata refers to the information about your media files, including title, caption, description, and alt text.This additional context not only helps in managing your files but also plays a crucial role in optimizing your site for search engines. Here’s how you can use metadata effectively:
- Ensure every image has an informative title and description that highlights its content.
- Utilize alt text to describe your images for accessibility and SEO benefits.
- regularly update metadata to reflect any changes in your content strategy or focus.
To further illustrate the impact of organized media management, consider the following table showing the benefits of using tags and metadata:
| Feature | Benefits |
|---|---|
| Tags | Easier file retrieval, improved search functionality |
| Metadata | Enhanced SEO, better accessibility, richer user experience |
By taking the time to properly tag and annotate your media files, you not only streamline your own editing process but also create a better experience for your visitors. A well-organized media library can lead to quicker load times and improved site navigation, resulting in higher engagement levels.
Final Thoughts on Maintaining an Organized WordPress Media Library
As you embark on the journey of maintaining an organized WordPress media library, remember that a well-structured library is more than just a convenience; it’s a vital aspect of enhancing your website’s performance and user experience. Here are some key strategies to keep in mind:
- Consistent Naming conventions: Use clear and descriptive names for your media files. This makes it easier to identify images and documents when browsing through your library. For example, instead of a generic name like “image1.jpg,” opt for something like “spring-sale-banner-2023.jpg.”
- Regularly Audit your Media: periodically review your media library to remove outdated or unused files. This helps in decluttering and ensures that your library remains efficient. You can use plugins that assist in identifying and deleting old media.
- Leverage Folders or Categories: Using folders or categories can significantly improve your media library’s organization. Create folders based on themes, types of content, or even specific campaigns to streamline your workflow.
- Optimize Images Before Uploading: Always optimize your images for the web before uploading. This not only saves storage space but also improves your site’s loading speed,which is crucial for user retention and SEO.
Along with these strategies, consider integrating a media management plugin.These tools can enhance your library’s capabilities by providing features like:
| Plugin Name | Key Features |
|---|---|
| WP Media Folder | Drag & drop folders, bulk file uploads, and quick search options. |
| FileBird | User-friendly media organization with unlimited folders and subfolders. |
| Media library Assistant | Advanced filtering, custom taxonomy support, and enhanced search functions. |
Utilizing these plugins can save time and prevent frustration when searching for specific media files. They empower you to take control of your media library, ensuring you spend less time managing files and more time creating compelling content.
Lastly, don’t underestimate the importance of backups. Regularly backing up your media files is essential. If you ever run into issues or accidentally delete something important, having a backup can be a lifesaver. Many backup plugins can automate this process, ensuring your media library is always secure and recoverable.
Frequently Asked Questions (FAQ)
Q&A: How to Add WordPress Media Folders and Organize Your Media Library better
Q1: Why should I organize my WordPress media library?
A1: Great question! If you’ve ever tried to find a specific image or video in a cluttered media library, you know it can be a headache. Organizing your media library not only saves you time but also helps you manage your content more efficiently. A tidy library means less stress and more focus on creating awesome content!
Q2: What are WordPress media folders?
A2: Think of media folders as virtual filing cabinets for your images,videos,and other media files. They allow you to categorize and group your media by project, date, or any other criteria that makes sense for your workflow. Instead of scrolling through endless thumbnails, you can quickly find what you need in a snap!
Q3: How can I add media folders to my WordPress site?
A3: While WordPress doesn’t have this feature built-in, you can easily add it with a plugin. Plugins like “Media Library Folders” or “FileBird” provide a user-friendly interface to create folders and organize your files with just a few clicks.It’s super easy, and you’ll wonder how you ever managed without it!
Q4: What if I already have a lot of media files? Can I still organize them?
A4: Absolutely! most media folder plugins allow you to drag and drop existing files into new folders, making it a breeze to reorganize what you already have.So don’t worry about starting from scratch—just jump in and start creating those folders!
Q5: Will adding folders slow down my WordPress site?
A5: Not at all! Adding media folders through plugins typically has no significant impact on your site’s performance. The real magic happens behind the scenes, keeping your media library organized without slowing you down or affecting your website speed.
Q6: Are there any downsides to using media folders?
A6: The only potential downside is that some plugins may require a premium version for advanced features. Though, the time saved and the ease of access usually outweighs any cost. Plus, investing in your content management is always smart!
Q7: After creating folders, how do I maintain organization?
A7: That’s a fantastic point! Regularly review your media library, adding new files to the appropriate folders as you go. It’s also helpful to delete any outdated or unused files, keeping your library clutter-free. make it a habit, and soon it’ll become second nature!
Q8: Is there anything else I should know?
A8: Just remember, a well-organized media library is not just about aesthetics; it enhances your workflow and productivity. Plus, it can even improve your SEO by helping you find and optimize media more easily. So go ahead, get started on those media folders—you won’t regret it!
Q9: Where can I find more tips on using wordpress effectively?
A9: There are tons of resources out there! Check out WordPress forums, blogs, or even YouTube tutorials. You can also follow our blog for more insightful tips and tricks to elevate your WordPress game! Let’s keep your site running smoothly and looking fantastic together!
In Retrospect
And there you have it! Organizing your WordPress media library with folders can transform the way you manage your digital assets, making it easier to find what you need when you need it.No more endless scrolling through a chaotic sea of images and files! By implementing the strategies we’ve discussed, you’ll not only save time but also enhance your website’s efficiency and presentation.
So, why wait? Dive in and start creating those media folders today. Your future self (and your audience) will thank you for the clarity and organization. If you’ve enjoyed this guide, don’t hesitate to share it with fellow WordPress users who could benefit from a more streamlined media library. Remember, a well-organized website is not just about aesthetics; it’s about creating a seamless experience for you and your visitors. Happy organizing!
