

Are you tired of running into the dreaded “memory limit tired” error while working on your WordPress site? If you’ve ever found yourself frustrated by this common issue, you’re not alone. The good news is that increasing your WordPress memory limit is easier than you might think! In this article, we’re diving into four expert-tested methods to boost your memory limit and ensure your site runs smoothly in 2025 and beyond. Whether you’re a seasoned developer or just getting your feet wet with WordPress, these straightforward techniques will help you optimize your website’s performance, enhance user experience, and give you the freedom to unleash your creativity without the constant worry of hitting memory limits. Let’s get started on transforming your WordPress experience!
Understanding the Importance of WordPress Memory Limit
The memory limit in WordPress is a crucial aspect that directly affects your site’s performance and user experience. When your website hits its memory limit, it can lead to slow loading times, errors, or even crashes. This is especially true for resource-intensive sites that utilize themes, plugins, and media files. Understanding and managing your WordPress memory limit can be the difference between a smooth-running website and a frustrating experience for your visitors.
Every WordPress installation comes with a default memory limit, typically set to 64MB or 128MB.While this may suffice for basic sites,it’s often inadequate for more complex applications that handle high traffic or employ numerous plugins.Increasing the memory limit allows WordPress to allocate more resources, enabling it to process requests more efficiently. This adjustment is especially beneficial for:
- Websites using memory-intensive plugins like page builders and eCommerce tools.
- Sites with high-resolution images or extensive media libraries.
- Multisite setups that require greater resource management.
Moreover, a higher memory limit can help mitigate common issues such as the infamous “White Screen of Death” or “Allowed Memory Size Exhausted” errors. These issues can frustrate site administrators and users alike, leading to lost traffic and potential revenue. By ensuring your memory limit is set appropriately,you can maintain a seamless user experience and keep your site running smoothly.
It’s also worth noting that the memory limit can be influenced by your hosting provider. Many shared hosting environments impose strict limits which might not be sufficient for growing sites. In such cases, understanding how to increase your WordPress memory limit is essential, and you may need to consider upgrading to a plan that offers more resources.
the significance of the WordPress memory limit cannot be overstated. It plays a pivotal role in the performance and stability of your site. As you explore the methods to increase this limit,remember that every additional megabyte can contribute to a more robust and user-friendly website. Keeping an eye on your memory usage and proactively managing it is critical in today’s fast-paced digital landscape.

Signs You Need to Increase Your WordPress Memory Limit
Noticing performance hiccups in your WordPress site? you might be running into memory limits. Here are some key indicators that suggest it’s time to boost your WordPress memory limit:
- Frequent Error Messages: If you’re encountering “Allowed memory size exhausted” errors, that’s a clear sign your site is hitting its memory cap.
- Slow Loading Times: A sluggish website can frustrate visitors. If your pages take too long to load, it could be a memory issue affecting your site’s performance.
- Plugin Malfunctions: If plugins aren’t functioning properly or fail to load, it may indicate insufficient memory.Problems with plugins can hinder your site’s functionality.
- Dashboard Glitches: Are you experiencing issues within your wordpress admin area? If buttons freeze or pages fail to load, it might be time to check your memory settings.
- Incompatibility with Themes: Sometimes, a particular theme may demand more memory than your current limit. If your theme isn’t displaying correctly,this could be a culprit.
To further illustrate, here’s a speedy overview of common memory limits across hosting plans:
| Hosting Type | Memory Limit |
|---|---|
| Shared Hosting | 64MB – 128MB |
| VPS Hosting | 128MB – 256MB |
| Dedicated Hosting | 256MB – 512MB |
| Managed WordPress Hosting | 256MB and above |
If you’re checking all the boxes above, don’t hesitate to take action. Increasing your memory limit can significantly enhance your site’s efficiency and user experience. A well-functioning site not only keeps your visitors happy but also contributes positively to your SEO efforts.
Remember, a healthy WordPress site is crucial for not just your business but also for your audience. They deserve a smooth browsing experience, and addressing memory limit issues is a key step in achieving that.

Exploring the Default Memory Limit and Its Constraints
WordPress, by default, sets a memory limit that can sometimes be a bottleneck for performance, especially when you’re running a resource-intensive website. This memory limit is crucial since it dictates how much memory PHP can allocate to your WordPress site for executing scripts and handling requests. When this limit is reached, you might encounter errors such as “Allowed Memory Size Exhausted”.Understanding the default settings and the constraints they impose is vital for any WordPress administrator aiming to enhance their site’s efficiency.
The default memory limit for a WordPress installation is typically set to 40MB for single sites and 64MB for multisite configurations. While these values might seem adequate for basic sites, they can quickly become insufficient as you add plugins, themes, and media files. A rundown of common scenarios triggering memory issues include:
- Using multiple plugins that demand a notable amount of memory
- Incorporating high-resolution images or videos
- Running resource-heavy themes
- Handling large databases with extensive queries
To help visualize the memory allocation and its implications, here’s a quick comparison of default memory limits across various PHP configurations:
| Configuration | Default Memory Limit |
|---|---|
| Single WordPress Site | 40MB |
| Multisite WordPress | 64MB |
| Recommended for Performance | 128MB or more |
When your website exceeds these limits, it can lead to slow load times or even crashes, frustrating your visitors and affecting your SEO rankings. Therefore, keeping a close eye on memory usage becomes a priority. You can easily monitor this using plugins like Query Monitor or P3 Plugin Performance Profiler, which can help identify the memory consumption of each component of your site.
In addition to monitoring, understanding the constraints of the default memory limit will empower you to make informed decisions about upgrading your hosting plan or optimizing your current setup. More often than not, a simple increase in memory allocation can resolve many performance issues. This is particularly critically important as your site grows and evolves,ensuring that you’re always providing a smooth user experience.
In short, the default memory limit is just a starting point. By recognizing its constraints and proactively managing your site’s memory needs, you can avoid potential pitfalls and enhance your WordPress site’s overall performance.
Quick Fixes: Adjusting memory Limit via wp-config.php
If you’re facing the dreaded memory limit issue in WordPress, adjusting the memory limit via your wp-config.php file is a straightforward and effective solution. This method is particularly useful as it allows you to specify exactly how much memory your site can use, ensuring that plugins, themes, and other processes have the resources they need to run smoothly.
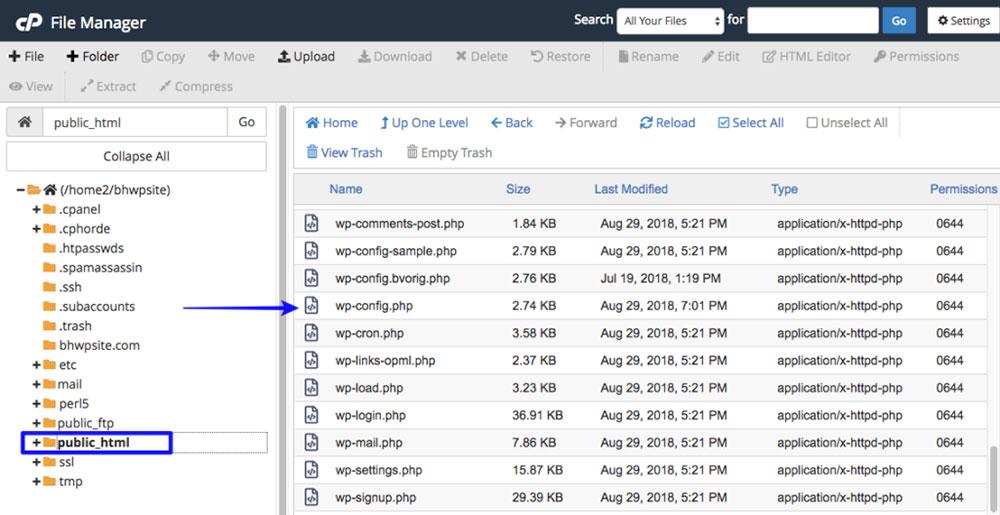
To get started, you’ll need to access your website’s files. You can do this through an FTP client like FileZilla or by using your hosting provider’s file manager. Once you’re in, navigate to the root directory of your WordPress installation, where you will find the wp-config.php file.
Before making any changes, it’s prudent to create a backup of your wp-config.php file. This way, if anything goes wrong, you can easily restore it. After backing up, open the file in a code editor and look for the line that says:
/* That's all, stop editing! Happy blogging. */Just above this line, you can add the following line of code to increase the memory limit:
define('WP_MEMORY_LIMIT', '256M');Feel free to replace 256M with whatever limit you deem necessary. Here are a few common values you might consider:
- 128M: Ideal for smaller sites or those with minimal plugins.
- 256M: Suitable for medium to large sites with several plugins.
- 512M: Recommended for heavy sites with complex themes and numerous plugins.
After you have added the line of code,save the changes and upload the updated wp-config.php file back to your server. To confirm that the memory limit has increased, you can use a plugin like site Health or check your site’s debug log. If issues persist,it might be worthwhile to consult with your hosting provider for further assistance,as some servers impose their own memory limits.
Boosting Performance by Modifying php.ini Settings
when it comes to enhancing the performance of your WordPress site, tweaking the php.ini settings can make a world of difference. This configuration file controls various aspects of PHP, which is the backbone of WordPress. By adjusting a few key settings, you can significantly improve your site’s speed and responsiveness, ultimately leading to a better user experience.
Key Settings to Modify:
- memory_limit: This setting determines how much memory PHP can allocate for your WordPress site. Increasing it can help prevent memory exhaustion errors, especially for resource-heavy themes or plugins.
- upload_max_filesize: If you often upload large images or files, increasing this limit will facilitate smoother uploads. A higher value means you won’t hit a wall when trying to upload media.
- post_max_size: This value should be larger than
upload_max_filesizeto ensure that any uploaded file is also accepted when submitted through forms. - max_execution_time: This setting defines how long a PHP script is allowed to run. Increasing this can help prevent timeout errors during lengthy processes like backups or updates.
here’s a brief overview of how you might adjust these settings:
| Setting | Recommended Value |
|---|---|
| memory_limit | 256M or higher |
| upload_max_filesize | 64M or higher |
| post_max_size | 64M or higher |
| max_execution_time | 300 seconds or higher |
Modifying these settings usually involves editing your php.ini file directly. If you’re unsure where to find it, it’s typically located in your server’s root directory or within a specific folder for your hosting account. Just open the file with a text editor, make your changes, and save it. Make sure to restart your web server for the changes to take effect.
Remember, while increasing these values can improve performance, it’s essential to find a balance.Setting overly high values may lead to server strain or even security issues. Always consider your server’s capacity and the actual needs of your website. Monitoring performance after making these changes can help you determine if further adjustments are necessary.
modifying your php.ini settings is a straightforward yet powerful way to boost your wordpress site’s performance. By taking the time to optimize these configurations,you can ensure that your website runs smoothly,even with the most demanding themes and plugins. Happy optimizing!
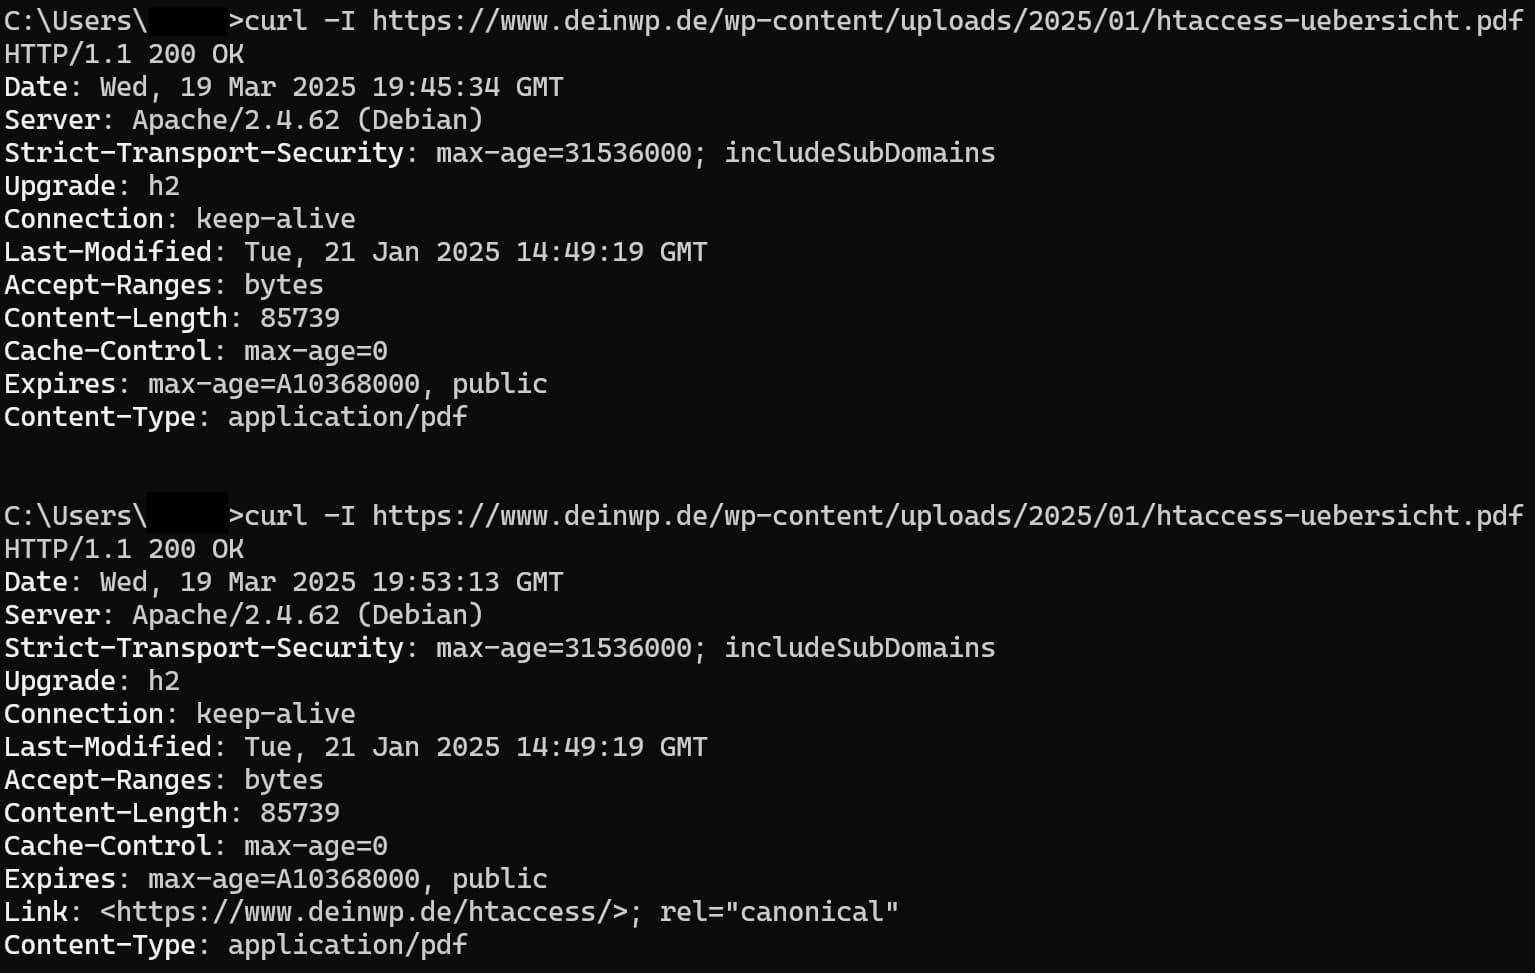
Using .htaccess to Increase Memory Limit for WordPress
When it comes to optimizing your WordPress site, increasing the memory limit can significantly boost performance, especially for resource-intensive plugins and themes. One effective way to achieve this is by using the .htaccess file in your WordPress installation. This method is particularly useful if you’re unable to modify the wp-config.php file or if your hosting provider restricts access to PHP configuration files.
To get started, locate your site’s root directory using an FTP client or the file manager provided by your hosting service. Look for the .htaccess file; if it’s not visible, ensure that your file manager is set to show hidden files. Before making any changes, it’s always an excellent idea to back up this file to prevent any unintentional disruptions to your website.
Once you have access to the .htaccess file, open it in a text editor and add the following line at the end:
php_value memory_limit 256MThis line sets the memory limit to 256MB, which should be sufficient for most WordPress sites. If your site requires more resources, feel free to adjust the value according to your needs. However, keep in mind that setting a limit too high without adequate server resources can lead to performance issues.
After saving your changes, test your website to ensure everything is functioning correctly. If you encounter any errors, you may need to check if your hosting provider allows you to modify the .htaccess file for PHP settings. If it doesn’t work, consider reaching out to your host for assistance.
Here’s a quick reference table summarizing common memory limits you can set in your .htaccess file:
| Memory Limit | Recommended Usage |
|---|---|
| 128M | Basic WordPress sites with minimal plugins |
| 256M | Medium-sized sites with multiple plugins |
| 512M | High-traffic sites or those using heavy themes/plugins |
Ultimately, increasing your WordPress memory limit via the .htaccess file is a straightforward and efficient method that can lead to improved site performance, reduced load times, and a better overall user experience. With just a few simple steps, you can ensure that your website runs smoothly and efficiently, setting the stage for growth and scalability.

When to Turn to Your Hosting Provider for Help
When you run into issues while increasing your wordpress memory limit,it’s essential to know when to reach out to your hosting provider for assistance. These professionals can provide guidance tailored to your specific hosting surroundings and may have insights that can resolve your issues more efficiently.
Here are some scenarios where contacting your hosting provider can be particularly beneficial:
- Server Configuration Issues: If you’ve tried all the methods to increase your memory limit but nothing seems to work, the problem might lie with the server configuration. your hosting provider can check server settings that could be overriding your changes.
- Persistent Errors: Encountering persistent errors such as the “white screen of death” or memory exhaustion errors? Your provider can definitely help diagnose the root cause and guide you through the troubleshooting process.
- Incompatibility with Hosting Plan: If you’re on a shared hosting plan,your provider can inform you about the memory limit constraints specific to your plan. They might suggest an upgrade if you consistently hit those limits.
- Performance Optimization: If increasing the memory limit is just one of many performance issues, your hosting provider may offer additional optimization strategies, such as caching solutions or content delivery network (CDN) options.
Additionally, it might be useful to have the following details ready when you contact your hosting provider:
| Information to provide | Description |
|---|---|
| Website URL | Your site’s link for context. |
| Current Memory Limit | What your current PHP memory limit is set to. |
| Error Messages | Any specific errors you’ve encountered. |
| Steps Taken | A brief rundown of what you’ve attempted to solve the issue. |
Lastly, don’t hesitate to ask your provider about any resources or documentation they have regarding memory limits and WordPress optimization. They often have valuable insights and support tools that can help you get the most out of your hosting experience.
Testing Your Changes: Ensuring the Memory Limit is Updated
After making the necessary adjustments to increase your WordPress memory limit, it’s crucial to verify that your changes have been successfully implemented. Here’s how you can test and ensure that WordPress is utilizing the updated memory limit:
- Check the Site Health Status: Navigate to Tools > Site Health in your WordPress dashboard. Here, you’ll find a summary of your website’s performance, including memory limit details.
- Use PHP Info: Create a PHP file (e.g.,
phpinfo.php) in your root directory with the following content:
Access this file via your browser (yourdomain.com/phpinfo.php) and look for the memory_limit directive to see if it reflects your changes.
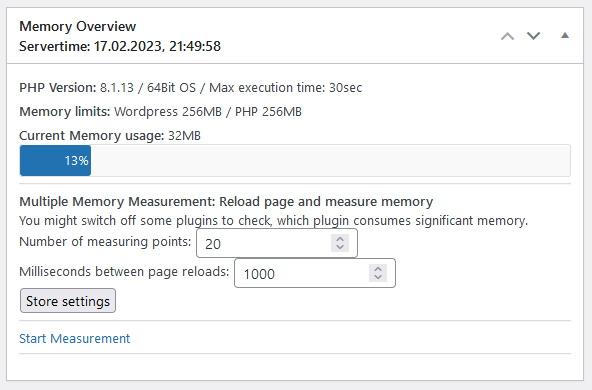
- Confirm via a Plugin: Many plugins, such as WP Memory Usage or Query Monitor, can definitely help you monitor your memory usage directly from the wordpress dashboard. Install one of these plugins, and it’ll display your current memory limit and usage.
- testing with Load: For more advanced users, consider using load testing tools like Apache JMeter or Load Impact to see if your site performs optimally under different conditions. This can give you insights into whether the memory increase has made a noticeable impact on performance.
Here’s a quick reference table to help you compare your previous and current memory limits after testing:
| Test Method | Previous Limit | Current Limit | Status |
|---|---|---|---|
| Site Health Check | 64M | 256M | ✅ Updated |
| PHP Info | 64M | 256M | ✅ Updated |
| Load Testing | 64M | 256M | ✅ Improved Performance |
Once you confirm that the memory limit is updated and functioning correctly, you can proceed with confidence, knowing that you’ve optimized your WordPress site for better performance and reliability. Regularly monitoring this can definitely help prevent future issues as your site grows and attracts more visitors.
Best Practices for Maintaining Optimal Memory Usage
To ensure that your WordPress site runs smoothly and efficiently,it’s crucial to maintain optimal memory usage. Here are some best practices that can help you keep your memory usage in check.
Optimize Plugins
Plugins can significantly impact memory usage, so it’s essential to choose them wisely. Follow these tips:
- limit active plugins: Only keep the essential ones activated.
- Research plugin performance: Opt for plugins known for their lightweight and efficient coding.
- Regularly update: Keep your plugins updated to benefit from performance improvements and bug fixes.
Use a Caching Solution
Caching can drastically reduce memory load by serving cached versions of your pages.Here’s how:
- Choose a highly-rated caching plugin: Popular options include W3 Total Cache and WP Super Cache.
- Configure caching settings: Ensure you optimize the settings based on your site’s specific needs.
- Regularly clear cache: This helps prevent memory bloat from outdated cached files.
Optimize Your Database
A clean and well-maintained database can improve memory efficiency. consider these strategies:
- Use a database optimization plugin: WP-Optimize and Advanced Database Cleaner are great options.
- Regularly delete unnecessary data: Remove spam comments, post revisions, and other obsolete entries.
- Schedule optimizations: Automate the process to ensure your database remains clean over time.
Monitor Memory Usage
Keeping an eye on your memory usage can help you identify potential issues before they become problematic. Here are some effective methods:
- Use a monitoring plugin: Plugins like Query monitor can definitely help track memory usage in real-time.
- Analyze memory consumption: Regularly review the memory footprint of your various WordPress components.
- Adjust settings based on findings: If you notice high memory usage, consider revisiting your plugin choices or caching settings.
Example Memory Optimization Table
| Action | Estimated Memory Savings |
|---|---|
| Deactivating unused plugins | 50MB |
| Implementing caching | 100MB |
| Database cleaning | 30MB |
| Regular monitoring | N/A |
By implementing these best practices, you can significantly enhance your site’s performance and ensure that it runs efficiently, even under heavy traffic. Remember, a well-optimized WordPress site is not just about increasing the memory limit; it’s about smartly managing the resources at your disposal.
Future-Proofing Your WordPress Site with Memory Management
As the digital landscape evolves, ensuring your WordPress site is equipped to handle future demands is crucial. one of the most effective ways to accomplish this is through adept memory management. By increasing your WordPress memory limit, you not only enhance your site’s performance but also create a robust environment to handle increased traffic and resource-intensive plugins.
memory management in WordPress revolves around the allocation of memory for various tasks, from rendering pages to executing complex queries. when your memory limit is set too low, you may encounter performance issues such as slow load times or even site crashes.Thus, it’s essential to optimize your memory settings regularly, especially as your site grows.
Here are some key points to consider for future-proofing your site:
- Assess Your Current Setup: Regularly review your current memory limit. The default limit is often set at 40MB for single sites and 64MB for multisite installations, but this may not suffice as your content expands.
- Choose the Right Hosting: Your hosting provider plays a vital role in memory allocation. Opt for hosts that offer scalable solutions and consider upgrading your plan as your site demands grow.
- Use Efficient Plugins: Not all plugins are created equal. Some can be resource-heavy, so choose lightweight options and regularly audit your plugins to ensure they align with your memory management strategy.
To provide a clearer picture, here’s a simple table showcasing recommended memory limits based on site type:
| Site Type | recommended Memory Limit |
|---|---|
| Small Business Site | 128MB |
| Medium to Large Blog | 256MB |
| E-commerce Site | 512MB |
| High-Traffic News Site | 1GB |
Ultimately, future-proofing your WordPress site through effective memory management will not only improve user experience but also boost your SEO rankings. Search engines favor fast,responsive sites,and with proper memory allocation,you’ll ensure your WordPress site remains competitive in an ever-changing digital landscape.
Remember, regular maintenance is key. Make it a habit to revisit your memory settings periodically, especially after significant updates or changes to your site’s content and structure.this proactive approach will keep your WordPress site not just functional, but thriving.
Conclusion: Empowering Your WordPress Experience
in today’s digital landscape, ensuring your WordPress site runs smoothly is more critically important than ever. One crucial aspect that can significantly enhance your site’s performance is increasing the wordpress memory limit. Whether you’re managing a personal blog or a high-traffic e-commerce site,having sufficient memory can lead to faster loading times and a more enjoyable user experience.
by implementing the methods we’ve discussed, you’re not just boosting your site’s performance; you’re also empowering yourself as a site owner. Here are some key benefits to keep in mind:
- Improved Performance: A higher memory limit means your website can handle more resource-intensive plugins and themes without crashing.
- Better User Experience: Faster load times lead to happier visitors, which can reduce bounce rates and increase conversion rates.
- Enhanced Security: Sites running smoothly are less likely to experience issues that could lead to vulnerabilities or downtime.
It’s essential to regularly monitor your site’s performance and memory usage. Tools like Query Monitor can help you identify if you need to increase your memory limit further. If you notice sluggish load times or frequent error messages, these are clear indicators that it’s time to take action.
Remember, while increasing the memory limit is a straightforward process, it’s crucial to be mindful of your hosting environment. Some shared hosting plans impose strict memory limits. If you find yourself hitting these limits frequently, it might be time to consider upgrading to a more robust hosting solution.
Lastly, don’t underestimate the power of good practices. Regularly updating your themes, plugins, and wordpress core can greatly enhance performance and security.Coupling these habits with the right memory settings can create a solid foundation for your WordPress site.
| Action | Description |
|---|---|
| Increase Memory Limit | Allows your site to utilize more resources, improving load times and performance. |
| Monitor Performance | Using tools to track memory usage can help identify if more adjustments are necessary. |
| Update Regularly | Keeping your site updated ensures you have the latest features and security patches. |
By taking these steps, you are not just fixing issues; you are proactively enhancing your WordPress experience. Embrace the power of increased memory limits, and watch your website thrive!
Frequently Asked Questions (FAQ)
Sure! Here’s a conversational Q&A format for your article on increasing the WordPress memory limit:
Q&A: How to Increase WordPress Memory Limit: 4 Easy Methods (Expert-Tested for 2025)
Q: Why should I care about the WordPress memory limit?
A: Great question! The WordPress memory limit affects how much data your site can handle at once. If you hit that limit, you might face issues like slow loading times, plugin errors, or even site crashes. Increasing it can enhance performance, especially if you’re running resource-heavy themes or plugins.
Q: How do I know if I need to increase the memory limit?
A: Signs that you need to boost your memory limit include error messages like “Allowed memory size exhausted” or noticeably sluggish website performance. If you’re experiencing these issues, it’s a good indication that your memory limit needs a tweak.
Q: what are the four methods you recommend for increasing the memory limit?
A: I’m glad you asked! Here are four expert-tested methods you can use to increase your WordPress memory limit:
- Edit the wp-config.php File: This is probably the easiest way! Just add a line of code to your
wp-config.phpfile to define a higher memory limit.
- Modify the php.ini File: if you have access to your server’s PHP settings, you can directly edit the
php.inifile to increase the memory limit.
- Use .htaccess File: For those on Apache servers, adding a specific line to your
.htaccessfile can do the trick as well.
- Contact Your Hosting Provider: Sometimes, the best option is to reach out to your hosting provider. they can make adjustments on their end and frequently enough provide recommendations tailored to your hosting plan.
Q: Are these methods safe to use?
A: Absolutely! These methods are widely used and, when done correctly, pose no risk to your site.Just make sure to back up your site before making changes, just in case something goes awry!
Q: What if I still face issues after increasing the memory limit?
A: If you’ve tried these methods and are still having problems, it might be time to look deeper. Consider checking for conflicting plugins, outdated themes, or even switching to a more robust hosting plan that can handle higher traffic loads.
Q: Can increasing the memory limit improve my SEO?
A: Yes! A faster, more reliable site can enhance user experience, which is a crucial factor in SEO rankings. Plus, less downtime means more people can access your content, which is always a win for visibility!
Q: How often should I reassess my WordPress memory limit?
A: It’s a good idea to check your memory limit whenever you make significant changes to your site—like installing new plugins, switching themes, or experiencing changes in traffic. Keeping an eye on your performance metrics will help you stay ahead of potential issues.
Feel free to adjust any parts to better fit your audience or style!
The Conclusion
And there you have it! With these four easy methods to increase your WordPress memory limit, you can ensure that your site runs smoothly, even as it grows. Remember, a well-optimized site not only enhances your user experience but also boosts your SEO rankings and overall performance.
So, don’t let memory limitations hold you back! Whether you choose to edit your files, adjust settings in your hosting dashboard, or reach out to your hosting provider, taking action today will pay off in the long run.
If you found this guide helpful, feel free to share it with fellow WordPress users. And don’t hesitate to drop your questions or experiences in the comments below—we’d love to hear how these methods worked for you! Here’s to a faster and more efficient WordPress site in 2025 and beyond! Happy blogging!