
Are you ready to dive into teh world of web development but not sure where to start? Look no further! Installing WordPress on XAMPP is the perfect way to kick off your journey. Whether you’re a budding blogger, an aspiring developer, or just curious about how websites work, this beginner’s guide will walk you through the process step-by-step. With XAMPP, you can create a local server surroundings that mimics a real web server, making it easy to test and build your WordPress site right on your own computer. No more worrying about hosting fees or domain names—just pure learning and creativity! So, grab a cup of coffee, roll up your sleeves, and let’s get started on setting up your very own WordPress site locally. You won’t regret it!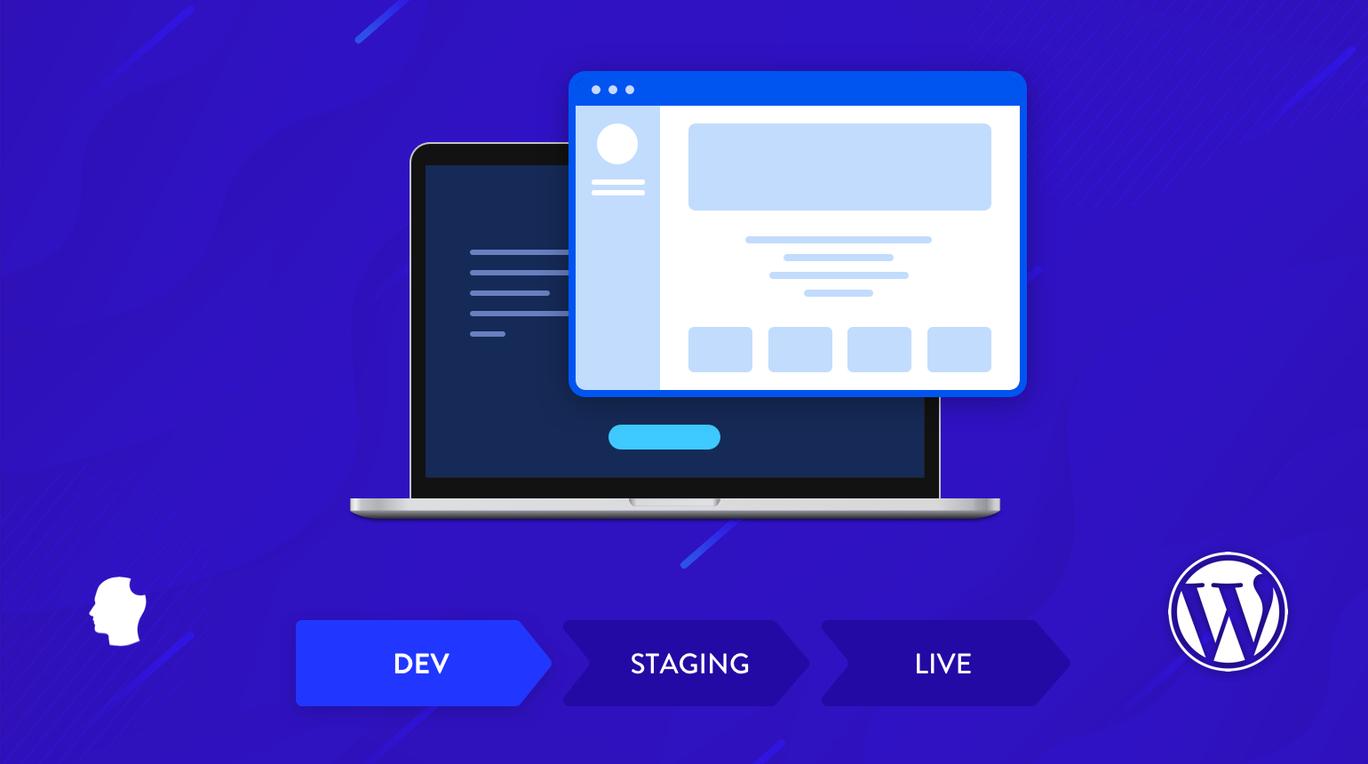
Understanding the Benefits of Local WordPress Development
When diving into web development,especially with WordPress,starting locally offers a plethora of advantages that can substantially enhance your learning and development experience. setting up a local environment with XAMPP not only makes the process easier but also allows you to experiment freely without the constraints of a live server.
Enhanced Speed and Performance: Developing on your local machine means you can bypass internet speed issues. Everything runs on your computer’s resources, leading to faster load times and a more efficient workflow. You won’t have to deal with the delays that can occur when uploading files to a server and waiting for changes to reflect.
Safe Testing Environment: A local setup provides a sandbox for you to test plugins, themes, and custom code. You can break things without worrying about impacting a live website. This allows for a risk-free environment where you can troubleshoot, debug, and innovate at your own pace.
Cost-Effective Development: working locally eliminates the need for hosting fees during the initial development phase. You can create as many sites as you want without incurring additional costs, making it perfect for freelancers or anyone learning the ropes of WordPress development.
Easy Backup and Migration: With local development, you can easily back up your WordPress site. If somthing goes wrong, restoring your setup is as simple as copying files or databases. Furthermore, moving your site from local to live is streamlined; you can package everything neatly and transfer it to your hosting provider.
Additionally, consider the following key benefits:
- Version Control: You can keep multiple versions of your project without the risk of overwriting live content.
- Collaboration: Local setups can be shared with team members for collaborative projects, making it easier to work together remotely.
- Learning Possibility: As you configure your local environment, you gain valuable insights into server management and WordPress functionality.
| Benefit | Description |
|---|---|
| Speed | Rapid load and response times. |
| Safety | Test without risking live sites. |
| Cost | No hosting fees while developing. |
| Backup | Simple backup and restore options. |
Getting Started with XAMPP Installation
To kick off your journey into the world of WordPress development, you’ll first need to set up XAMPP on your local machine. This software package is a powerful, free tool that creates a local server environment, allowing you to run PHP and MySQL applications seamlessly. Here’s a step-by-step guide to get you started:
Download XAMPP
The first step is to download XAMPP from the official website. Here’s what you need to do:
- Visit the XAMPP official website.
- Select the version compatible with your operating system (Windows, macOS, or Linux).
- Click the download button and wait for the setup file to complete downloading.
Install XAMPP
Once the download is complete,installing XAMPP is straightforward:
- run the setup file you just downloaded.
- Follow the on-screen instructions, and when prompted, choose the components you want to install. For wordpress, you’ll need Apache and MySQL at a minimum.
- Complete the installation and launch the XAMPP Control Panel.
Start Apache and mysql
After installation, you will need to start the servers:
- Open the XAMPP Control Panel.
- Click the Start button next to both apache and MySQL.
- Ensure both services are running properly (indicated by green lights).
Configure Your Environment
Now that your servers are running, you’ll need to set up your database for WordPress:
- Open your web browser and navigate to http://localhost/phpmyadmin.
- Create a new database by clicking on the Databases tab, entering a name (e.g., wordpress_db), and hitting Create.
- Keep this database name handy,as you will need it during the WordPress installation process.
Accessing Your Local Server
Your local server is now successfully set up! You can access the XAMPP dashboard by visiting http://localhost in your web browser. This is your gateway to managing your local server and database, and you’ll be using it frequently as you dive deeper into WordPress development.
Ready for WordPress
With XAMPP fully installed and configured, you’re all set to proceed with installing WordPress. Make sure to gather the necessary files and have your database details handy,as these will be crucial for the next steps in creating your local WordPress site.
Setting Up Your XAMPP Environment for WordPress
is an essential first step in your journey to mastering the world of local development. With XAMPP, you can create a safe, efficient space on your computer to work on your WordPress projects without the need for a live server. Here’s how to get started:
Download and Install XAMPP
First things first, you’ll need to download XAMPP from the official website. Follow these simple steps:
- Visit the XAMPP website.
- Select the version compatible with your operating system.
- Run the installer and follow the prompts to install XAMPP on your machine.
Configure Your XAMPP Settings
Once you have XAMPP installed, it’s time to configure it for WordPress. Here’s what you need to do:
- Launch the XAMPP Control Panel.
- Start the Apache and MySQL modules by clicking the “Start” buttons next to each.
- If prompted by your firewall, allow access to these services.
double-check that both services are running correctly by entering http://localhost in your web browser. You should see the XAMPP welcome page!
Create a Database for WordPress
WordPress requires a database to store all its content. Here’s how to create one:
- In your browser, navigate to http://localhost/phpmyadmin.
- Click on the “Databases” tab.
- Enter a name for your new database (e.g., wordpress_db) and click “Create”.
Download and Set Up WordPress
Next,it’s time to download WordPress and set it up in your XAMPP environment:
- Go to the WordPress download page.
- Download the latest version of WordPress.
- Extract the downloaded ZIP file into the htdocs folder inside your XAMPP installation directory (usually found at C:xampphtdocs).
- Rename the extracted folder to your desired project name (e.g., mywordpresssite).
Run the WordPress Installation
you’re ready to install WordPress:
In your web browser, navigate to http://localhost/mywordpresssite.Follow the on-screen instructions to set up WordPress:
- Select your language.
- Enter your database details:
Field Value Database Name wordpress_db Username root Password (leave blank) Database Host localhost - Finish the installation by following prompts to set up your site title, username, password, and email.
Downloading WordPress: Where to Find the Latest Version
When embarking on your journey to set up WordPress locally with XAMPP, the first step is to obtain the latest version of wordpress.Fortunately, finding this is a straightforward process. The official WordPress website is your go-to destination, offering the most secure and up-to-date version available. Simply navigate to wordpress.org/download, where you can download the latest zip file.
Upon reaching the download page, you’ll notice a prominent button that says “Download WordPress X.X” (with X.X representing the current version number). Click on it, and this will initiate the download of a compressed file to your computer. Here’s what you need to do next:
- Locate the downloaded zip file in your computer’s downloads folder.
- Unzip the file using a program like WinRAR or 7-Zip.
- Extract the contents to a folder where you’ll host your local WordPress site.
It’s vital to ensure that you always download WordPress from the official site. This guarantees that you’re working with the latest features, enhancements, and security patches. Additionally, downloading from unofficial sources can expose your system to various risks, including malware and outdated software.
once you’ve extracted the files, you’ll need to move the entire WordPress folder to the “htdocs” directory inside your XAMPP installation folder. This is typically found in C:xampphtdocs. You can rename the folder to something simple like “mywordpress” to make it easier to access later.
For those who want to dive deeper, here’s a fast reference table summarizing the installation prerequisites:
| Requirement | Description |
|---|---|
| XAMPP | Apache, MySQL, PHP server environment installed on your machine. |
| Database | A MySQL database created using phpMyAdmin for your WordPress site. |
| Web Browser | A modern web browser to access your local WordPress site. |
With the latest version safely nestled in your XAMPP’s htdocs folder, you’re just a step away from breathing life into your local WordPress setup.The next tasks will involve configuring your database and setting up your WordPress site, but rest assured, the excitement of creating your own site is just beginning!
Creating a Database for Your WordPress Site
Before diving into the exciting world of WordPress, it’s crucial to establish a solid foundation by creating a database.This process is not only straightforward but also essential for your site to function effectively. A database will store all your posts, pages, comments, and settings, making it the backbone of your WordPress installation.
To get started,follow these steps:
- Open XAMPP Control Panel: Launch the XAMPP Control Panel on your computer and ensure that the MySQL module is running. This is where your database will be hosted.
- Access phpMyAdmin: Open your web browser and navigate to
http://localhost/phpmyadmin. This is the interface where you can manage your databases. - Create a New Database: Click on the “Databases” tab at the top of the page. In the “Create database” field, enter a name for your new database, preferably something relevant to your website (such as,
my_wordpress_db), and click “Create.”
Congratulations! You’ve just created a new database. But wait, there are a few more important steps to ensure everything is in place:
after creating the database, it’s a good idea to check its settings. Here’s how:
| Database Name | collation |
|---|---|
| my_wordpress_db | utf8mb4_general_ci |
Make sure to select utf8mb4_general_ci as the collation. This setting ensures that your database can handle a wide range of characters, including emojis—because who doesn’t love a good emoji in a comment?
Once your database is set up, you’ll need the database name, username, and password, as these will be required during the WordPress installation process.typically, the username is root and the password is left blank by default in XAMPP.
With your database ready, you’re one step closer to launching your WordPress site locally. This crucial step not only lays the groundwork for your site but also empowers you to manage your content efficiently. So, roll up your sleeves, and let’s get moving to the next phase of installing WordPress!
Configuring WordPress to Connect with your Database
Once you have XAMPP installed and running, the next critical step is to configure WordPress to connect with your database. This process is essential for your site to function correctly, as it allows WordPress to store and retrieve data efficiently. Let’s break this down into manageable steps.
First things first, you need to create a database for your WordPress installation. Follow these steps:
- Open your web browser and type
http://localhost/phpmyadminin the address bar. - In phpMyAdmin, click on the Databases tab.
- Enter a name for your new database in the Create database field (for example,
wordpress_db). - Select utf8_general_ci as the collation from the dropdown menu.
- Click the Create button to finalize your database creation.
With your database ready, it’s time to configure the wp-config.php file,which is where WordPress connects to your database. Here’s how to do it:
- Navigate to the directory where you extracted WordPress files and locate the
wp-config-sample.phpfile. - Rename this file to
wp-config.php. - Open the
wp-config.phpfile in a text editor. - Find the following lines and update them with your database information:
| Field | Value | Description |
|---|---|---|
DB_NAME |
'wordpress_db' |
Your database name. |
DB_USER |
'root' |
Default XAMPP username. |
DB_PASSWORD |
'' |
Password for the database user (usually blank). |
DB_HOST |
'localhost' |
Host name for the database server. |
After updating these fields, save the changes to your wp-config.php file. This configuration is vital as it tells WordPress how to communicate with your database.
you can proceed with the WordPress installation by navigating to http://localhost/wordpress in your web browser. follow the on-screen instructions, and your locally hosted WordPress site will be ready to go!
Installing WordPress Locally: Step-by-Step Guide
Installing WordPress locally using XAMPP is a fantastic way to dive into web development without the need for a live server. It allows you to experiment freely and learn at your own pace. Let’s break down the process into manageable steps to get you started on your WordPress journey!
Step 1: Download and Install XAMPP
First things first, you’ll need to download XAMPP, an easy-to-install Apache distribution containing MariaDB, PHP, and Perl.
- Visit the XAMPP official website.
- Choose the version compatible with your operating system (Windows, macOS, or Linux).
- Run the installer and follow the on-screen instructions to complete the installation.
Step 2: Start XAMPP and Configure Modules
Once installed, launch the XAMPP Control Panel. Here’s how to configure the necessary modules:
- Click on the Start button next to Apache and MySQL.
- Ensure both modules are running; their status should change to green.
Step 3: Create a Database for WordPress
Next, you need to set up a MySQL database for your WordPress installation:
- Open your web browser and go to http://localhost/phpmyadmin.
- Click on the Databases tab.
- Enter a name for your database (e.g., wordpress_db) and click Create.
Step 4: Download WordPress
Now, let’s get the WordPress files:
- Navigate to the WordPress download page.
- Download the latest version as a .zip file.
- Extract the .zip file and move the contents into the htdocs folder within your XAMPP installation directory (e.g., C:xampphtdocswordpress).
Step 5: Run the Installation Wizard
With everything set, it’s time to install WordPress:
- In your browser, go to http://localhost/wordpress.
- Select your preferred language and click Continue.
- Fill in the database information:
Field Value Database Name wordpress_db User Name root Password (leave blank) Database Host localhost Table Prefix wp_ - Click Submit and then Run the Installation.
Step 6: Complete the Setup
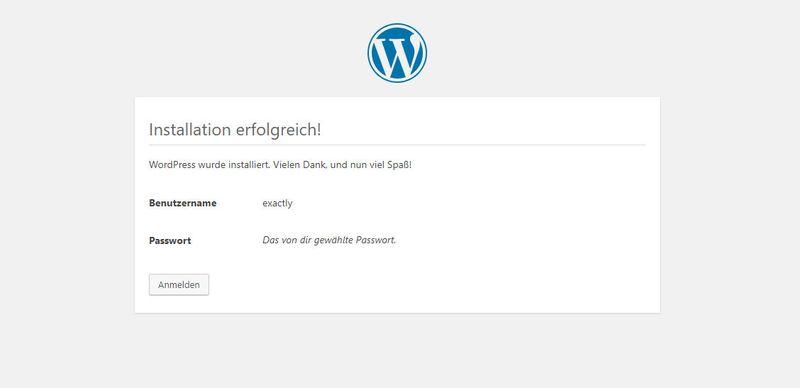
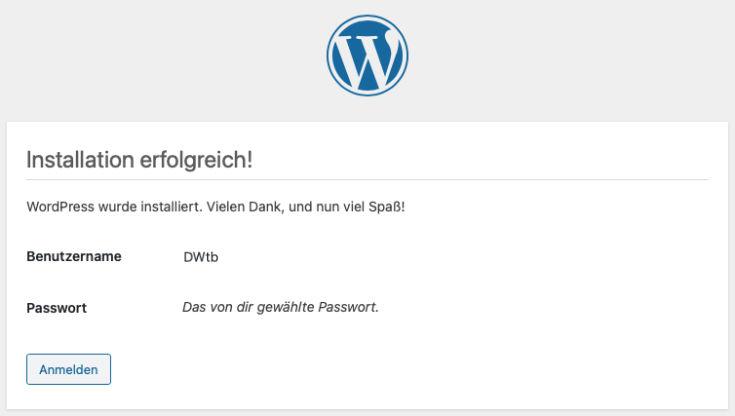
Fill out the site title, username, password, and email address on the setup page. Don’t forget to keep your login details secure! After filling everything out, click Install WordPress.
Congratulations! You’ve successfully installed WordPress locally. You can now log in to your site by visiting http://localhost/wordpress/wp-admin.
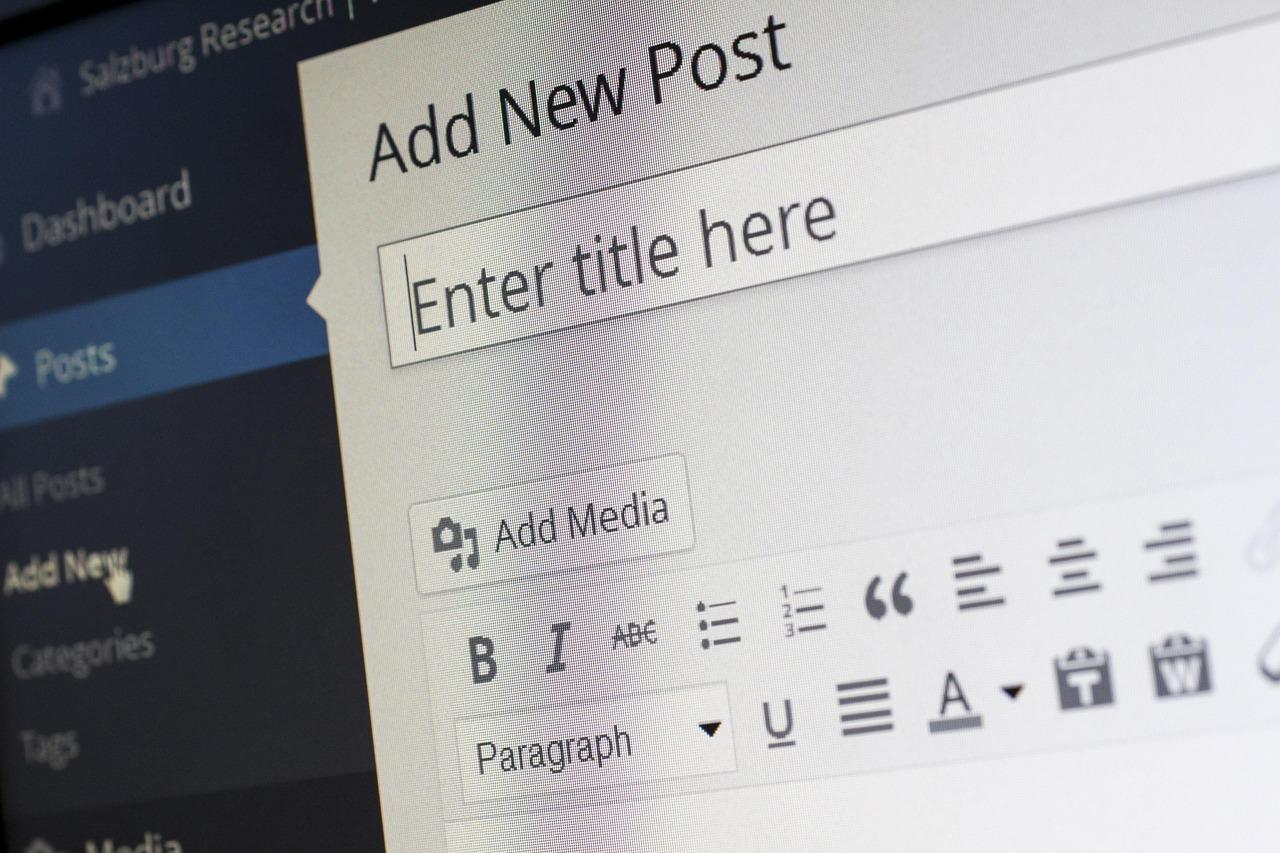
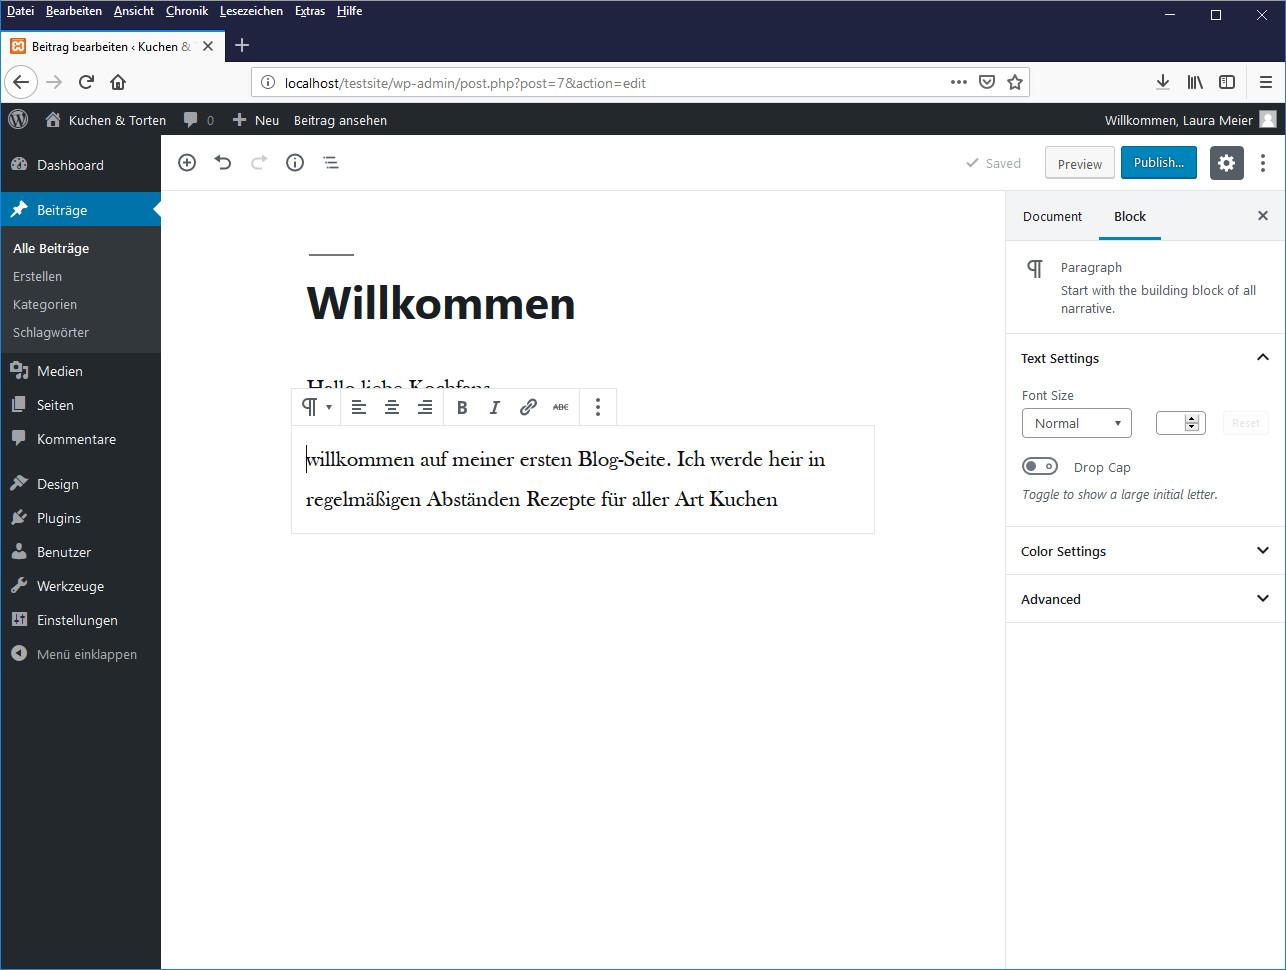
Exploring Your Local WordPress Dashboard
Once you’ve successfully installed WordPress on XAMPP, it’s time to dive into the heart of your new site: the WordPress Dashboard. This powerful interface is where the magic happens, allowing you to manage your content, customize your site, and monitor performance—all from one convenient location.
Your first stop will be the Dashboard Home. Here, you’ll find a summary of your site’s activity, including recent comments, a quick draft option, and news from the WordPress community. Familiarizing yourself with this area is essential; it serves as your command center, providing quick access to different sections of your site.
From the left sidebar, you can navigate to various sections, such as:
- Posts: Manage your blog entries, create new posts, and organize your content using categories and tags.
- Pages: Create and manage static pages for your website,such as an About or Contact page.
- Media: Upload and manage your images, videos, and other media files.
- Appearance: Customize your site’s look and feel, install themes, and manage widgets.
- Plugins: Enhance your website’s functionality by adding new features through plugins.
One nifty feature to explore is the Customize option under the Appearance menu. This allows you to see changes in real-time, such as adjusting colors, adding logos, and altering layouts. It’s like a mini design studio right within your dashboard!
Additionally, don’t overlook the Settings tab, where you can configure vital aspects of your site, including general settings, reading options, and permalinks. Proper configuration here is crucial for optimal site performance and user experience.
To help you get started, here’s a quick overview of some essential settings you might want to adjust:
| Setting | Description |
|---|---|
| Site Title | Your website’s name, visible on the homepage and browser tab. |
| Tagline | A brief description that summarizes your site. |
| Timezone | Set your local timezone for accurate scheduling. |
| permalink Structure | Customize how URLs are displayed for your posts and pages. |
The Dashboard is not just about functionality; it’s also user-kind. With intuitive options and a clean layout, even beginners can navigate seamlessly. The more you explore, the more comfortable you’ll become. So go ahead, click around, and unleash your creativity!
Essential Plugins to Enhance Your Local Development
When developing locally, having the right plugins can significantly elevate your WordPress experience. Here are some essential plugins that can help streamline your workflow and boost productivity:
- WP Super Cache: This plugin helps you create static HTML files from your dynamic WordPress content, making your local site faster and more responsive.
- Duplicator: Perfect for those who want to clone their local site or migrate it to a live server with ease. Just a few clicks, and your entire site can be packaged into a zip file.
- Query Monitor: A must-have for debugging, this plugin provides insights into database queries, PHP errors, and other performance metrics to ensure your site runs smoothly.
- Yoast SEO: Even in a local environment,optimizing your site for search engines is crucial. This plugin guides you through SEO best practices right from the start.
| Plugin | Functionality |
|---|---|
| WP Super Cache | Improves performance through caching |
| Duplicator | Facilitates site migration and backups |
| Query Monitor | Debugging tool for site performance |
| Yoast SEO | SEO optimization and best practices |
These plugins not only enhance your local development experience but also prepare you for a smoother transition to a live environment when your site is ready. They tackle various aspects of WordPress management, from performance optimization to SEO, ensuring that your work is efficient and effective.
By integrating these tools into your local setup, you’ll save time and avoid common pitfalls that can arise during development. So,whether you’re a seasoned developer or just getting started,consider adding these essential plugins to your toolkit for a more seamless and productive WordPress development experience.

Troubleshooting Common Issues During Installation
Encountering issues during your WordPress installation on XAMPP can be frustrating, but many problems have simple solutions. Here are a few common issues and how to resolve them.
1. Error Establishing a Database Connection
This is a common error that usually indicates a problem with your database name, username, or password. Here’s what you can do:
- Check your wp-config.php file: Ensure that the database name,username,and password match what you set in phpMyAdmin.
- database server: Make sure the database server is set to
localhost.
2. White Screen of Death
If you encounter a blank screen after the installation, it could be due to a plugin or theme conflict. Follow these steps:
- disable all plugins: Access the
wp-contentfolder and rename thepluginsfolder toplugins_disabled. - Switch to a default theme: Rename your active theme’s folder to deactivate it, forcing WordPress to revert to a default theme.
3. 404 Errors on Permalinks
If you’re getting 404 errors for your posts, it might be a permalink issue. Fix it by:
- Resetting permalinks: Go to Settings > Permalinks in your WordPress dashboard and simply click Save Changes to flush the rewrite rules.
4.XAMPP Control Panel Not Starting
If the XAMPP control panel fails to start,it might be due to port conflicts. Here’s how to troubleshoot:
- Change apache Port: open the XAMPP control panel, click on Config next to apache, and select httpd.conf. Change the line
Listen 80toListen 8080. - Restart XAMPP: Always restart XAMPP after making changes to ensure they take affect.
5.Database Import Errors
When you import your database and encounter errors, it could be due to file size limitations. Follow these guidelines:
- Check php.ini settings: locate the
php.inifile in your XAMPP installation and increase the values forupload_max_filesizeandpost_max_size. - Use phpMyAdmin: If the file is too large, consider breaking it into smaller parts or using the command line to import it.
6. Visual Issues or Broken Layout
If your WordPress site doesn’t look right, it might be loading the wrong styles or scripts. here’s a fix:
- Check URL settings: Ensure your
siteurlandhomevalues in the database are set correctly, typically resemblinghttp://localhost/yourwordpress. - Clear browser Cache: Sometimes, a simple cache clear can resolve loading issues.
With these tips, you can easily troubleshoot and overcome the most common issues when installing WordPress on XAMPP. Happy blogging!

Backing Up Your Local WordPress Site
is a crucial step that every developer and site owner should prioritize. Whether you’re experimenting with new themes, plugins, or customizations, having a backup ensures you can quickly restore your site if anything goes awry. Here’s how to make sure your local WordPress site remains safe and sound.
There are a few methods to back up your site effectively. You can choose to back up your files manually or use plugins designed for local environments. Here are some simple options:
- manual Backup: This involves copying the WordPress files and exporting the database using phpMyAdmin.
- Using Plugins: While most plugins are designed for live sites, there are local options that can streamline the backup process.
- Automated Scripts: If you’re comfortable with coding, writing a script to automate the backup process can save time.
For a manual backup, follow these essential steps:
- Navigate to your XAMPP installation directory, usually found in
C:xampphtdocs. - Copy your entire WordPress folder to a safe location on your computer or an external drive.
- Open phpMyAdmin by visiting
http://localhost/phpmyadmin. - Select your WordPress database, click on the Export tab, and choose the Quick method for an easy export.
Storing backups properly is just as important as creating them. Consider the following best practices:
- Organize Backups: Keep backups in clearly labeled folders with dates for easy identification.
- Multiple Locations: Store backups in different locations, such as an external hard drive and cloud storage, to prevent data loss.
- Regular Schedule: Set a routine for backing up your site, especially before making significant changes.
Here’s a quick comparison table of the backup methods:
| Backup Method | Pros | Cons |
|---|---|---|
| Manual Backup | Full control over files and database | Time-consuming, requires technical knowledge |
| Plugins | User-friendly, automated | Limited options for local sites |
| Automated Scripts | Efficient, saves time | Requires coding knowledge |
Having a reliable backup strategy can save you from hours of work and frustration. by following these steps and maintaining a regular backup routine, you’ll ensure that your local WordPress site remains secure and can withstand any unexpected issues that may arise.

Taking Your Local Site Live: What You Need to know
Once you’ve set up your local WordPress site using XAMPP, the next exciting step is to take it live! Transitioning from a local development environment to a live server involves several critical considerations to ensure a smooth launch and optimal performance.
Here are some essential tips to keep in mind:
- Choose a Reliable Hosting Provider: Research and select a hosting service that meets your needs.Look for providers that offer excellent uptime, customer support, and scalability options.
- Domain Registration: Secure a domain name that reflects your brand. Ensure it is indeed easy to remember and spell,and check for availability before making your purchase.
- Back Up your Local Site: Always create a complete backup of your local site. This includes both the database and files, ensuring you can restore your site if anything goes wrong during the migration.
- Check Your Site’s Functionality: Before going live, thoroughly test your website. Check for broken links, missing images, and ensure all plugins are functioning correctly.
- Optimize for Speed: A fast-loading site enhances user experience and SEO. Consider optimizing images, using caching plugins, and minifying CSS/JavaScript files.
When you’re ready to migrate your site, follow these steps:
- Export your WordPress database from phpMyAdmin.
- Upload your WordPress files to the live server using FTP.
- Import your database into the live server’s phpMyAdmin.
- Update the
wp-config.phpfile with your live database details. - Change your site URL in the database if necessary.
| Step | Action |
|---|---|
| 1 | Export Database |
| 2 | Upload Files via FTP |
| 3 | Import Database |
| 4 | Update wp-config.php |
| 5 | Change Site URL |
once your site is live, don’t forget to monitor its performance closely. Use tools like Google Analytics and google Search Console to track your site’s traffic and identify areas for enhancement. Implementing SEO strategies from the get-go will help your site gain visibility in search engines.
Frequently asked Questions (FAQ)
Q&A: How to Install WordPress on XAMPP Locally – Beginner’s Guide
Q1: What is XAMPP, and why should I use it to install WordPress?
A1: Great question! XAMPP is a free and open-source cross-platform web server solution stack package developed by Apache Friends. it’s perfect for beginners because it sets up a local server environment on your machine,allowing you to test and develop websites without needing to upload them online. By using XAMPP, you can experiment with WordPress or any other web applications in a safe space—your local computer!
Q2: Do I need any technical skills to install WordPress on XAMPP?
A2: Not at all! That’s the beauty of this guide. We designed it specifically for beginners, so you’ll find step-by-step instructions that are easy to follow. If you can click a few buttons and type in some information, you’re already halfway there!
Q3: What are the prerequisites before starting the installation?
A3: Before diving in, you’ll need to download and install XAMPP on your computer. It’s available for Windows, macOS, and Linux, so no worries about compatibility! You’ll also need the latest version of WordPress, which you can grab from the official WordPress website. Lastly, make sure your system has enough RAM and storage for a smooth experience.
Q4: What’s the first step in the installation process?
A4: The very first step is to open XAMPP and start the Apache and MySQL modules.These are the two essential components you need to run WordPress locally. Just click the “Start” button next to each module in the XAMPP Control Panel,and you’re off to the races!
Q5: How do I create a database for WordPress?
A5: Creating a database is simple! Open your web browser and go to http://localhost/phpmyadmin. This interface allows you to manage databases easily. Click on the “Databases” tab, enter a name for your new database (like wordpress_db), and hit “Create.” You’ll need this database to store all your WordPress data!
Q6: What’s next after setting up the database?
A6: now, it’s time to install WordPress! Unzip the WordPress package you downloaded earlier and move it to the htdocs folder in your XAMPP installation directory. You can rename the WordPress folder if you want a custom URL, like http://localhost/myblog. Next, navigate to this URL in your browser, and you’ll be guided through the WordPress installation wizard. Just follow the prompts,input the database name you created,and you’re golden!
Q7: Do I need to worry about security when using XAMPP for local development?
A7: Since you’re working locally,security risks are quite low compared to a live website. However, it’s always good practice to follow basic security guidelines, like not using easily guessable passwords for your database and WordPress admin account. Remember, this is your playground, so keep it safe and make it fun!
Q8: Can I use this local installation for real projects?
A8: Absolutely! Installing WordPress on XAMPP is a fantastic way to develop and test your projects before going live. You can customize your themes, try out plugins, and ensure everything works perfectly before launching your site to the world. Think of it as your personal sandbox—play around and get creative!
Q9: What if I get stuck during the installation process?
A9: No need to panic! There are tons of resources available. You can revisit our guide for clarification or check out forums and communities like WordPress.org and Stack Overflow. Plus, don’t forget that practice makes perfect. The more you experiment, the more comfortable you’ll become!
Q10: Is this guide really for beginners?
A10: Yes, it absolutely is! We crafted this guide with beginners in mind, breaking down each step to ensure that anyone can follow along. So, if you’re eager to learn and ready to take the plunge into the world of WordPress, you’ve got this! Trust us, you’ll be amazed at what you can create locally with just a little effort.
Feel free to explore this exciting journey of installing WordPress on XAMPP.With our guide, you’re not just learning—you’re taking the first step toward becoming a web development wizard! Ready, set, go!
The Way Forward
And there you have it! You’ve successfully installed WordPress on XAMPP, unlocking a world of possibilities for your website development journey. By setting up a local server environment, you’ve equipped yourself with the tools to experiment, learn, and create without the pressure of a live environment.
Whether you’re a budding blogger, an aspiring web designer, or just someone curious about how websites work, this hands-on approach is the perfect way to dive into the world of WordPress. Remember, practice makes perfect—so don’t hesitate to explore themes, plugins, and all the fantastic features WordPress has to offer.
If you encounter any bumps along the way, don’t fret! The WordPress community is vast and supportive, ready to help you troubleshoot any issues. And who knows? Your local development could be the first step toward creating something amazing that might just inspire others.
So, roll up your sleeves, get creative, and start building your dream website right at home. Happy blogging, and welcome to the exciting world of WordPress!