
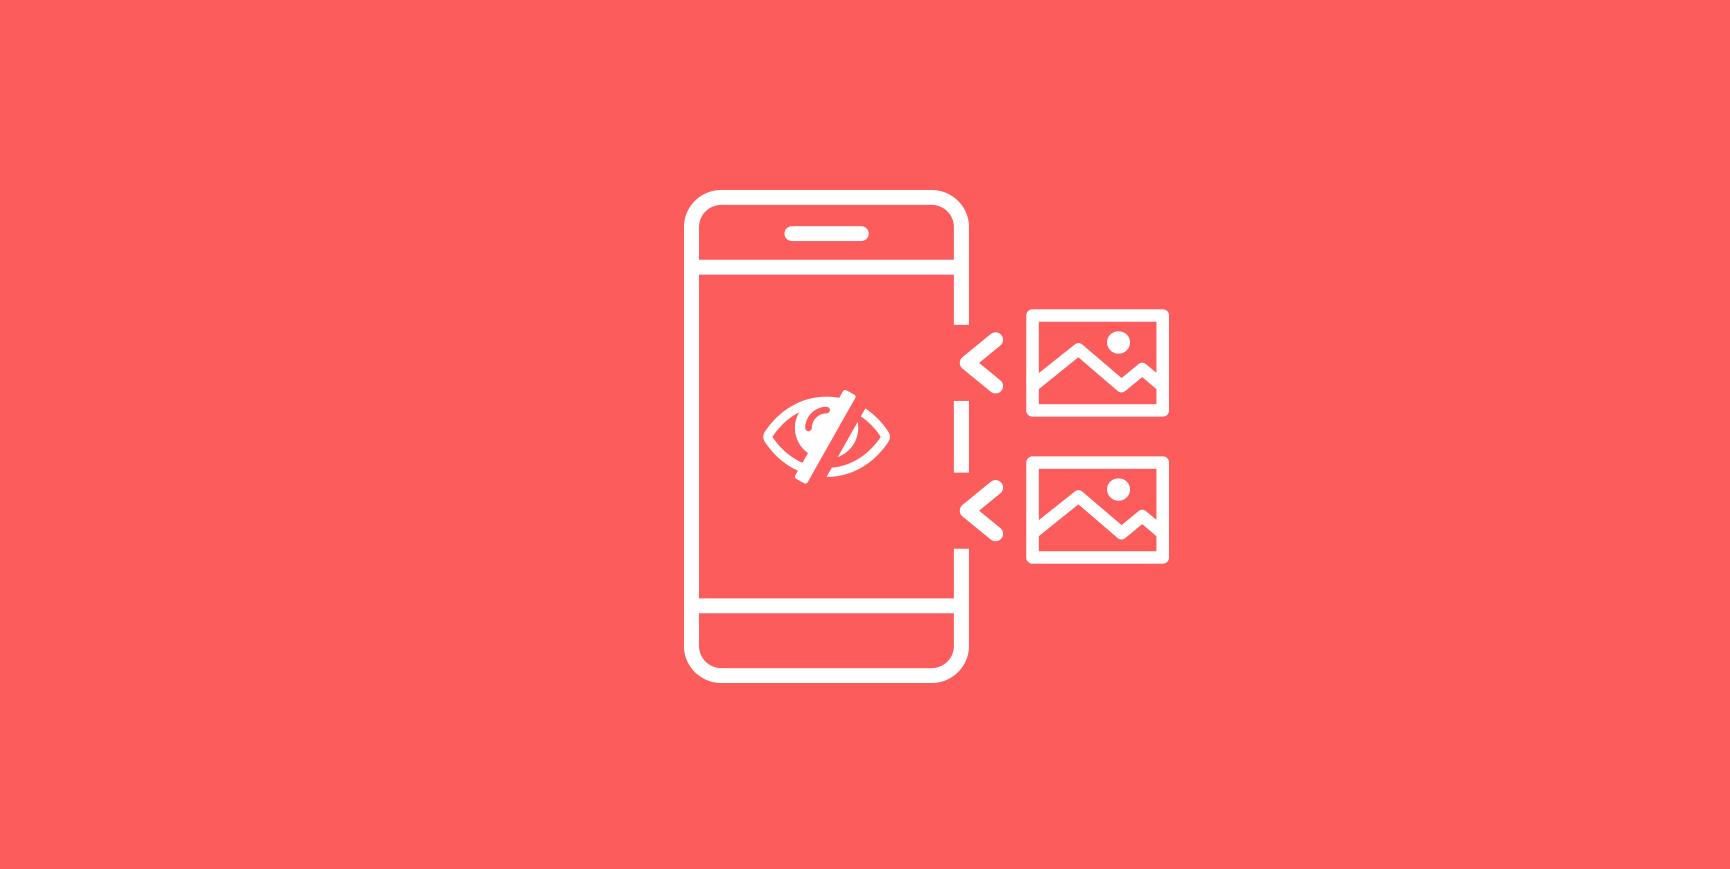
Are you looking to give your WordPress site a cleaner,more polished look? If so,you might have noticed that featured images can sometimes steal the show—especially when they don’t quite fit the vibe of your content. Whether you’re aiming for a minimalist aesthetic or simply want to keep your readers focused on the text, hiding the featured image can be a game changer. Luckily, you don’t need to be a coding whiz or a design guru to achieve this. In this article, we’ll walk you through two easy methods to hide featured images in WordPress. Get ready to transform your site’s appearance wiht just a few simple clicks! Let’s dive in!
Understanding the Importance of Featured Images in WordPress
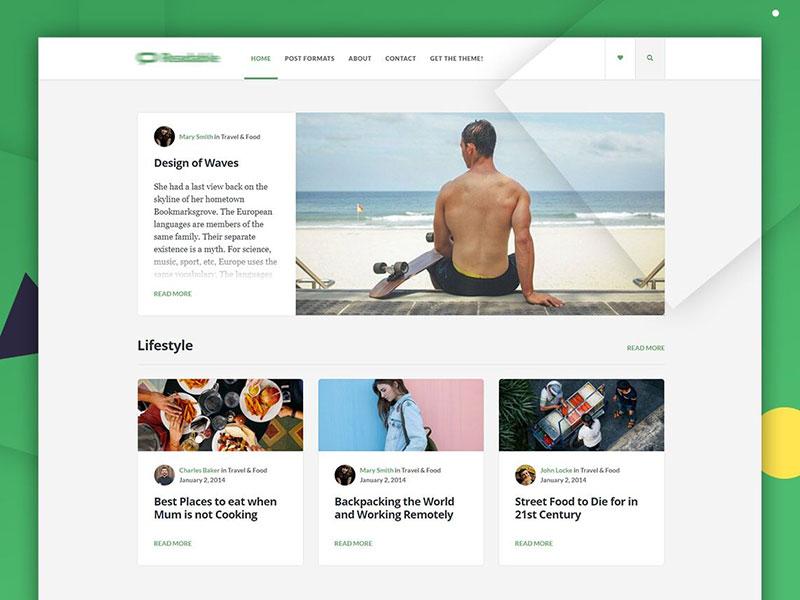
When it comes to WordPress, featured images play a crucial role in enhancing the visual appeal adn engagement of your posts. These images serve as the frist impression for your content, frequently enough determining whether a visitor clicks through to read more. Therefore, understanding their importance can help you make informed decisions about your site’s design and user experience.
Here are some notable reasons why featured images matter:
- Visual Impact: A striking featured image can capture attention promptly, sparking interest in your content.
- SEO Benefits: Optimized images can improve your site’s search engine ranking, enhancing visibility and traffic.
- Social Media Sharing: When your posts are shared on social platforms, the featured image is frequently enough the visual hook that draws clicks.
- Brand Consistency: Using consistent imagery across posts can help establish and reinforce your brand identity.
However, there may be situations where you want to hide the featured image for specific posts. Perhaps you’re aiming for a minimalist design, or you want to maintain focus on the content itself without distractions. Fortunately, WordPress provides straightforward methods to achieve this, allowing you to customize your site’s appearance while still taking advantage of the benefits that featured images offer.
To effectively hide featured images, you can adopt two easy methods that require minimal technical knowledge:
| method | Description |
|---|---|
| CSS Method | add custom CSS to your theme to hide featured images site-wide or on specific posts. |
| Plugin Method | Use a reliable plugin designed to manage featured images without any coding. |
By understanding the significance of featured images and knowing how to manage their visibility, you can create a more tailored experience for your visitors. Whether you’re promoting a new product, sharing a personal story, or delivering facts, the choice to show or hide featured images can be an essential part of your site’s design strategy.
When you Might Want to Hide a Featured Image
There are several scenarios when opting to conceal a featured image can enhance your WordPress site’s appearance and functionality. Understanding these circumstances can help you craft a more cohesive and engaging user experience.
as a notable example, if you’re running a blog with a minimalist design, a visible featured image might disrupt the clean aesthetic you’re aiming for. In such cases, hiding the image can maintain a streamlined look that keeps your readers focused on the content rather than visual distractions. Here are a few specific situations where you might want to consider this:
- Content-Centric Pages: When the focus is solely on the text, hiding the featured image can help in emphasizing your written content.
- Custom Layouts: If you’re using a custom layout or builder that doesn’t accommodate featured images, hiding them can prevent awkward formatting.
- Social Media Posts: If you’re sharing snippets of your content on platforms where an image is not necessary, keeping it hidden can streamline your messaging.
- Brand Consistency: When your brand’s visual identity relies on specific imagery,displaying a featured image that doesn’t align can confuse your audience.
Moreover, there are instances where the featured image may not resonate with your audience. For example, if your post is about an abstract topic or a conceptual idea, a literal image might not capture the essence of your content. In such cases,removing the featured image can create intrigue and encourage readers to delve deeper into your writing.
Another reason to hide a featured image is during updates or redesigns of your website.If you’re in the process of changing your theme or overall design, it’s often best to temporarily hide images until the new layout is finalized. This ensures a clean transition and allows you to assess how the overall appearance is impacted without clutter.
Ultimately, the decision to hide a featured image should align with your content strategy and design goals. By being thoughtful about when and why to conceal these images, you can enhance your site’s visual appeal and improve user engagement effectively.
method One: Hiding Featured Images Using the Block Editor
If you’re looking to give your WordPress site a more customized look,hiding the featured image can be an essential step.Whether you want to make your content pop or maintain a clean aesthetic, the Block Editor offers a straightforward way to achieve this.Let’s dive into the steps you need to follow.
First, navigate to the post or page where you want to hide the featured image. Once inside the Block Editor, look for the Document Settings panel on the right side of the screen. If you don’t see it, simply click on the gear icon in the upper right corner to make it visible.
In the Document Settings, scroll down to the Featured Image section. Here’s what you can do:
- Click on the Remove Featured Image link. This will instantly hide the image from your post.
- If you want to keep the image but not display it on the frontend, consider changing it to a placeholder image that aligns better with your aesthetic.
Another option is to apply a bit of CSS to control the visibility of the featured image without removing it. You can add custom CSS in the Additional CSS section found under Appearance > Customize. Here’s a simple code snippet you can use:
.wp-block-post-featured-image {
    display: none;
}
This will effectively hide the featured image across all your posts. Just remember that using CSS will keep the image in the background, so it will still be part of your page’s source code, which may affect SEO.
To make sure your changes look good, always preview your post before hitting publish. This way,you can confirm that the featured image is hidden as you intended and that your content is visually appealing.
By taking these steps, you can effectively manage the display of featured images in your posts, giving you more creative freedom and ensuring a better user experience for your audience.

Step-by-step Guide to Hiding Images in the Block Editor
Hiding images in the Block Editor can be a straightforward task if you know where to look and what settings to adjust. Whether you want to keep your featured image from appearing on the post or customize the way images are displayed, the Block Editor provides simple tools to achieve this. Below, we’ll explore how to effectively hide your featured image using different methods.
method 1: Using the Document Settings
One of the easiest ways to hide your featured image is by adjusting the settings within the Document panel. Here’s how:
- Select your post or page in the Block Editor.
- In the right sidebar, locate the Document tab.
- Scroll down to the Featured Image section.
- If a featured image is already set, you can remove it by clicking the Remove featured image link.
by following these steps, your featured image will no longer display on the front end of your website, giving you a clean look while you focus on the content.
Method 2: Using Custom CSS
If you prefer to keep the featured image set but want to hide it from view, adding a bit of custom CSS can do the trick. Here’s a simple way to hide the featured image without removing it:
- In the Block Editor, click on the Customize option in the WordPress dashboard.
- Navigate to Additional CSS.
- Copy and paste the following CSS code:
.post-thumbnail {
        display: none;
    }
this code targets the featured image and ensures it does not show up on your posts. Remember to save your changes, and voila! The image will remain hidden while still being part of your post’s data.
quick Comparison table of Methods
| Method | Ease of Use | Reversibility |
|---|---|---|
| Document Settings | Very Easy | Yes |
| Custom CSS | Moderate | Yes |
Choosing the right method for hiding your featured image depends on your comfort level with WordPress settings and CSS. Experiment with both to find what works best for your site’s aesthetic and usability. Hiding images can enhance the focus on your content and improve the overall user experience.
Method Two: Custom CSS for Hiding Featured Images
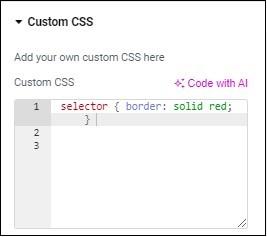
To effectively hide featured images in wordpress using custom CSS, you’ll need to access your theme’s customizer or directly modify your stylesheet. This method is particularly beneficial for those who want to maintain control over their site’s aesthetics without delving into code-heavy solutions.follow the steps below to achieve a clean, featured-image-free look.
First, navigate to your WordPress dashboard and go to Appearance > Customize. From there, look for the Additional CSS section. This is where you will paste your custom code. If you are using a child theme or have access to your theme’s editor, you can also add this CSS directly into your style.css file.
Here’s a simple CSS snippet to get you started:
css
/ Hide featured image on single posts /
.single .post .featured-image {
    display: none;
}

/ Hide featured image on homepage /
.home .post .featured-image {
    display: none;
}
This code snippet targets the featured images specifically within single posts and the homepage. You can adjust the selectors based on your theme’s structure. To find the correct class for your theme, right-click on the featured image and select “Inspect” to see the associated HTML elements.
For those who wish to selectively hide featured images, consider utilizing additional classes. Here’s a quick example that displays how you can hide images only on certain categories or post types:
css
/ Hide featured image in specific category /
.category-your-category .post .featured-image {
    display: none;
}
Tips for Effective Use:
- Testing: After adding your CSS, always refresh your site to see the changes. It’s wise to check on different devices to ensure the layout remains intact.
- Backup: Whenever you make changes to your CSS, it’s prudent to keep a backup of your original styles. This way, if anything goes wrong, you can revert easily.
- Browser Compatibility: Ensure that the CSS works well across all major browsers. Sometimes, minor adjustments may be required for specific browsers.
if you are unsure about the effectiveness of your CSS changes, you can easily revert them by simply deleting the code from the Additional CSS section. This adaptability allows you to experiment with different styles without the fear of permanent alterations.
using custom CSS to hide featured images is a straightforward yet powerful approach that allows you to customize your WordPress site’s appearance effortlessly. By following the steps outlined and experimenting with the provided snippets, you can create a tailored look that resonates with your brand and content style.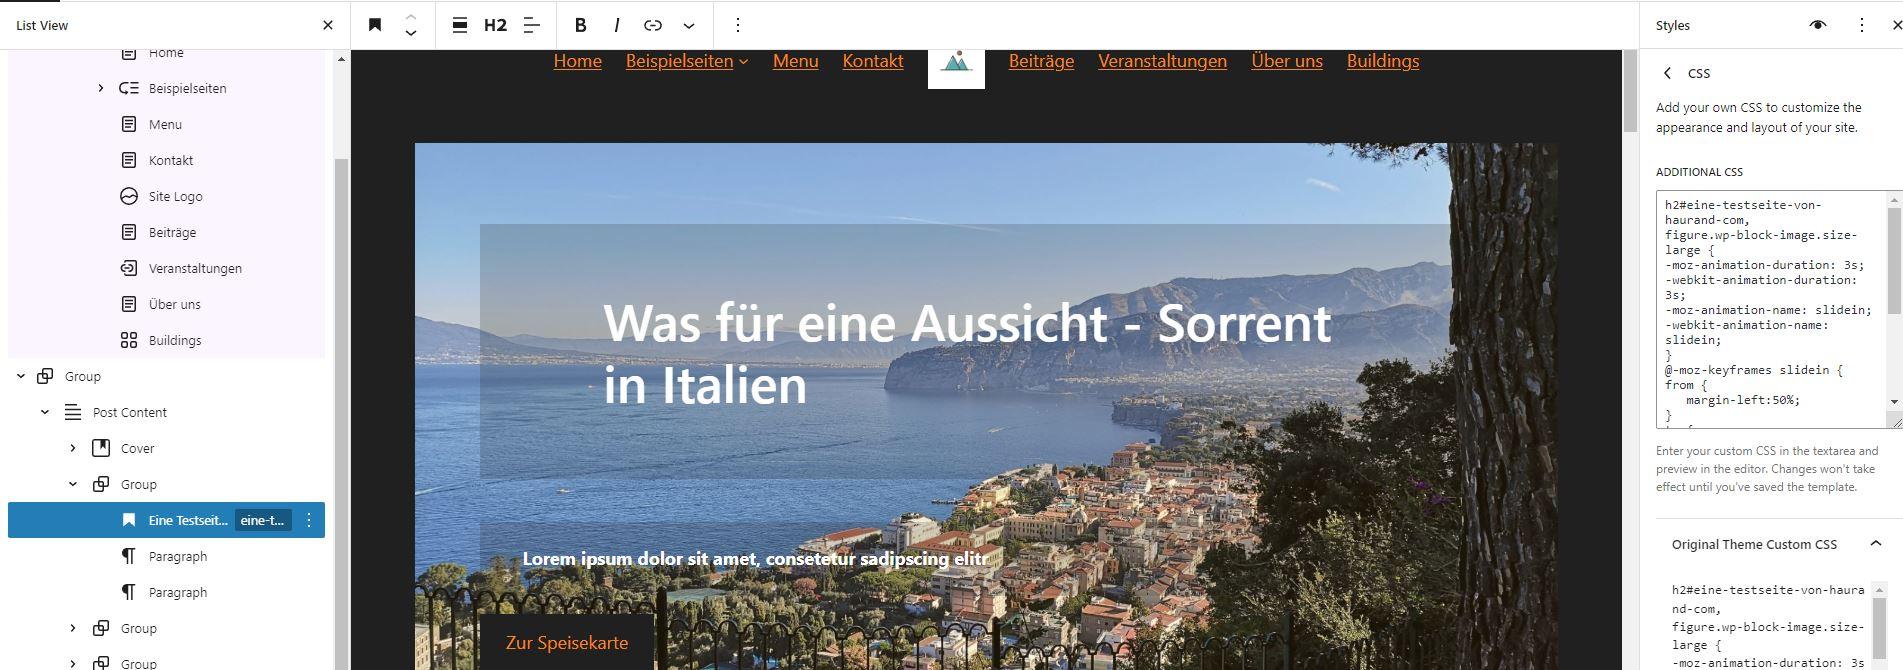
how to Add Custom CSS in wordpress
If you want to hide the featured image in your WordPress posts, adding custom CSS can be a powerful way to achieve this without affecting the overall functionality of your site. The good news is that WordPress makes it relatively easy to implement your own styles without coding knowledge. Let’s dive into how you can add custom CSS to your WordPress site effectively.
To get started, you can navigate to the Customizer by going to Appearance > Customize in your WordPress dashboard. Within the Customizer, look for the Additional CSS section. This area is designed for you to inject custom styles that override the default theme styles.
Here’s how to hide the featured image using CSS:
    .post-thumbnail {
        display: none;
    }
Simply paste the above code snippet into the Additional CSS box and hit Publish. This will effectively hide any featured images from displaying in your posts. If you wish to target specific post types or individual posts, you can enhance your CSS with more specific selectors.
Alternatively, you can add custom CSS through a child theme or a plugin if you prefer a more organized approach. Using a child theme means you won’t lose your customizations when the theme updates. For those who opt for a plugin, you might want to consider using a plugin like Simple Custom CSS and JS. This allows you to add CSS directly and gives you the flexibility to manage it separately.
Here’s a simple table showcasing notable CSS selectors you might use:
| CSS Selector | Description |
|---|---|
| .post-thumbnail | Targets the featured image on all posts. |
| .single .post-thumbnail | Hides featured image on single post pages. |
| .archive .post-thumbnail | hides featured image on archive pages. |
Utilizing these methods not only gives you control over the appearance of your posts but also helps maintain a clean and focused design. remember, while hiding the featured image can be effective, ensure that your content remains visually appealing and engaging for your readers.
Testing and Troubleshooting Your Changes
Once you’ve implemented the method to hide the featured image in WordPress, it’s essential to put your changes to the test. This ensures that everything works as was to be expected and that your site maintains its aesthetic and functionality. Here are a few steps to help you confirm that your changes are successful:
- Clear Your Cache: If you’re using a caching plugin or your web host has caching enabled, clear the cache to see the most recent changes.
- Check on Different Devices: Make sure to view your site on desktop, tablet, and mobile. Sometimes elements may behave differently across devices.
- Use Incognito Mode: Open your site in an incognito window to bypass any cached pages and see your changes live.
- Inspect with Developer Tools: Right-click on the page and select “Inspect” to open developer tools. Check for any unwanted side effects in the code.
If you encounter any issues after hiding the featured image, here are some troubleshooting tips:
- Revisit Your Code: Double-check any custom CSS or PHP snippets you’ve added.A small typo can lead to unexpected results.
- Review Plugin Conflicts: Disable any plugins that might interfere with your theme’s functionality. Reactivate them one at a time to identify the culprit.
- Examine Theme Settings: Some themes have built-in options for controlling the visibility of featured images. Ensure these settings align with your changes.
In case you need a quick reference, here’s a simple table outlining the potential issues and their solutions:
| issue | Possible Solution |
|---|---|
| featured image still visible | Check CSS for errors or caching issues. |
| Layout breaks after changes | Inspect for missing elements or conflicting styles. |
| Images showing in some posts | Ensure the adjustments are applied site-wide or per post. |
| site speed issues | Optimize images and scripts after any major changes. |
By following these testing and troubleshooting steps, you can ensure a smooth experience for your visitors while effectively hiding the featured images. Remember, the goal is not just to make changes, but to make sure those changes enhance your site’s functionality and user experience.
Best Practices for Managing Featured Images in WordPress
When it comes to managing featured images in WordPress, maintaining a clean and aesthetically pleasing design is key. Here are some best practices to consider:
- Consistent Sizing: Ensure all featured images are of consistent dimensions. This creates a uniform look across your site and improves load times.
- Descriptive Filenames: Name your images descriptively before uploading. This helps with SEO and makes it easier to organize your media library.
- Optimize for Web: Use tools to compress images to reduce file size without sacrificing quality. Fast-loading pages enhance user experience.
- Alt Text Usage: Always add alt text for accessibility and SEO. A well-written alt tag can improve your site’s search engine ranking.
Another important aspect is to consider the placement and visibility of featured images. sometimes, you may want to hide a featured image for specific posts or pages while maintaining its presence in the backend. This can be particularly useful for landing pages or posts where the content speaks for itself without the need for visuals.
Here are a couple of methods to achieve this:
- CSS Method: By adding custom CSS, you can easily hide the featured image on your desired pages. Use the following code snippet:
.post-id-123 .wp-post-image {
    display: none;
}
Replace 123 with the actual post ID where you want the image hidden. This method is quick and efficient.
- Plugin Method: Consider using a plugin like Hide Featured Image. This allows you to toggle the visibility of featured images on a per-post basis without any coding.
Regardless of the method you choose, make sure to test the changes across different devices to ensure a seamless experience for all users. A well-managed featured image strategy not only enhances your site’s aesthetics but also plays a crucial role in user engagement and SEO effectiveness.
| method | Pros | Cons |
|---|---|---|
| CSS Method | Quick and no plugins needed | Requires basic coding knowledge |
| Plugin Method | User-pleasant, no coding required | Additional plugin may slow down site |
Conclusion: Making the Most of Your WordPress Design
Designing a WordPress site that resonates with your audience involves more than just choosing a theme or plugin; it’s about creating a cohesive visual experience.By effectively managing elements like the featured image, you can enhance your site’s aesthetics and improve user engagement.Here are some essential tips to ensure you make the most of your wordpress design:
- Consistency is Key: Maintain a uniform style across your site. Whether you decide to hide the featured image or not, ensure that your other design elements align with this choice.
- Focus on Content: Sometimes less is more. Hiding the featured image can draw more attention to your written content, making it the star of the show.
- Responsive Design: Consider how hiding a featured image impacts mobile users.Test your site on various devices to ensure a seamless experience.
- Testing and Feedback: Don’t hesitate to experiment. Use A/B testing to see how your audience reacts to changes, and gather feedback to refine your design further.
Another crucial aspect of WordPress design is optimizing for SEO. A well-structured site not only looks good but also performs well in search rankings. If you’re hiding featured images, remember to:
- Use Alt Text: Even if the image isn’t visible, include alt text for SEO benefits and accessibility.
- Optimize Page Load Times: ensure that hiding images doesn’t compromise your site’s speed, as this can affect user experience and SEO.
Lastly, consider the overall user journey. Each design element should guide visitors toward your desired action, whether that’s signing up for a newsletter, making a purchase, or simply exploring your content further. By combining strategic design choices with user-centric principles, you can create a WordPress site that not only looks great but also achieves your goals.
| Design Element | Impact on User Experience |
|---|---|
| Featured Image | Visual appeal, sets mood |
| Content Layout | Ease of readability, navigation |
| Color scheme | Brand identity, emotional response |
| Call-to-Action Buttons | Increased conversions, user guidance |
By putting these strategies into practice, you can maximize the impact of your WordPress design, ensuring that it serves your content and audience effectively. Embrace the flexibility of WordPress to create a site that embodies your vision while meeting your users’ needs.
Frequently Asked Questions (FAQ)
Q: Why would I want to hide the featured image on my WordPress site?
A: Great question! There are several reasons you might want to hide your featured images. For example, you could be trying to maintain a clean and minimalistic design, or maybe the featured image doesn’t align with your overall branding.Sometimes,it just doesn’t fit well with the content of your post. Whatever your reason, hiding the featured image can definitely help enhance the visual flow of your site.
Q: What are the two easy methods to hide a featured image in WordPress?
A: you’re in for a treat! The two methods we’ll cover are super simple. The first method involves using custom CSS, which lets you control the appearance of your site without any plugins. The second method uses a plugin, which can be an excellent option if you prefer a more hands-off approach. Both methods are effective, so you can pick the one that suits you best!
Q: I’m not a techie. Will using custom CSS be complicated?
A: Not at all! Even if you’re not a tech wizard, adding custom CSS is straightforward. I’ll guide you through each step in the article, so you’ll feel like a pro by the end. Plus, it’s a great skill to have in your back pocket for future tweaks!
Q: What if I change my mind and want to show the featured image later?
A: No problem! One of the great things about both methods is that they’re easily reversible. If you use custom CSS, just remove the code you added. If you use a plugin, you can simply deactivate it or change the settings. Flexibility is key!
Q: Are there any downsides to hiding the featured image?
A: That’s a valid concern. Hiding the featured image can affect how your posts appear on social media and in search results. Featured images are frequently enough used to grab attention, so consider how hiding them might impact your audience. However, if you have a clear vision for your site, it can also enhance your user experience by keeping your design cohesive.
Q: What if I want to hide featured images on specific posts only?
A: You’re in luck! both methods allow for flexibility. If you’re using custom CSS, you can target specific post IDs to hide the featured image only on those posts. If you opt for a plugin, many offer options to hide featured images on individual posts or pages. You’ll have full control over your content!
Q: I’m excited to try this! Where can I find the detailed steps for both methods?
A: Awesome! Just head over to the article, and you’ll find a step-by-step guide for each method. I’ve made sure to include screenshots and tips to make it even easier for you. Happy customizing!
In Retrospect
And there you have it! Hiding the featured image in WordPress is not only straightforward but can also be a game-changer for your site’s visual appeal. Whether you opted for the CSS method or the plugin route, you now have the tools to tailor your content exactly how you envision it.Remember, every element on your website communicates something to your visitors. By choosing to hide that featured image,you’re steering the focus where you want it—on your words and ideas. So go ahead, give it a try!
If you found this guide helpful, don’t hesitate to share it with fellow WordPress users. And if you have any questions or need further assistance, feel free to drop a comment below. Happy blogging!